So you just found out you are working at an AVID school and are trying to figure out how to incorporate all the things into your lessons.
Lucky for you, interactive notebooks (INBs) or interactive student notebooks (ISNs) and AVID are a perfect match — but that doesn’t mean it isn’t overwhelming learning how to get started.
PS: There’s no difference between INBs and ISNs, it’s more of a tomayto/tomahto situation.

If you’re new to AVID, here’s a quick rundown:
Advancement Via Individual Determination (AVID) is an in-school academic support program for grades seven through twelve. The purpose of the program is to prepare students for college eligibility and success. AVID places academically average students in advanced classes; levels the playing field for minority, rural, low-income, and other students without a college-going tradition in their families; and targets students in the academic middle–B, C, and even D students–who have the desire to go to college and the willingness to work hard.
– California Department of Education
My AVID Background
I was fortunate enough to be thrown into the AVID world straight from the get-go of my teaching career. In my first of two student teaching placements, I was at a National AVID Demonstration Site School, which meant the entire building was all-in on using AVID strategies.
My second, longer, student-teaching placement was also at an AVID school, and I got to student-teach one of the AVID elective classes in addition to the math classes I was teaching. The school even sent me to AVID trainings where I learned about how to properly lead the AVID tutorial process and I also was lucky enough to attend some larger AVID PD with my cooperating teacher and their admin.
In the many years since then, I have both worked in schools that do and schools that don’t use AVID. If you’ve never heard of AVID before, know you’re not alone. Unless you’ve been thrown into the world or grew up going to a school that used it, it makes sense that you wouldn’t have heard about it before.
With so much depth to the AVID program, it is easy for your head to get spinning, so I’ll try to cover the basics of what you need to know.
AVID Note & Review Principles
AVID encourages a 5-phase focused note-taking process that places a large emphasis on reviewing notes for long-term memory. Here’s a graphic that summarizes it, courtesy of AVID.

AVID also promotes incorporating WICOR (Writing, Inquiry, Collaboration, Organization, and Reading) into all subject areas, even math.
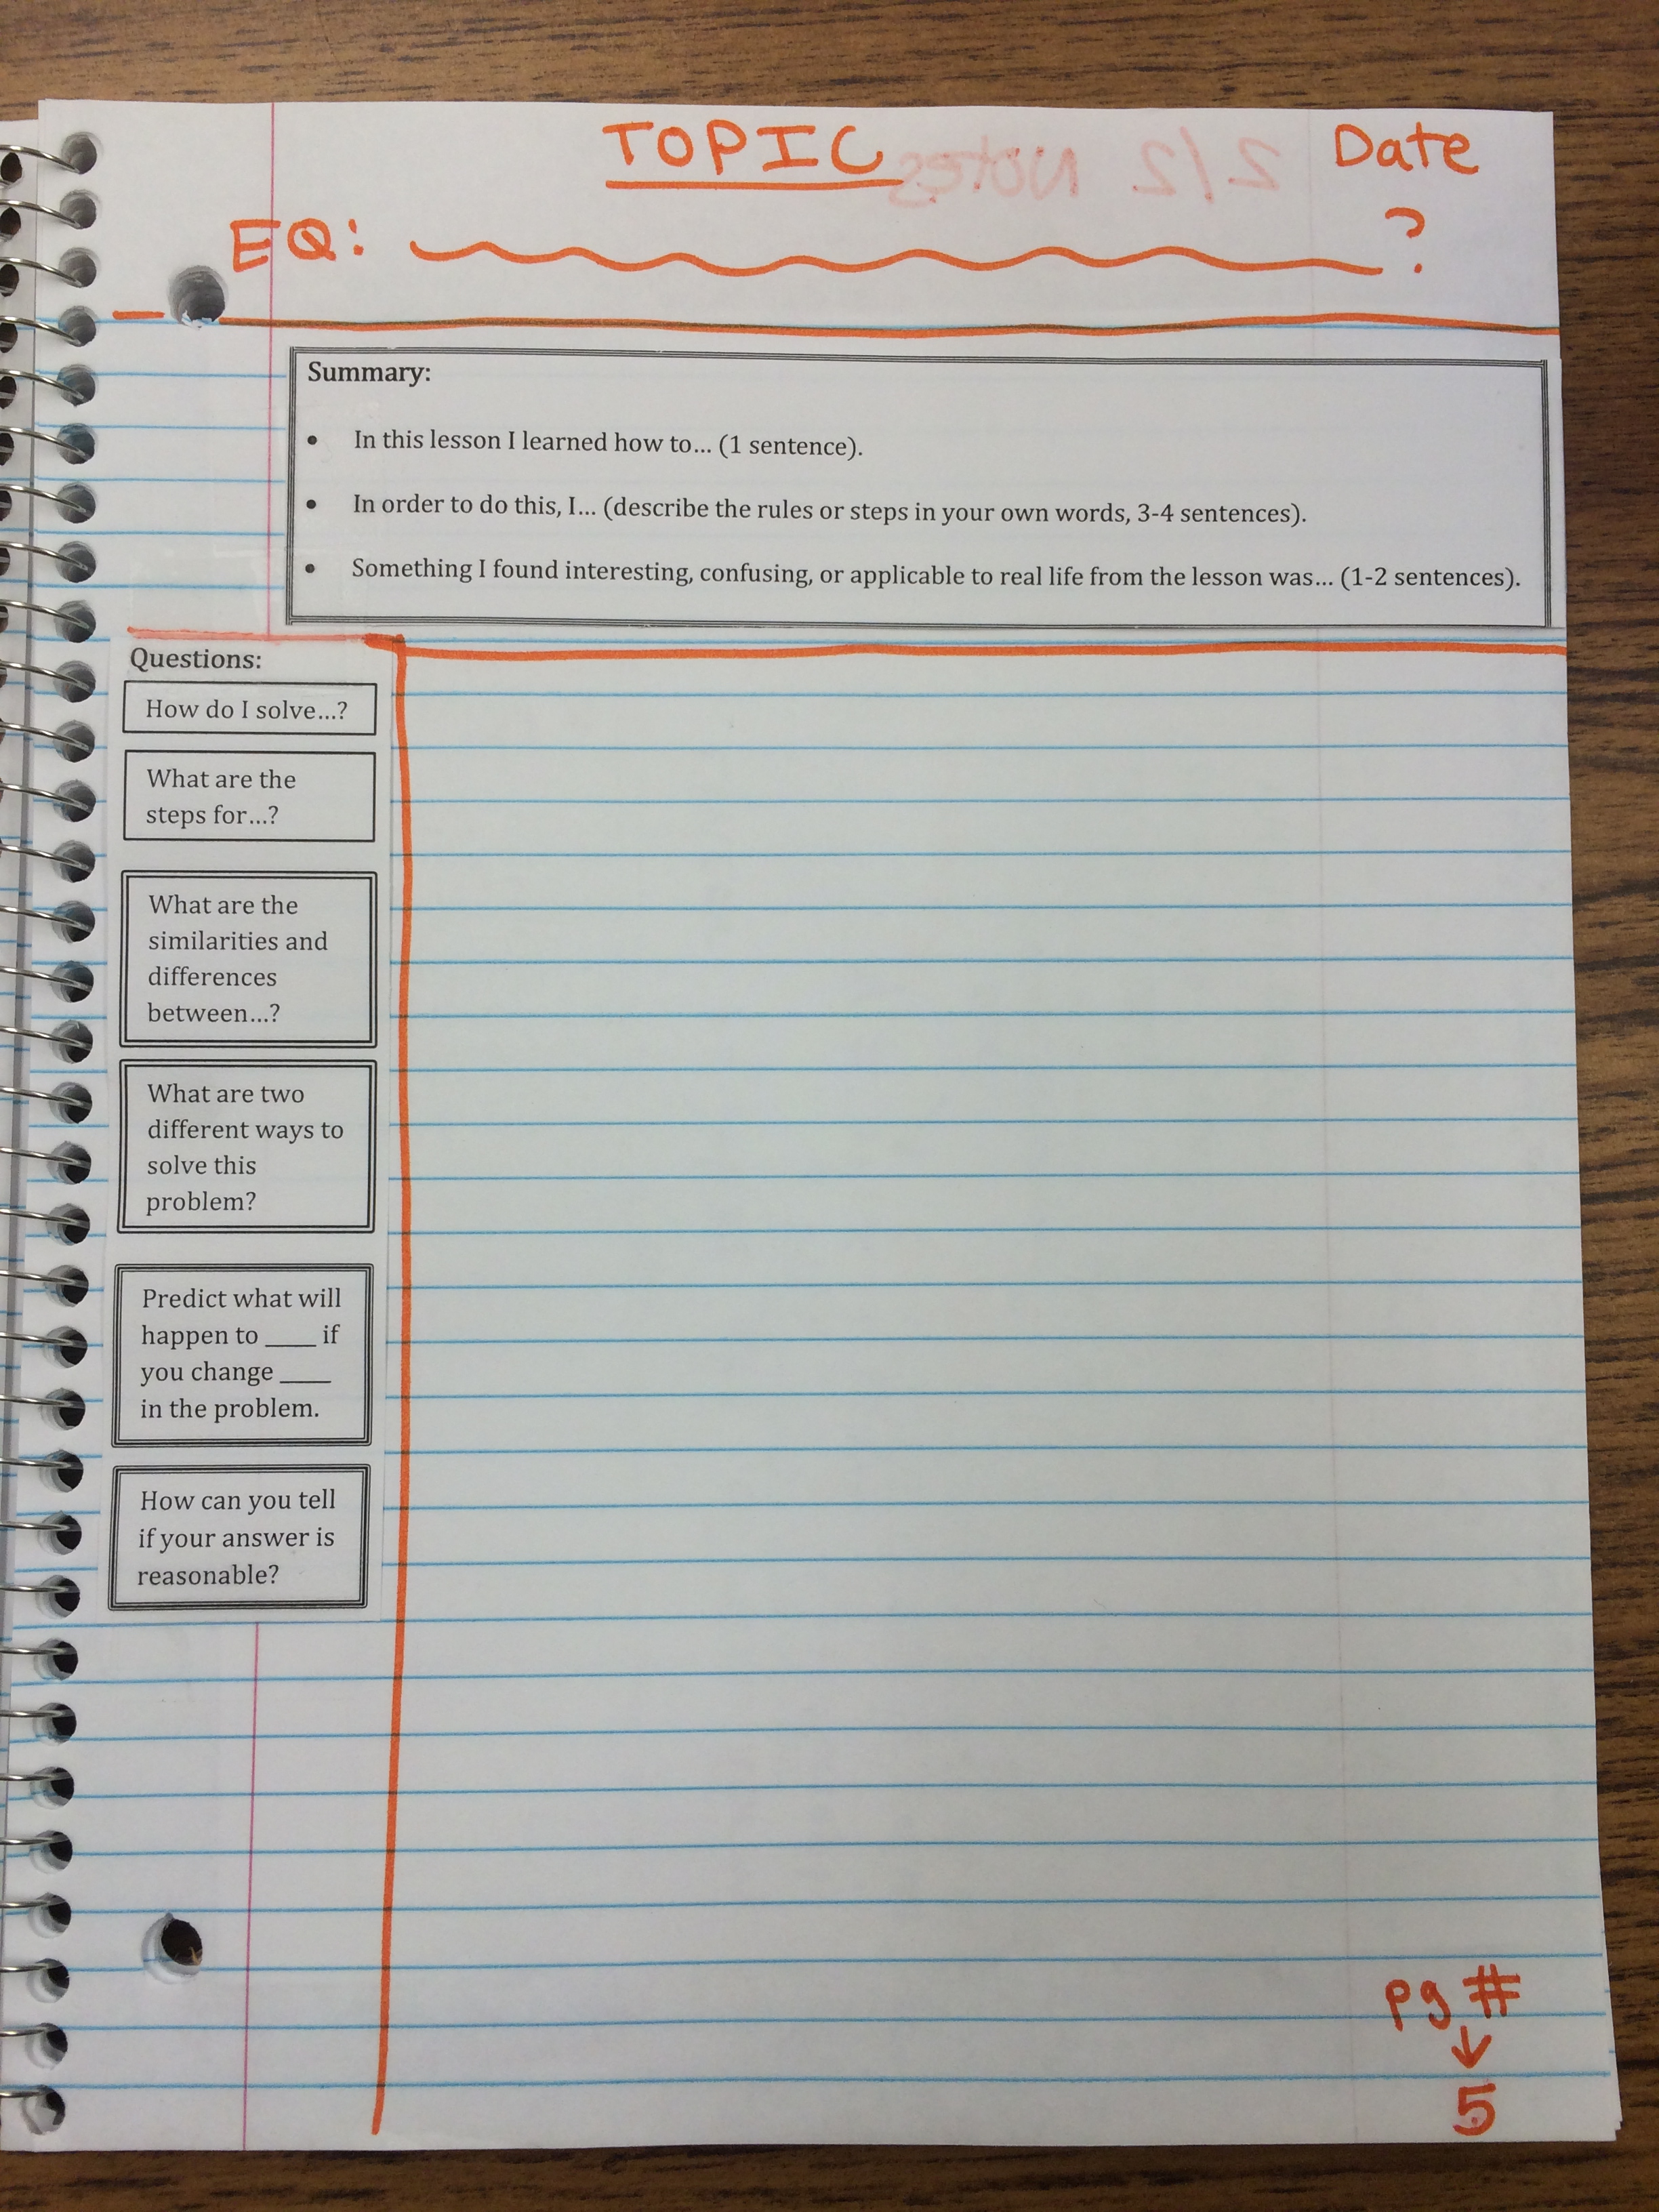
Finally, AVID suggests using Cornell notes in all subject areas to promote these above strategies.
The AVID 2-Page Spread
We can incorporate all of AVID’s favorite things by using a specific 2-page notebook spread per topic.

For every topic you will teach your students, it will span two notebook pages, specifically a left and a right page.
Here’s an example of what that can look like in practice:
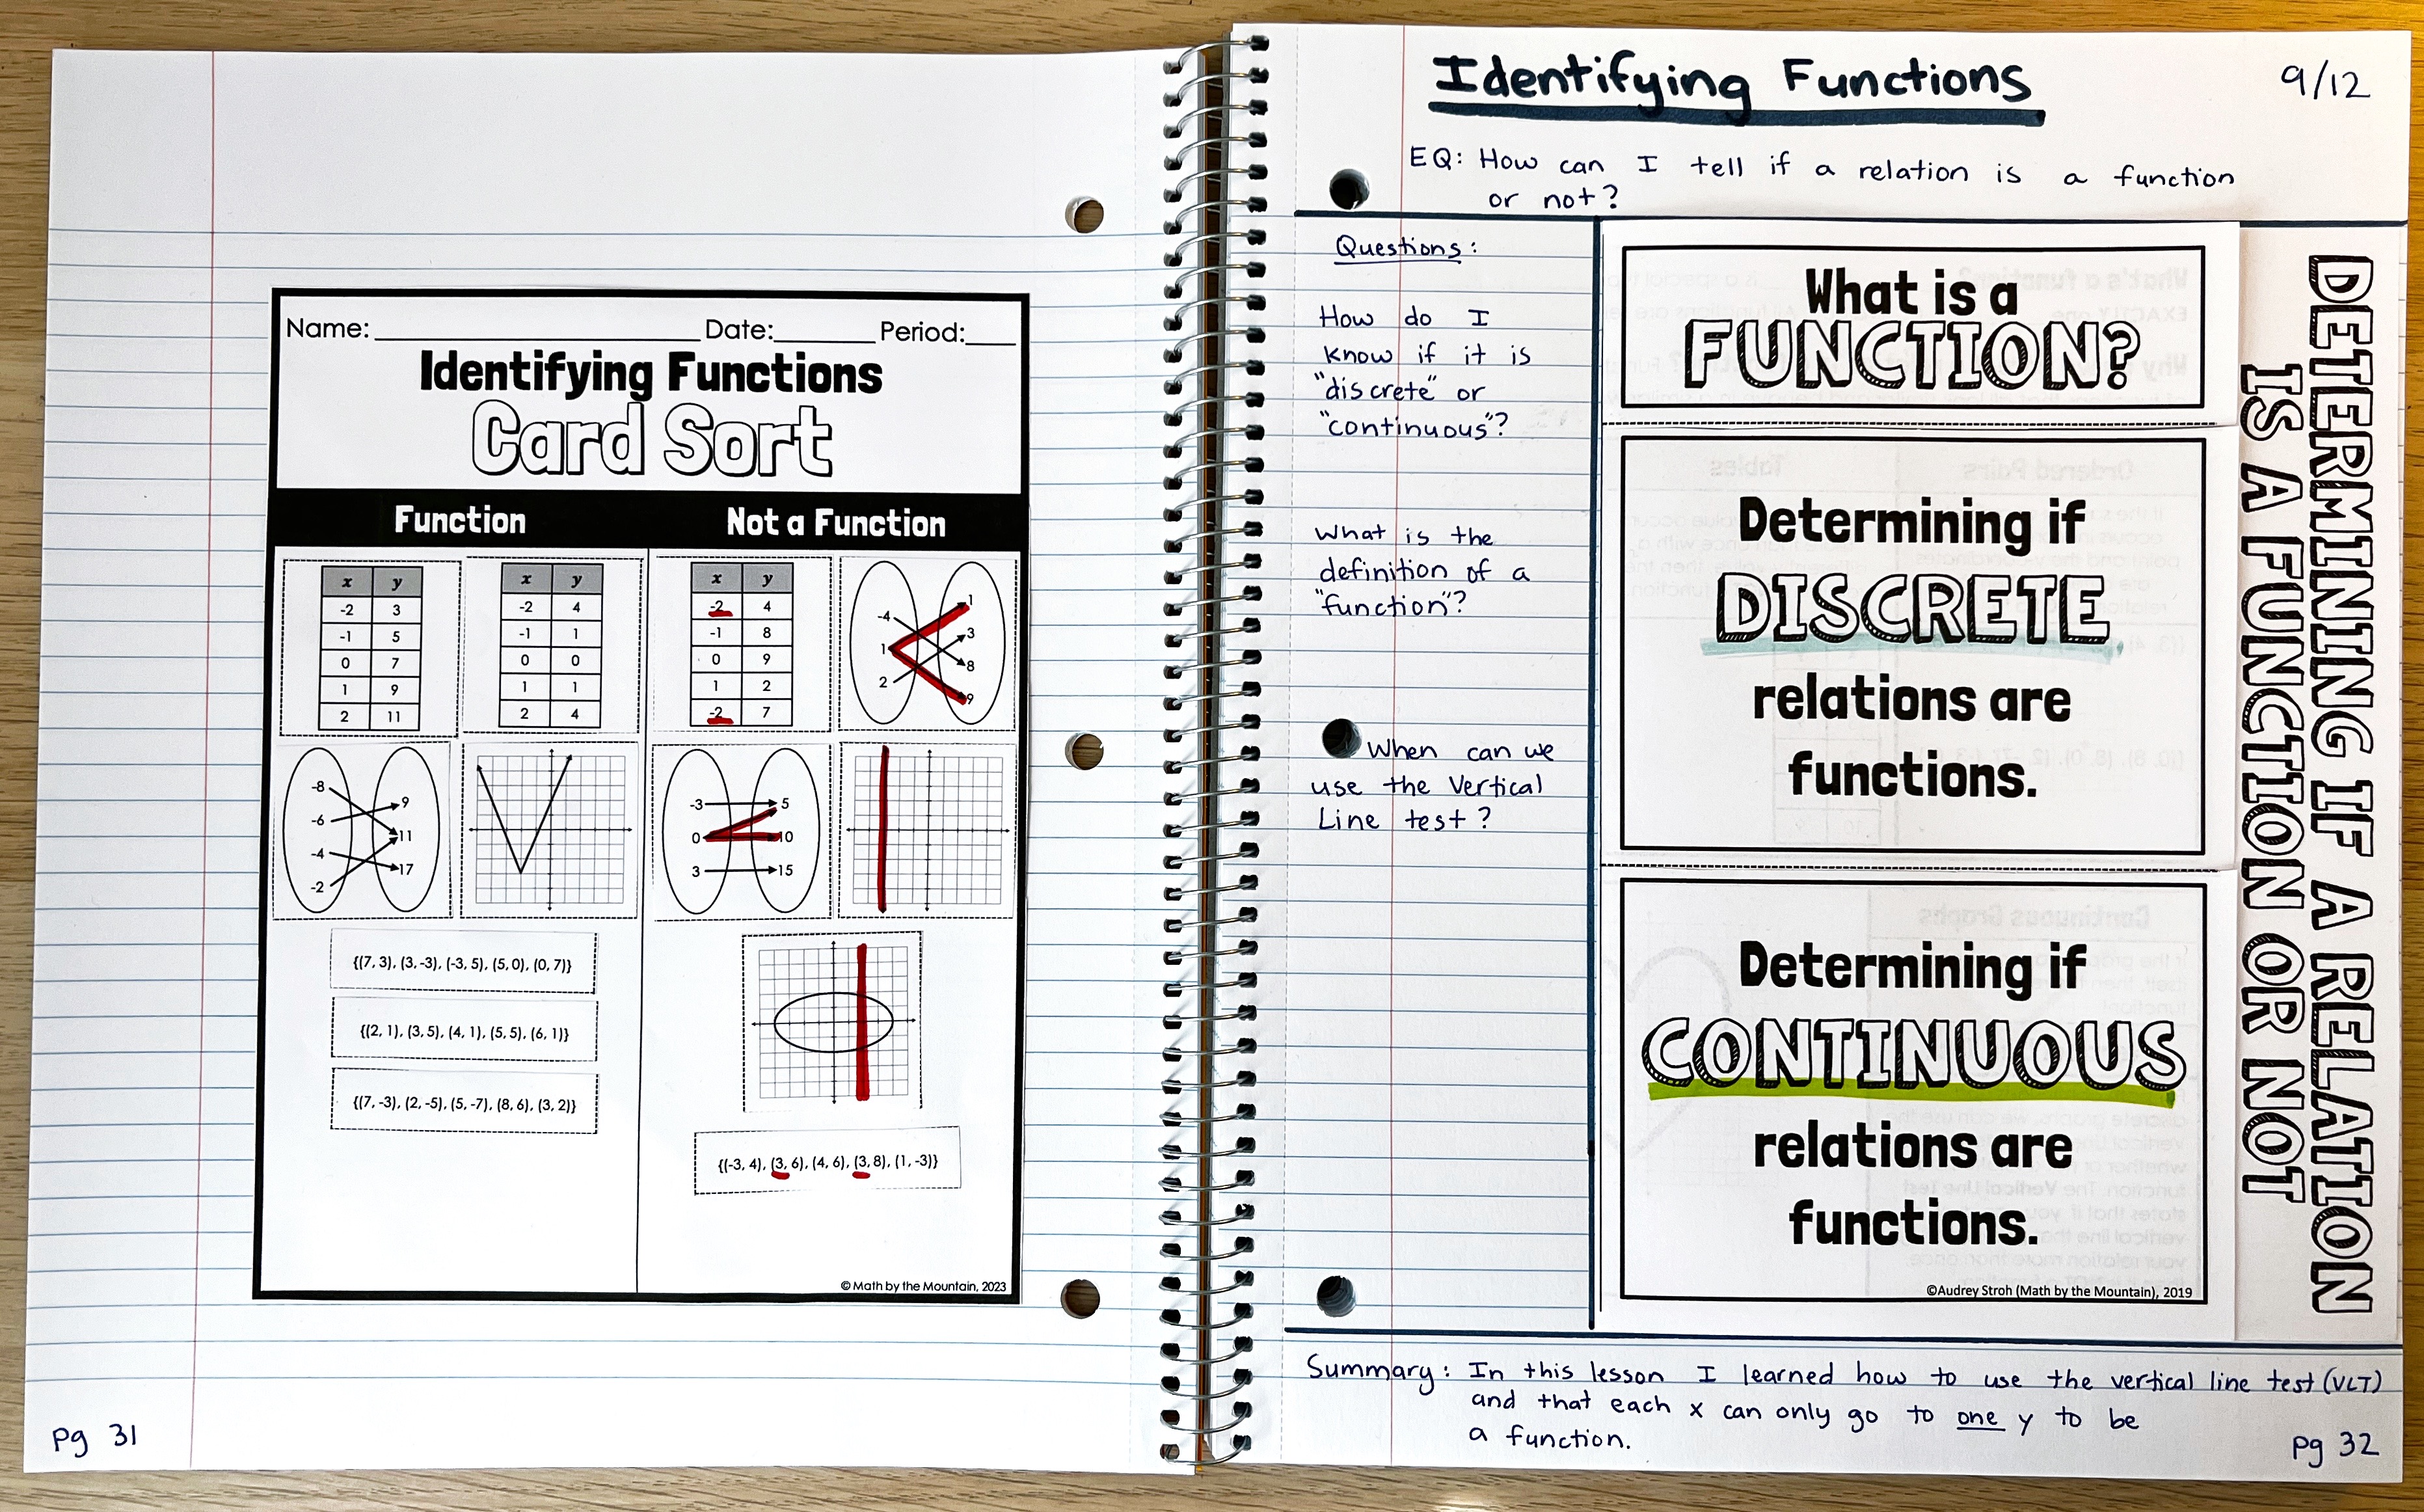
On the right/input page there is a title for the topic, the essential question (EQ) that students are learning about, and a filled-out set of review questions and a summary of the lesson.
On the left/output page, there is a card-sort activity where students can process and practice their learning.
What’s the deal with left and right pages? Why are they backward?
At some point, someone thought they were doing something with right-brain/left-brain theory corresponding to what should go on each left and right notebook page, and unfortunately, it stuck.
If you’re unfamiliar, there is a myth that one side of our brain is our logical side and the other is our creative side. This 2-page spread style of doing the right page first and then going back to reflect and be creative on the left page was inspired by that.
If you’re like me, this feels incredibly backward, which is why I don’t do it that way.
How I structure my Interactive Notebook 2-Page Spreads:
If you’ve read some of my blog posts before, you may already know that I am not a fan of feeling any sort of pressure to stick with a left/right page structure. The typical AVID structure shown above also seems backward to my brain, with the teacher-directed input on the right and then the students processing their output on the left.
Here’s how I normally structure my notes.

My favorite 2-page spread combo is to have a new topic of notes on the left and a matching recap warm-up that we complete the following day on the right. Here’s an example of what that looks like:
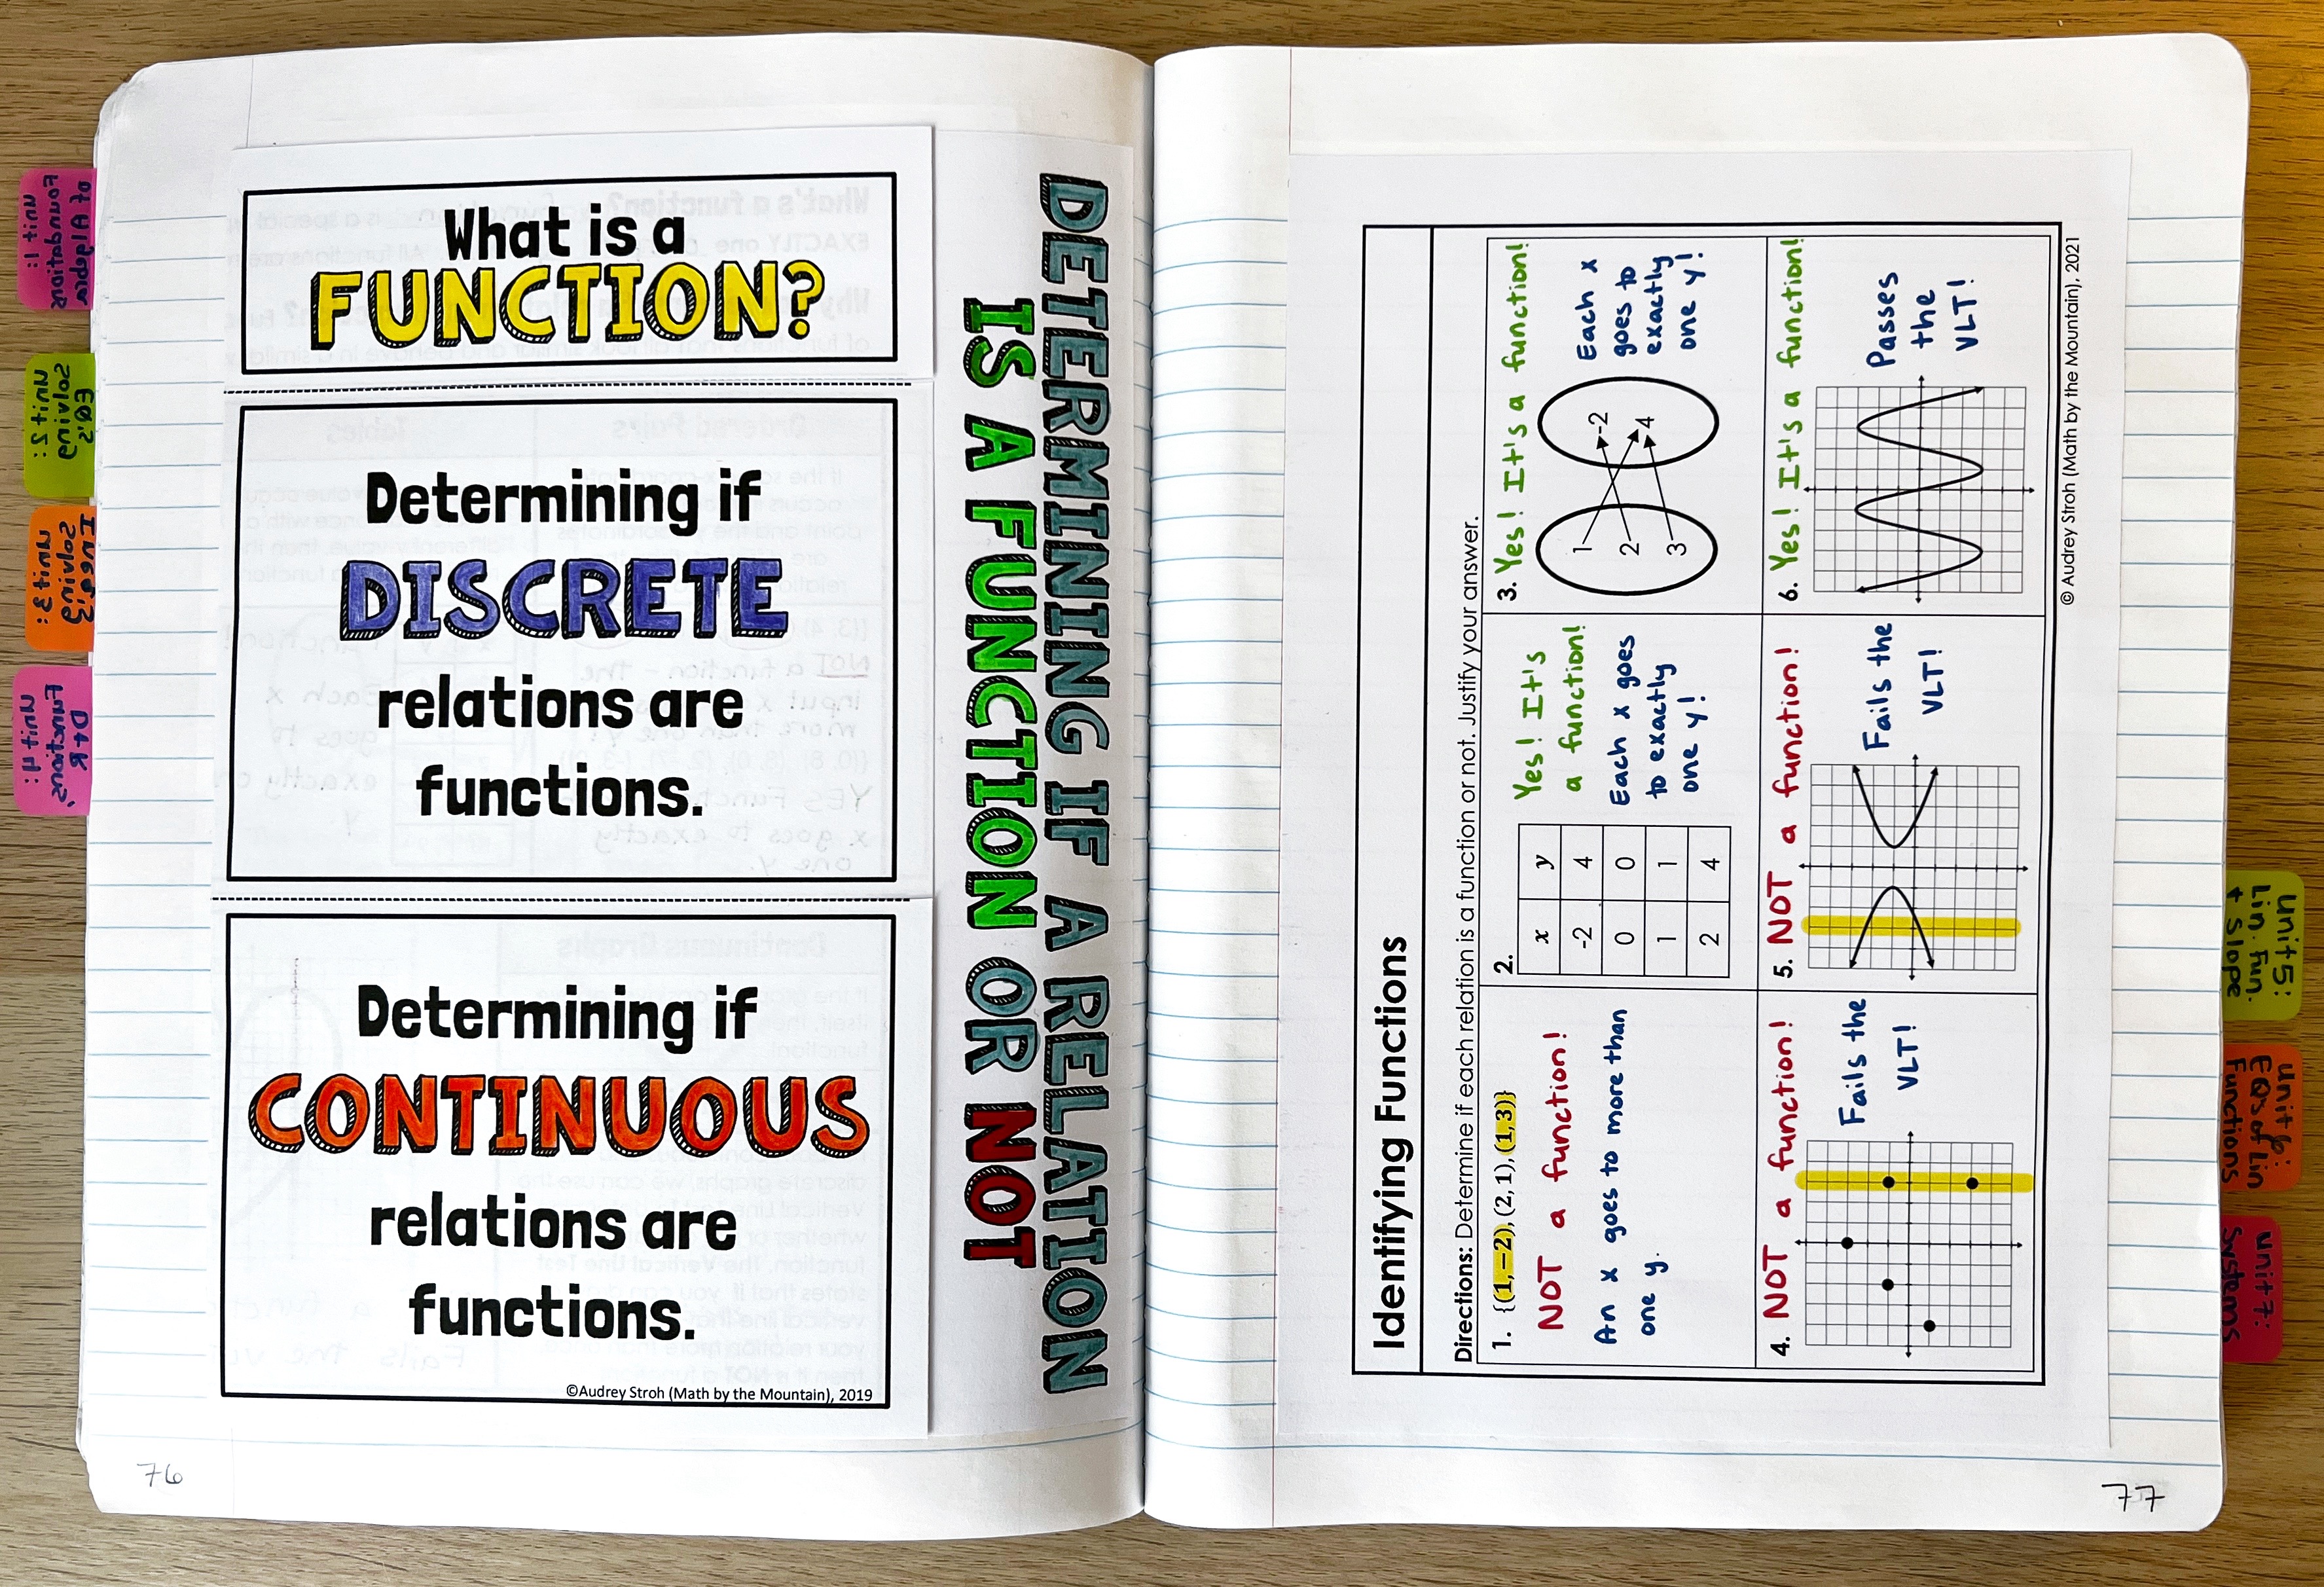
This is the same exact lesson as was shown above, but without the Cornell style notes around it, and with a recap-warmup instead of a card sort activity. I also don’t include the date because I found it was never really relevant.
Notebook Considerations for AVID Interactive Notebooks
As much as I am a fan of using composition notebooks for interactive notebooks due to their durability, they just don’t work well for AVID-style notebooks.
Using Cornell notes takes up a TON of space. You won’t be able to fit all of the Cornell format plus a foldable on a composition notebook page. Instead, opt for a spiral notebook. The larger the page, the better.
I like the large 5-Star brand notebooks that have a full 8.5 x 11 pages, which will have plenty of room to write essential questions, write questions about the notes, glue in foldables, and write a summary.
Alternate AVID Cornell Note Setup (for more writing space)
If you already have composition notebooks or if your students have small spirals (or if they just can’t write that small), it’s A-OK to play around with the format of the Cornell notes a bit to make it all fit without your students feeling cramped for writing space.
An easy alternate layout is to move the summary from the bottom of the input page to the top of the output page, like this:

More AVID-style INB Examples
Here are some deep-cut throw-back pictures from my first AVID year (during student teaching!).
At the beginning of the notebook, we put in examples of questions students may ask as well as a template of what our Cornell notes should look like every day. Including sentence starter examples was SO helpful for students and I highly recommend having an exemplar page at the beginning of your AVID-style interactive notebook.


Always Include a Table of Contents (TOC)
No matter what style of interactive notebook you choose to make, always include a table of contents. You can have a giant one at the front, or one at the beginning of each unit (my preference).
Table of Contents makes it much easier for students to go back and find old notes when they are reviewing, and when something is easy it will actually be used which is our goal.


Thank you so much for sharing this info!! I will definitely be using this in my classes this year!!
LikeLike
Thank you so much for sharing this!! I will definitely be using it in my classroom this year!!!
LikeLike
I am new to Avid and I want to incorporate this in my class!! Thank you so much!! I am still trying to figure out what to do 🥲.
LikeLike