Here are the notes I used this year for the 2nd unit of Algebra 1:
Day 1:
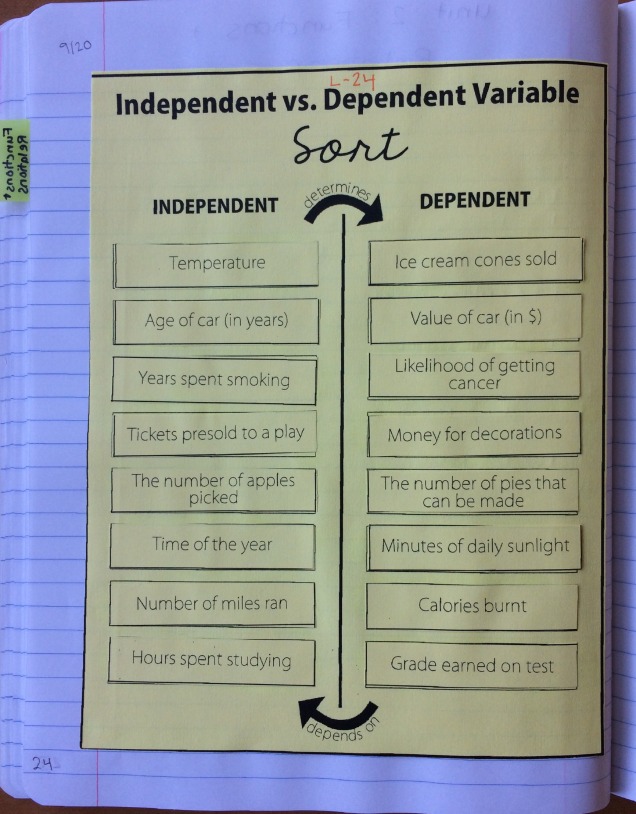
We started off the unit with a classifying variables sort. This was a good way to jog students’ memories about their prior knowledge, and it also served as a jumping point into domain and range!
From there, we went into what a relation, domain, and range is, and how it relates to independent and dependent variables. 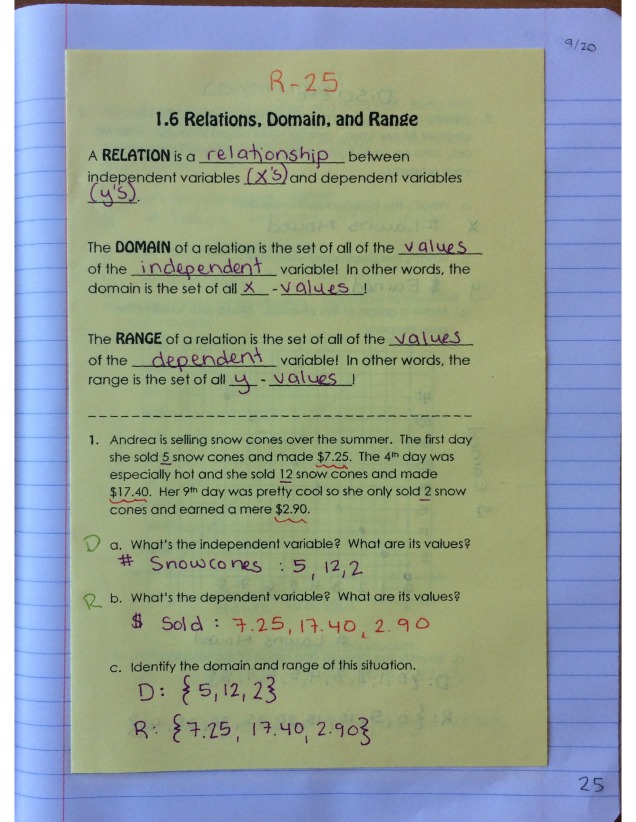
We then made the distinction that there are two types of relations, discrete and continuous, and we must pay attention to context to determine what type of relation we have. 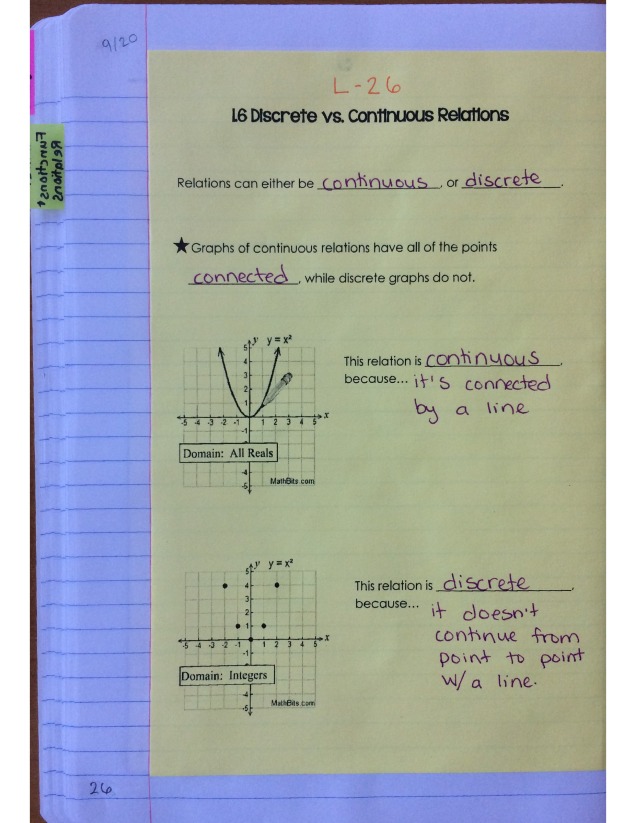
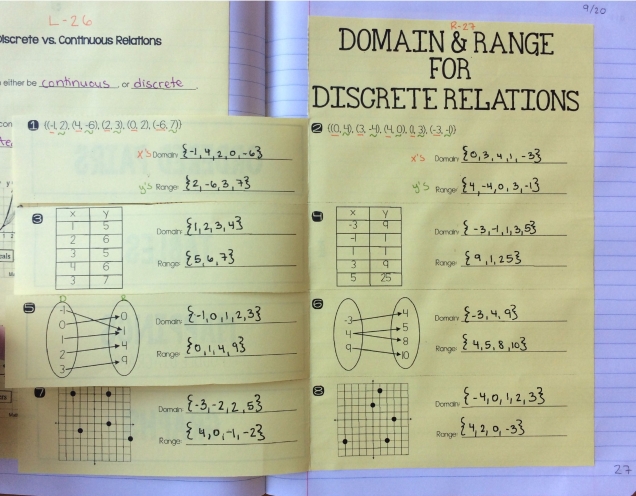
From there, we started to talk about all of the different ways we could represent a discrete relation, and how we find the domain and range from each representation. We used this foldable, which went over great with the students. They caught on super quickly, and they mentioned that they liked having one example to do together, and one to do on their own for each representation. 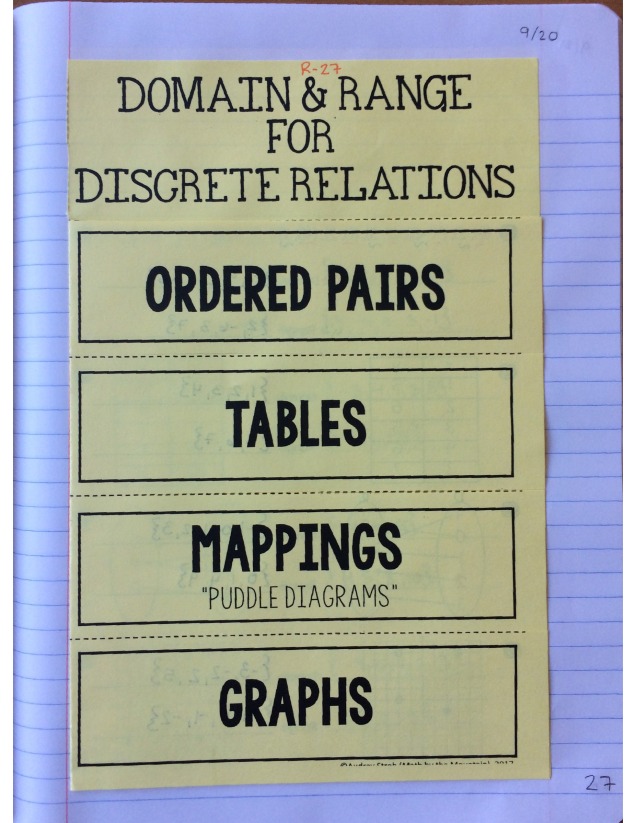
Day 2:
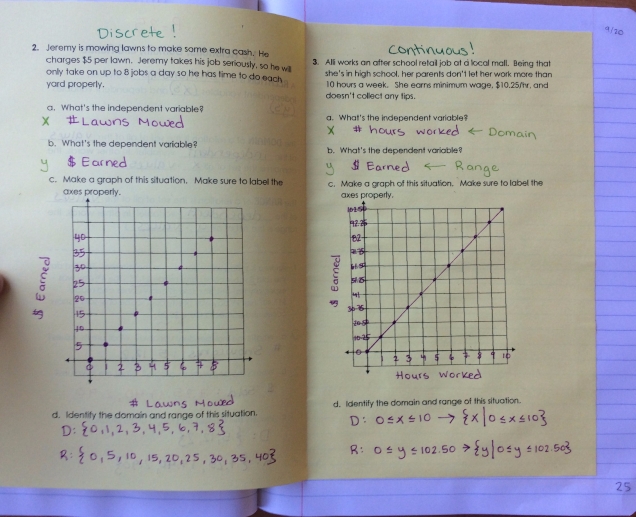
We started off with a word problem to review domain and range in a (discrete) relation. 
From there, we filled out a Frayer vocabulary model for functions, to make sure that students really understood what they are and aren’t. 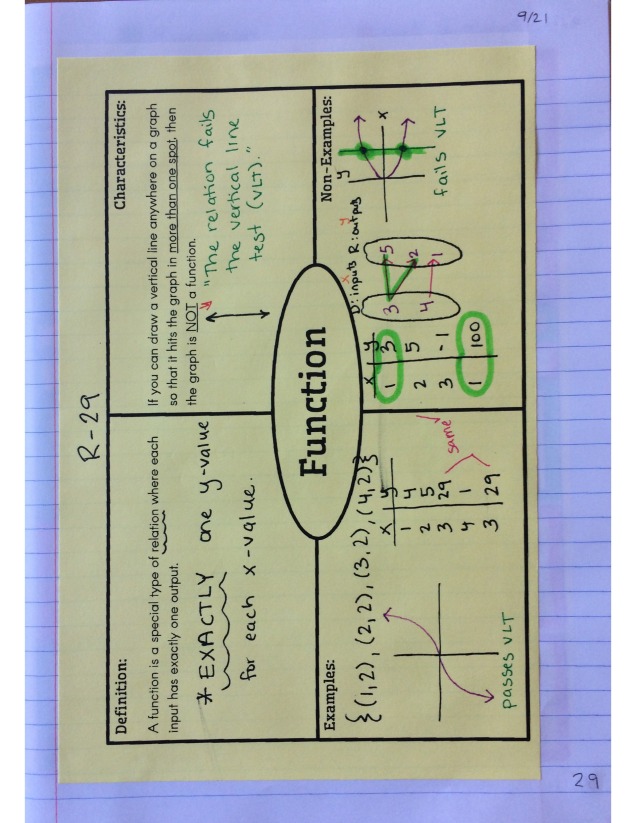
Then, using the definition for function we just wrote down on the Frayer model, we made a cheat sheet to refer back to that tells us all of the different ways a relation (discrete or continuous) would NOT be a function. 
We practiced classifying functions using a card sort from Amazing Mathematics. Instead of cutting and pasting, we decided to color-code instead! Love it! (In the words of one of my students, this is the page that has “fourteen thousand graphs.”)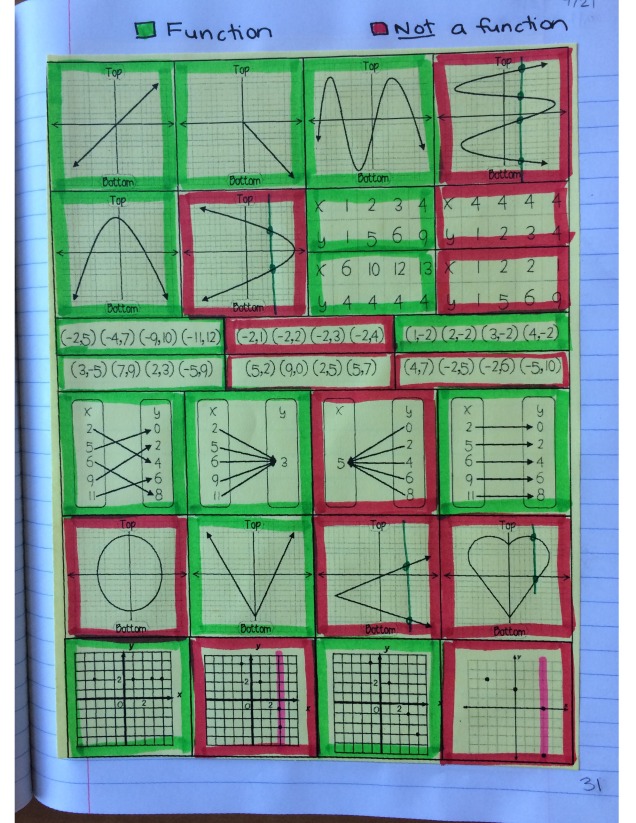
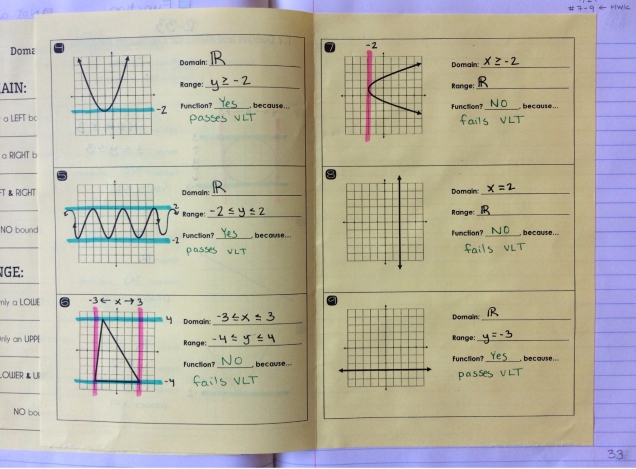
We then filled out another cheat sheet, this time for domain and range of continuous functions. Students reasoned together through the inequalities and we talked about what a bound actually means (we used a lot of basketball references). 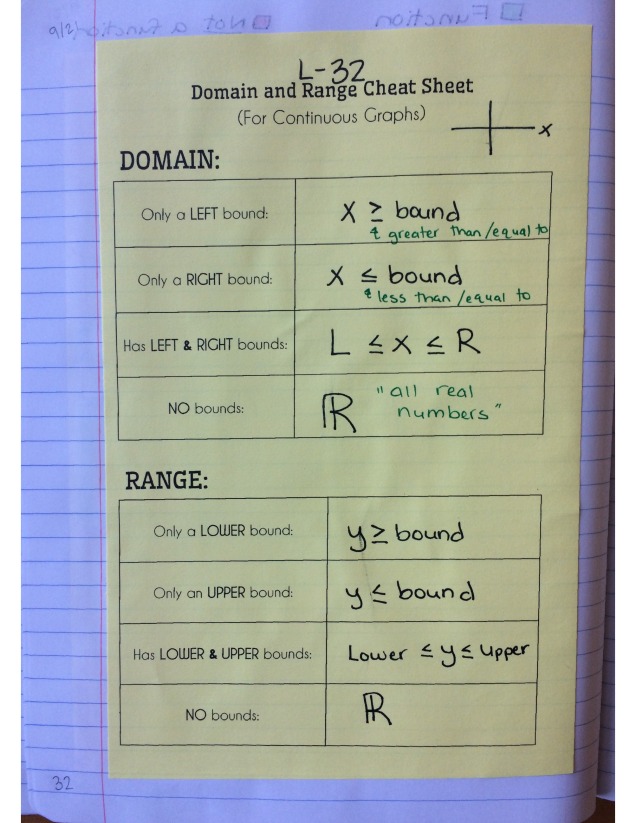
We practiced finding the domain and range for continuous relations (as well as determining whether or not they were a function), using the following set of notes. PS: It took me a LONG time to figure out how to make a parabola or a trigonometric wave using Microsoft’s shape tools. I feel overly proud of this set of notes! You can download them here! 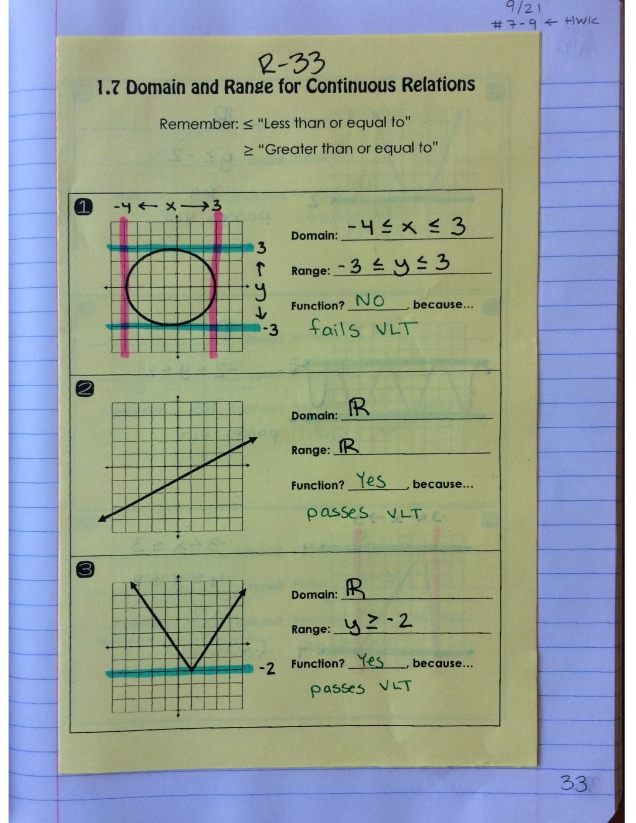
Day 3:
We began with a recap warm-up on domain and range for continuous relations. 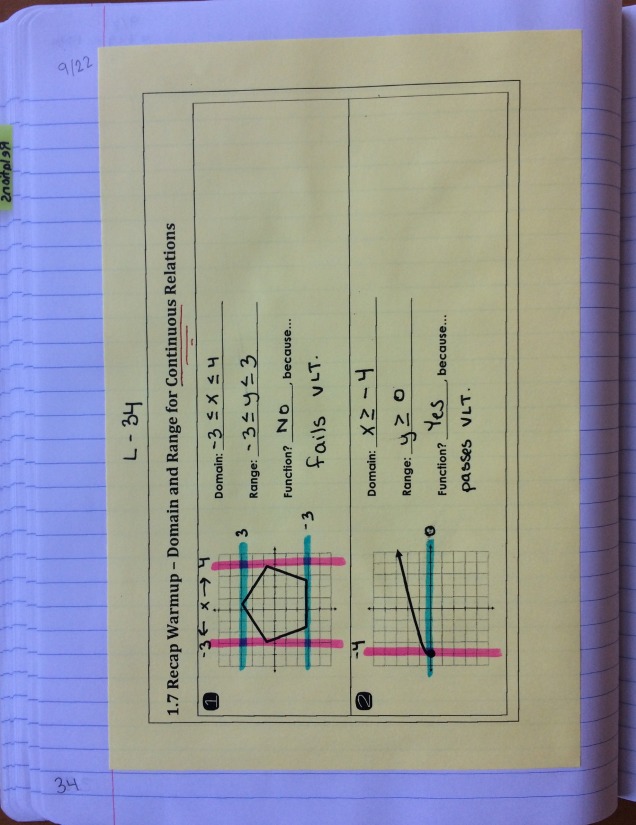
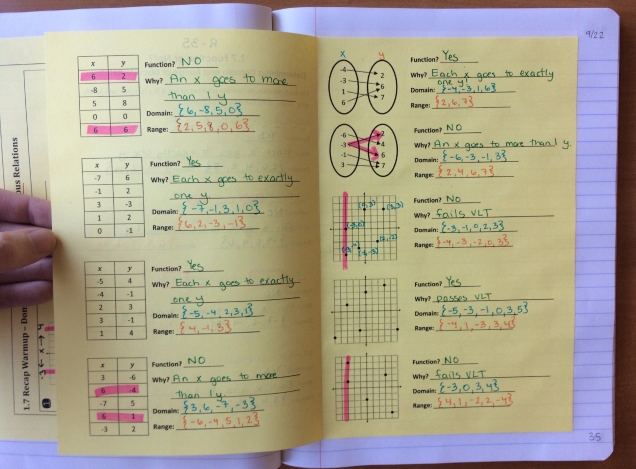
To make sure that students didn’t forget about discrete relations, we went back and did more practice with determining their domain and range, and also stating whether or not the relations were functions. 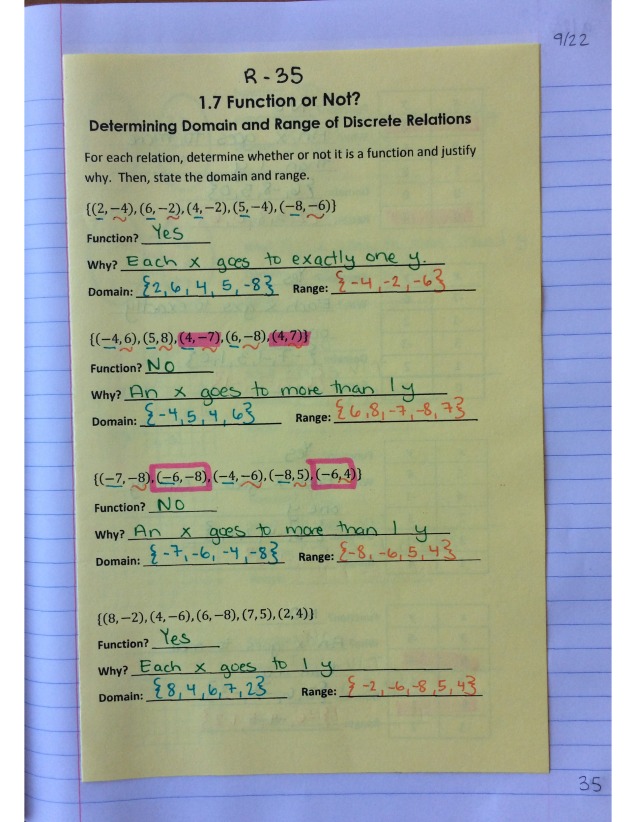
Day 4:
We started off with a reference sheet on function notation and how to read/say it. 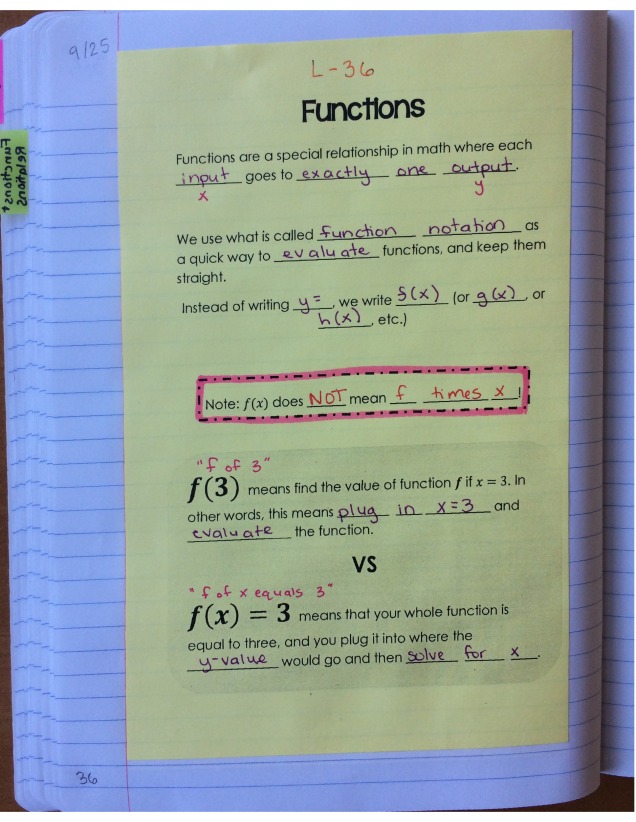
From there, we did a lot of practice with function notation. 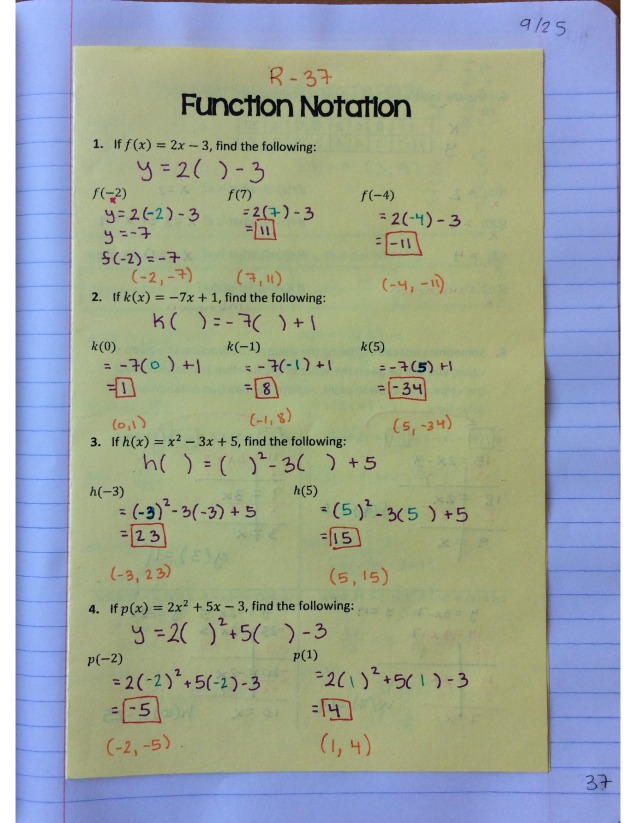
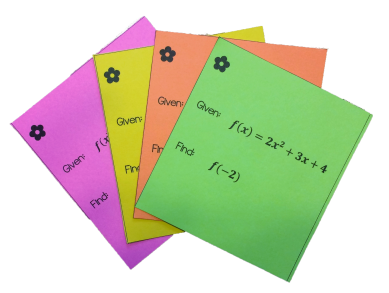
Inside this set of notes, we really emphasized interpreting what we were being given in a problem (input or output value) and what the problem was actually asking us to find (input or output value), before starting the problem. This helped students from making a lot of careless mistakes. After we practiced function notation in both directions (evaluating a function, and solving for an input given the function’s output), we mixed up the problems and even threw a few variables and function compositions in there!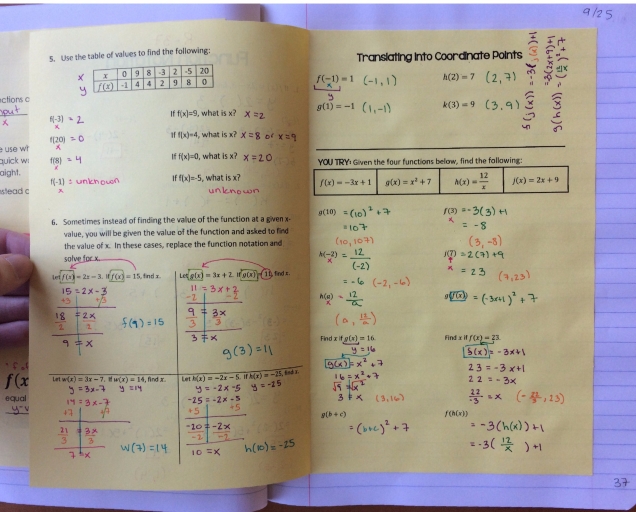
Day 5:
Recap warm-up on function notation. Problems 5 and 6 both spurred amazing conversations about order of operations. 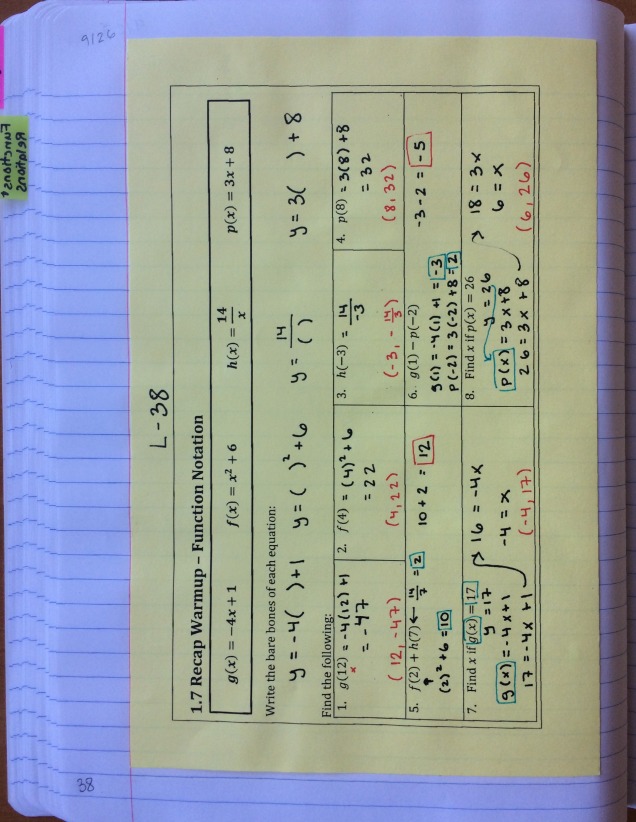
After doing this recap warm-up, we did my function notation mystery sum activity, which was a blast. It encourages students to collaborate together and it’s really high engagement each time.
From there, we continued talking about function notation, but now in terms of a graph. Interpreting what the function notation was telling us was such a huge part of the previous day’s lesson, that I wanted to see how they could do when we attached a context to the problem. 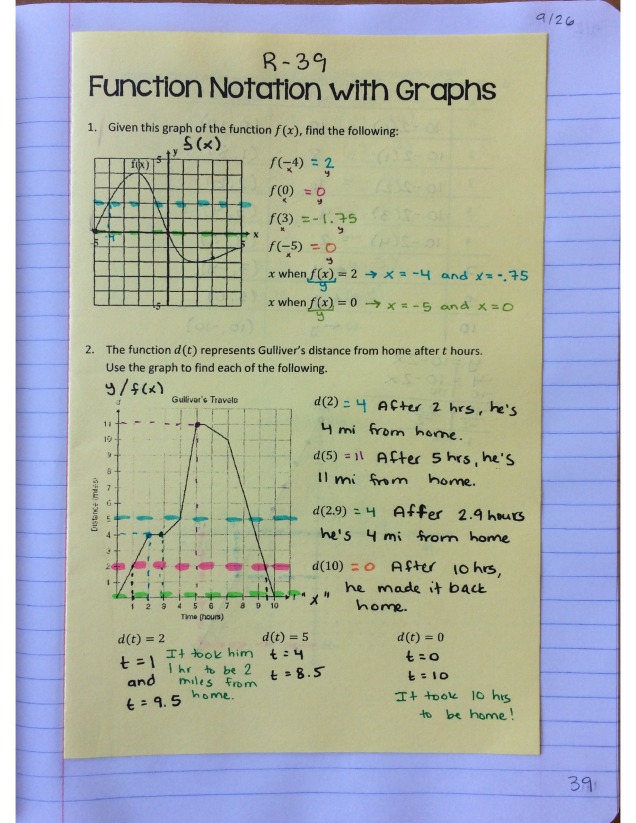
Inside, we worked on graphing functions, and using the graph to find an x-value. Some students preferred solving for x, but others were impressed by my tracing over on the graph method. To each their own–that’s the beauty of math, in my opinion. 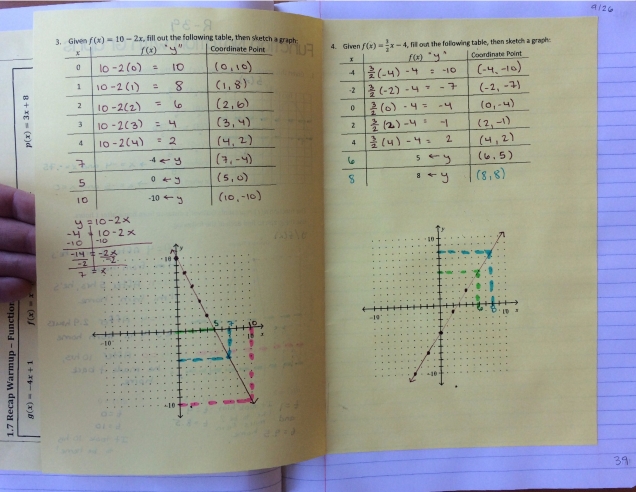
Day 6:
Recap warm-up over function notation with graphs, and then we reviewed for the test. 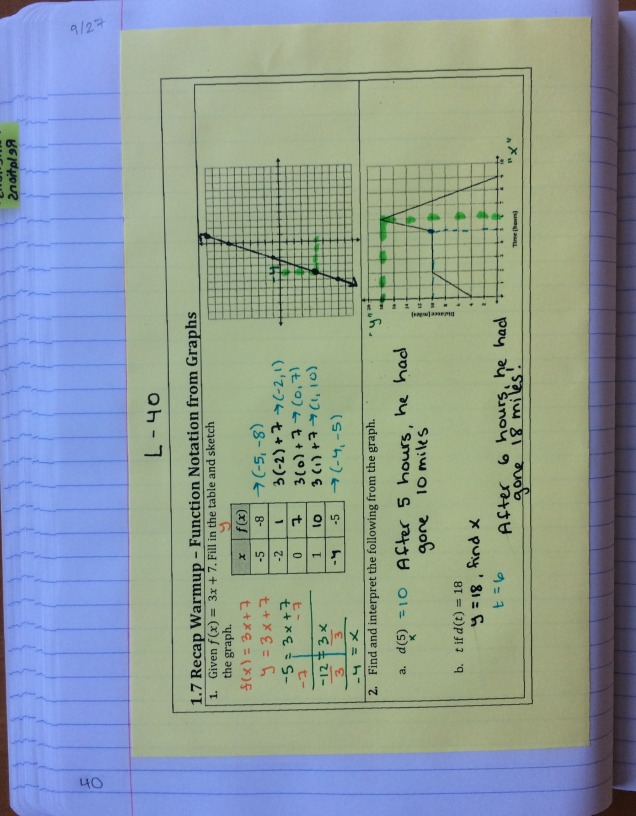
Day 7: Test!