If you’re wanting to do interactive notebooks, you’re going to want to make sure you have several supplies ready and organized.

If you’re wanting to do interactive notebooks, you’re going to want to make sure you have several supplies ready and organized.
So now that you know what an interactive notebook is and what goes in them, your next question is probably:

NO!
If you teach Algebra 1, odds are you have 8th graders or freshmen. In either case these are students in a major transition period. Either at the very end of middle school or the very beginning of high school.
Typically, these students still majorly struggle with organization and need to be explicitly taught several soft skills like how to take good notes, how to use notes to refer back to if they get stuck, how to study, how to stay organized, and so on.
Continue readingIn this blog post, we are going to go over all of the basics of interactive notebooks. To get us started, let’s go to the very beginning…
An interactive notebook is just a composition or spiral notebook that students develop over the course of a class where students can organize their notes and their learning to be used as a study tool.
Continue readingThis is part of my Unit 1 Interactive Notebook for Algebra 1. You can view the rest of it here.
Properties of real numbers. What a snooze fest, am I right? WRONG!
This set of notes turns that notion upside down and gets students involved in creating their own examples to demonstrate each property to make a lively and memorable lesson.

You might wonder, “why would I want to teach properties of real numbers?” It’s a simple way to help students start thinking algebraically and flexibly, especially after having a long summer off from math. These properties demonstrate nice rules for manipulating and moving numbers and variables around in expressions and will help them understand why certain moves are “legal” when we start solving equations. Helping students think flexibly and understand the structure of an expression is a huge step in their journey toward mathematical fluency.
Continue readingThis is part of my Unit 1 Interactive Notebook for Algebra 1. You can view the rest of it here.
There’s nothing trickier than picking the very first topic to cover in all of Algebra 1. So many options, so what goes first?
To start the very first unit of Algebra 1 off, I begin by talking about the real number system and how we classify numbers.
Why oh why, is this where I start, you might ask?
Instilling this vocabulary is very important in helping students be able to hold fluent conversations about math. I can’t tell you how many students I’ve had in Algebra 2 (or Pre-Calc!) over the years that have asked “what’s an integer?” and they are unable to complete a problem that they otherwise would know how to do solely because they lack the basic vocabulary and don’t understand what the question is asking.

This is silly, and I want to prevent these things from happening as much as possible. Math really is its own language, and helping students learn it will allow them to be more confident and much more successful in the long run.
Continue readingStarting the year off right is SO important for any class, but especially in Algebra 1, in particular. Everything that is done in the first unit lays the foundation for everything to come throughout the rest of the year, so there is is a lot riding on starting the year strong.

Students NEED to have a strong foundation, or else they’ll be fighting an uphill battle all year, which is no good. I’ve spent a lot of time thinking about what topics are most important for students to know (from vocabulary to skills), so that each following unit has a strong foundation. Here are all of the notes I used with my students during the 1st unit of Algebra 1.
If you want to look inside any of the pages included in this unit, you can take a look at these topic-specific posts for a more detailed look!
The logistics of starting an interactive notebook is one of the most dauting barriers for math teachers. Here’s a set of simple 3 steps to take to get started!

You will want to be on the same page as your students, quite literally, when using interactive notebooks. Being on the same page allows you so many opportunities to promote study skills and refer students back to a particular topic to help them get “un-stuck.” Promoting study skills is one of the biggest benefits of interactive notebooks so don’t skip this step.

WORD OF CAUTION: Make sure to number the pages as the very first thing that you do! Interactive notebooks get very thick over the course of a semester, and it will be difficult to write in the corners by the time the notebook is almost complete.
If you want more tips on choosing a notebook, read this post about What notebook should I use for an Algebra 1 Interactive Notebook?
If you’re just getting started with using interactive notebooks with your Algebra 1 class, you might have a few questions about what type of notebook you should use, how many pages, and how to make sure all of your students have one to use. In this post, I’ll try to address them all. If I leave something out, leave me a comment so I can answer your question!
As a die-hard spiral-notebook lover, it even surprised myself when I first realized that composition books are the best choice for interactive notebooks. They had never been my first, second, or even third choice for my own personal note-writing over my life, so I was a bit resistant to trying them for the first time. Here’s what I found:

Starting the year off right is SO important for any class, but especially in Algebra in particular, since everything that is done in the first unit is used throughout the entire year. Students NEED to have a strong foundation, or else they’ll be fighting an uphill battle all year, which is no good. I’ve spent a lot of time thinking about what topics are most important for students to know (from vocabulary to skills), so that each following unit has a strong foundation.
Here are all of the notes I used with my students during the 1st unit of Algebra 1.
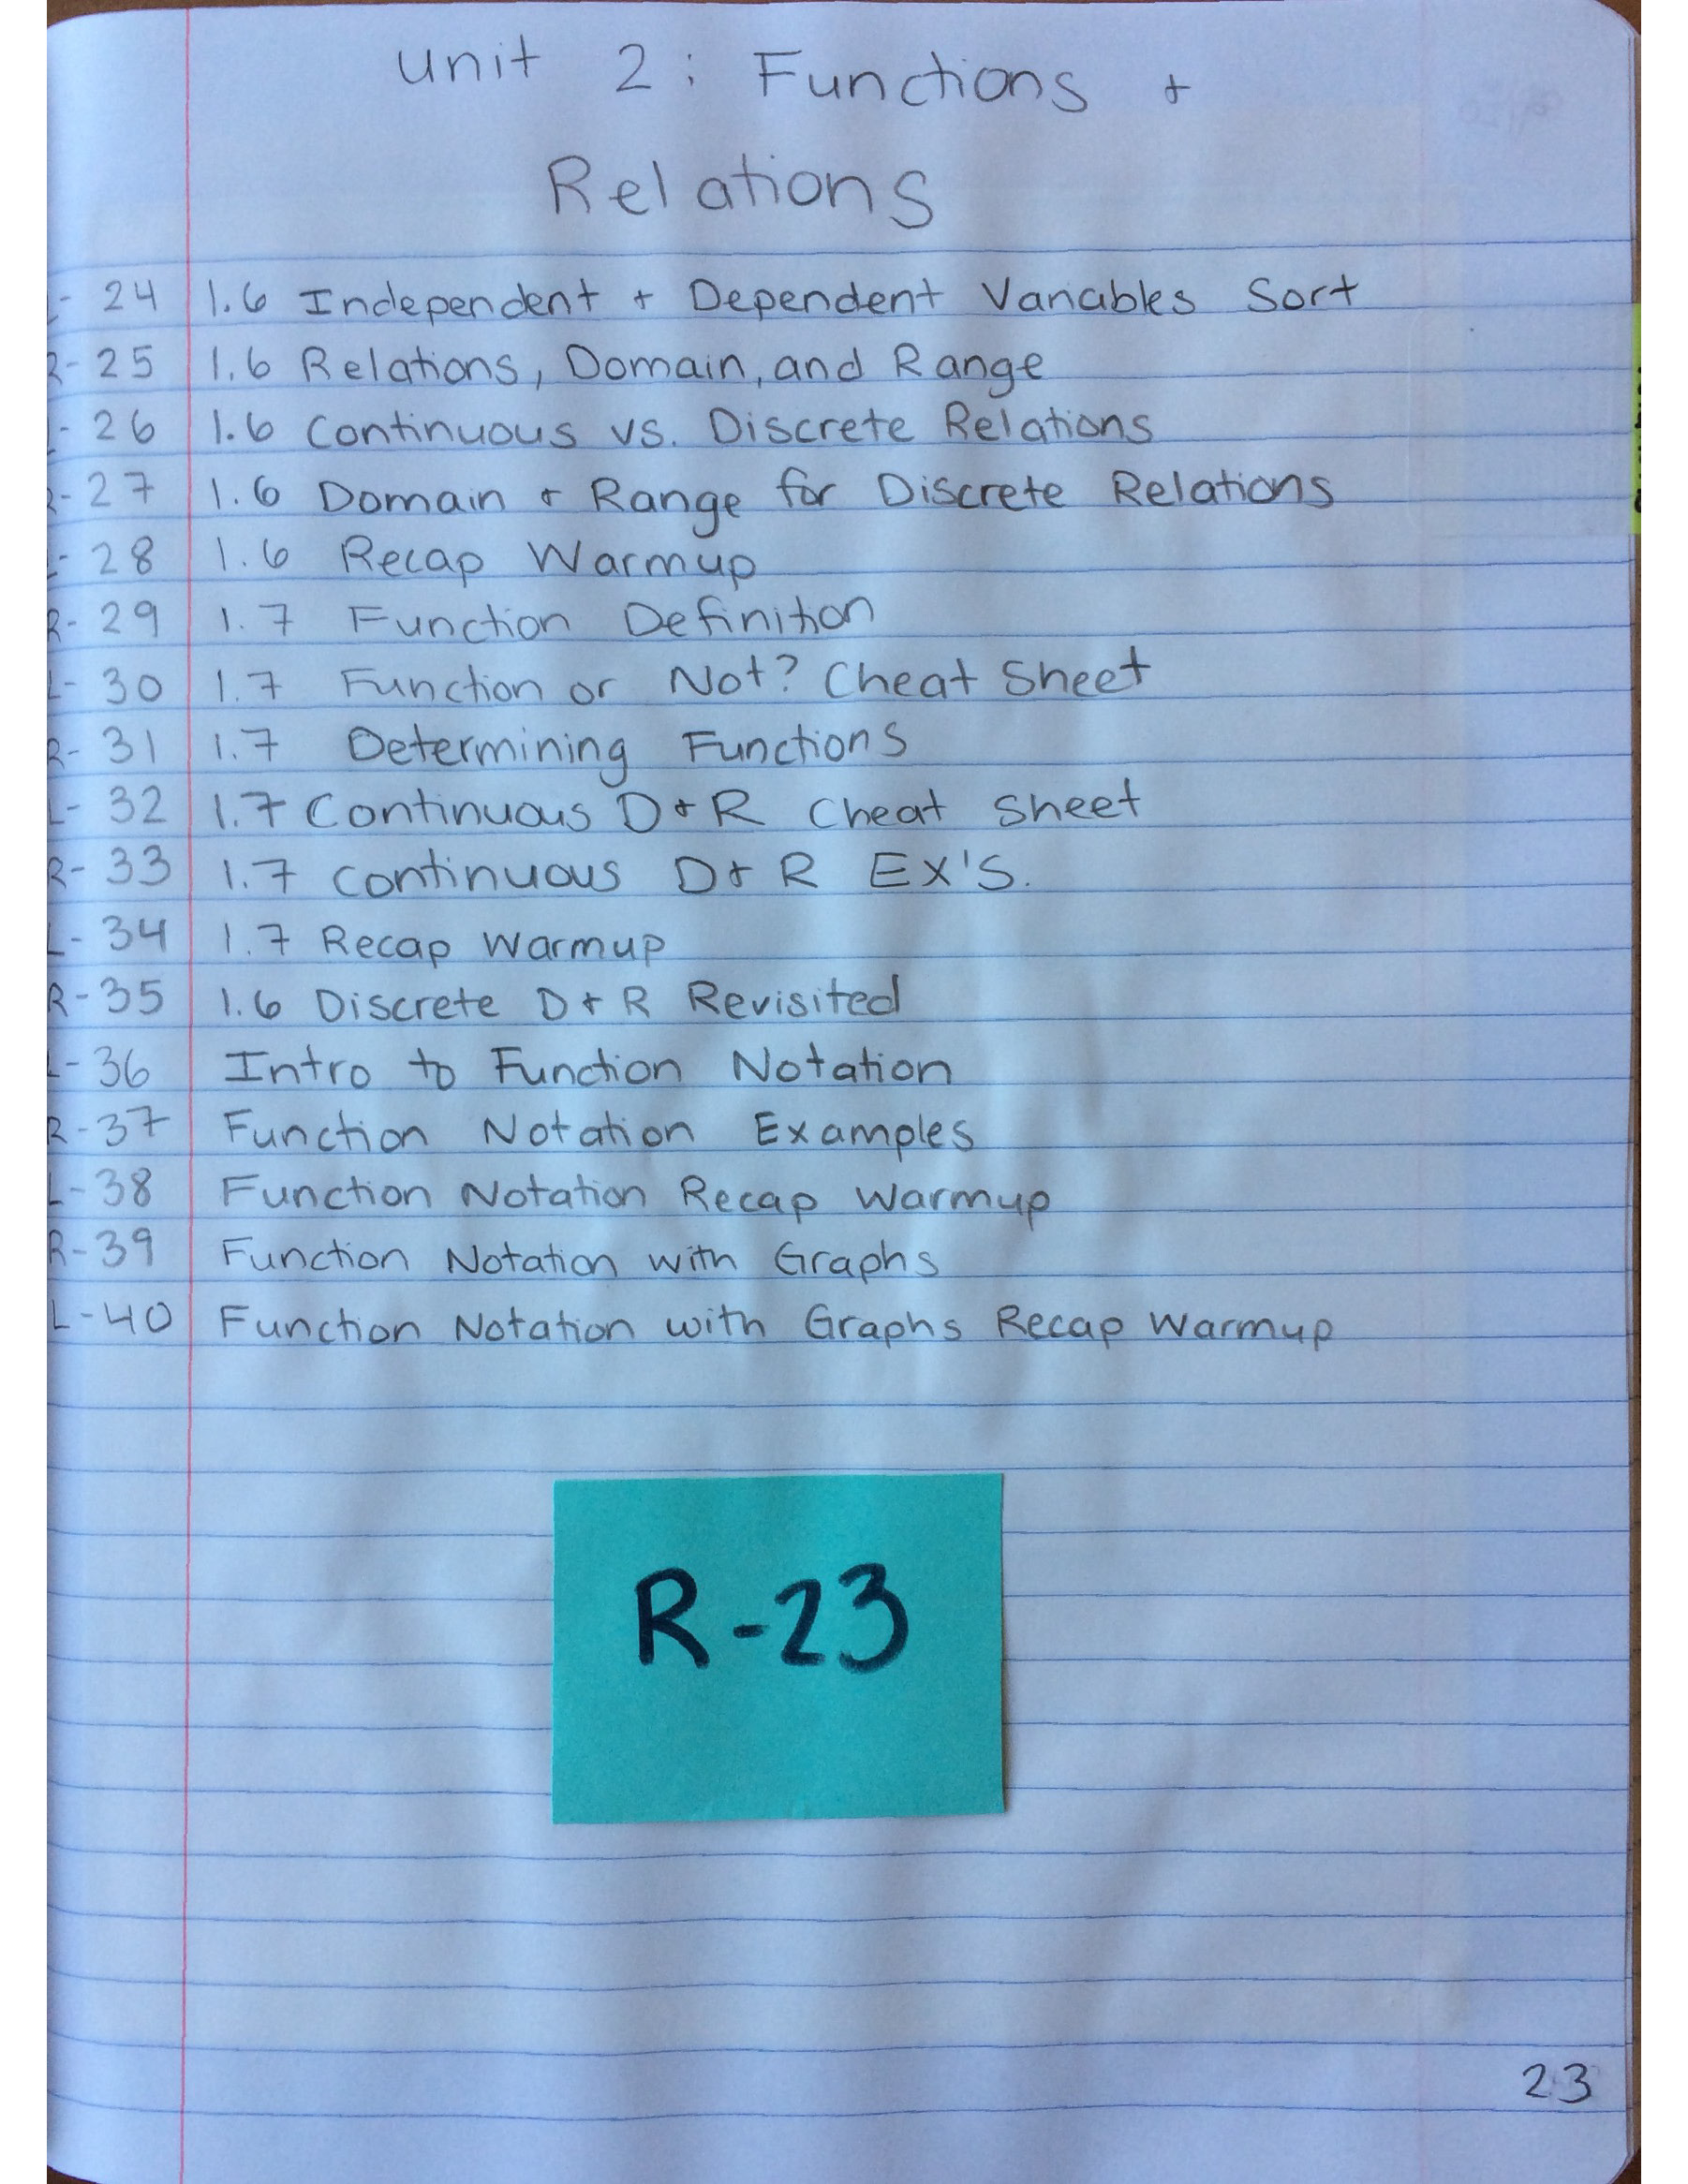
Here are the notes I used this year for the 2nd unit of Algebra 1:
Day 1:
We started off the unit with a classifying variables sort. This was a good way to jog students’ memories about their prior knowledge, and it also served as a jumping point into domain and range!
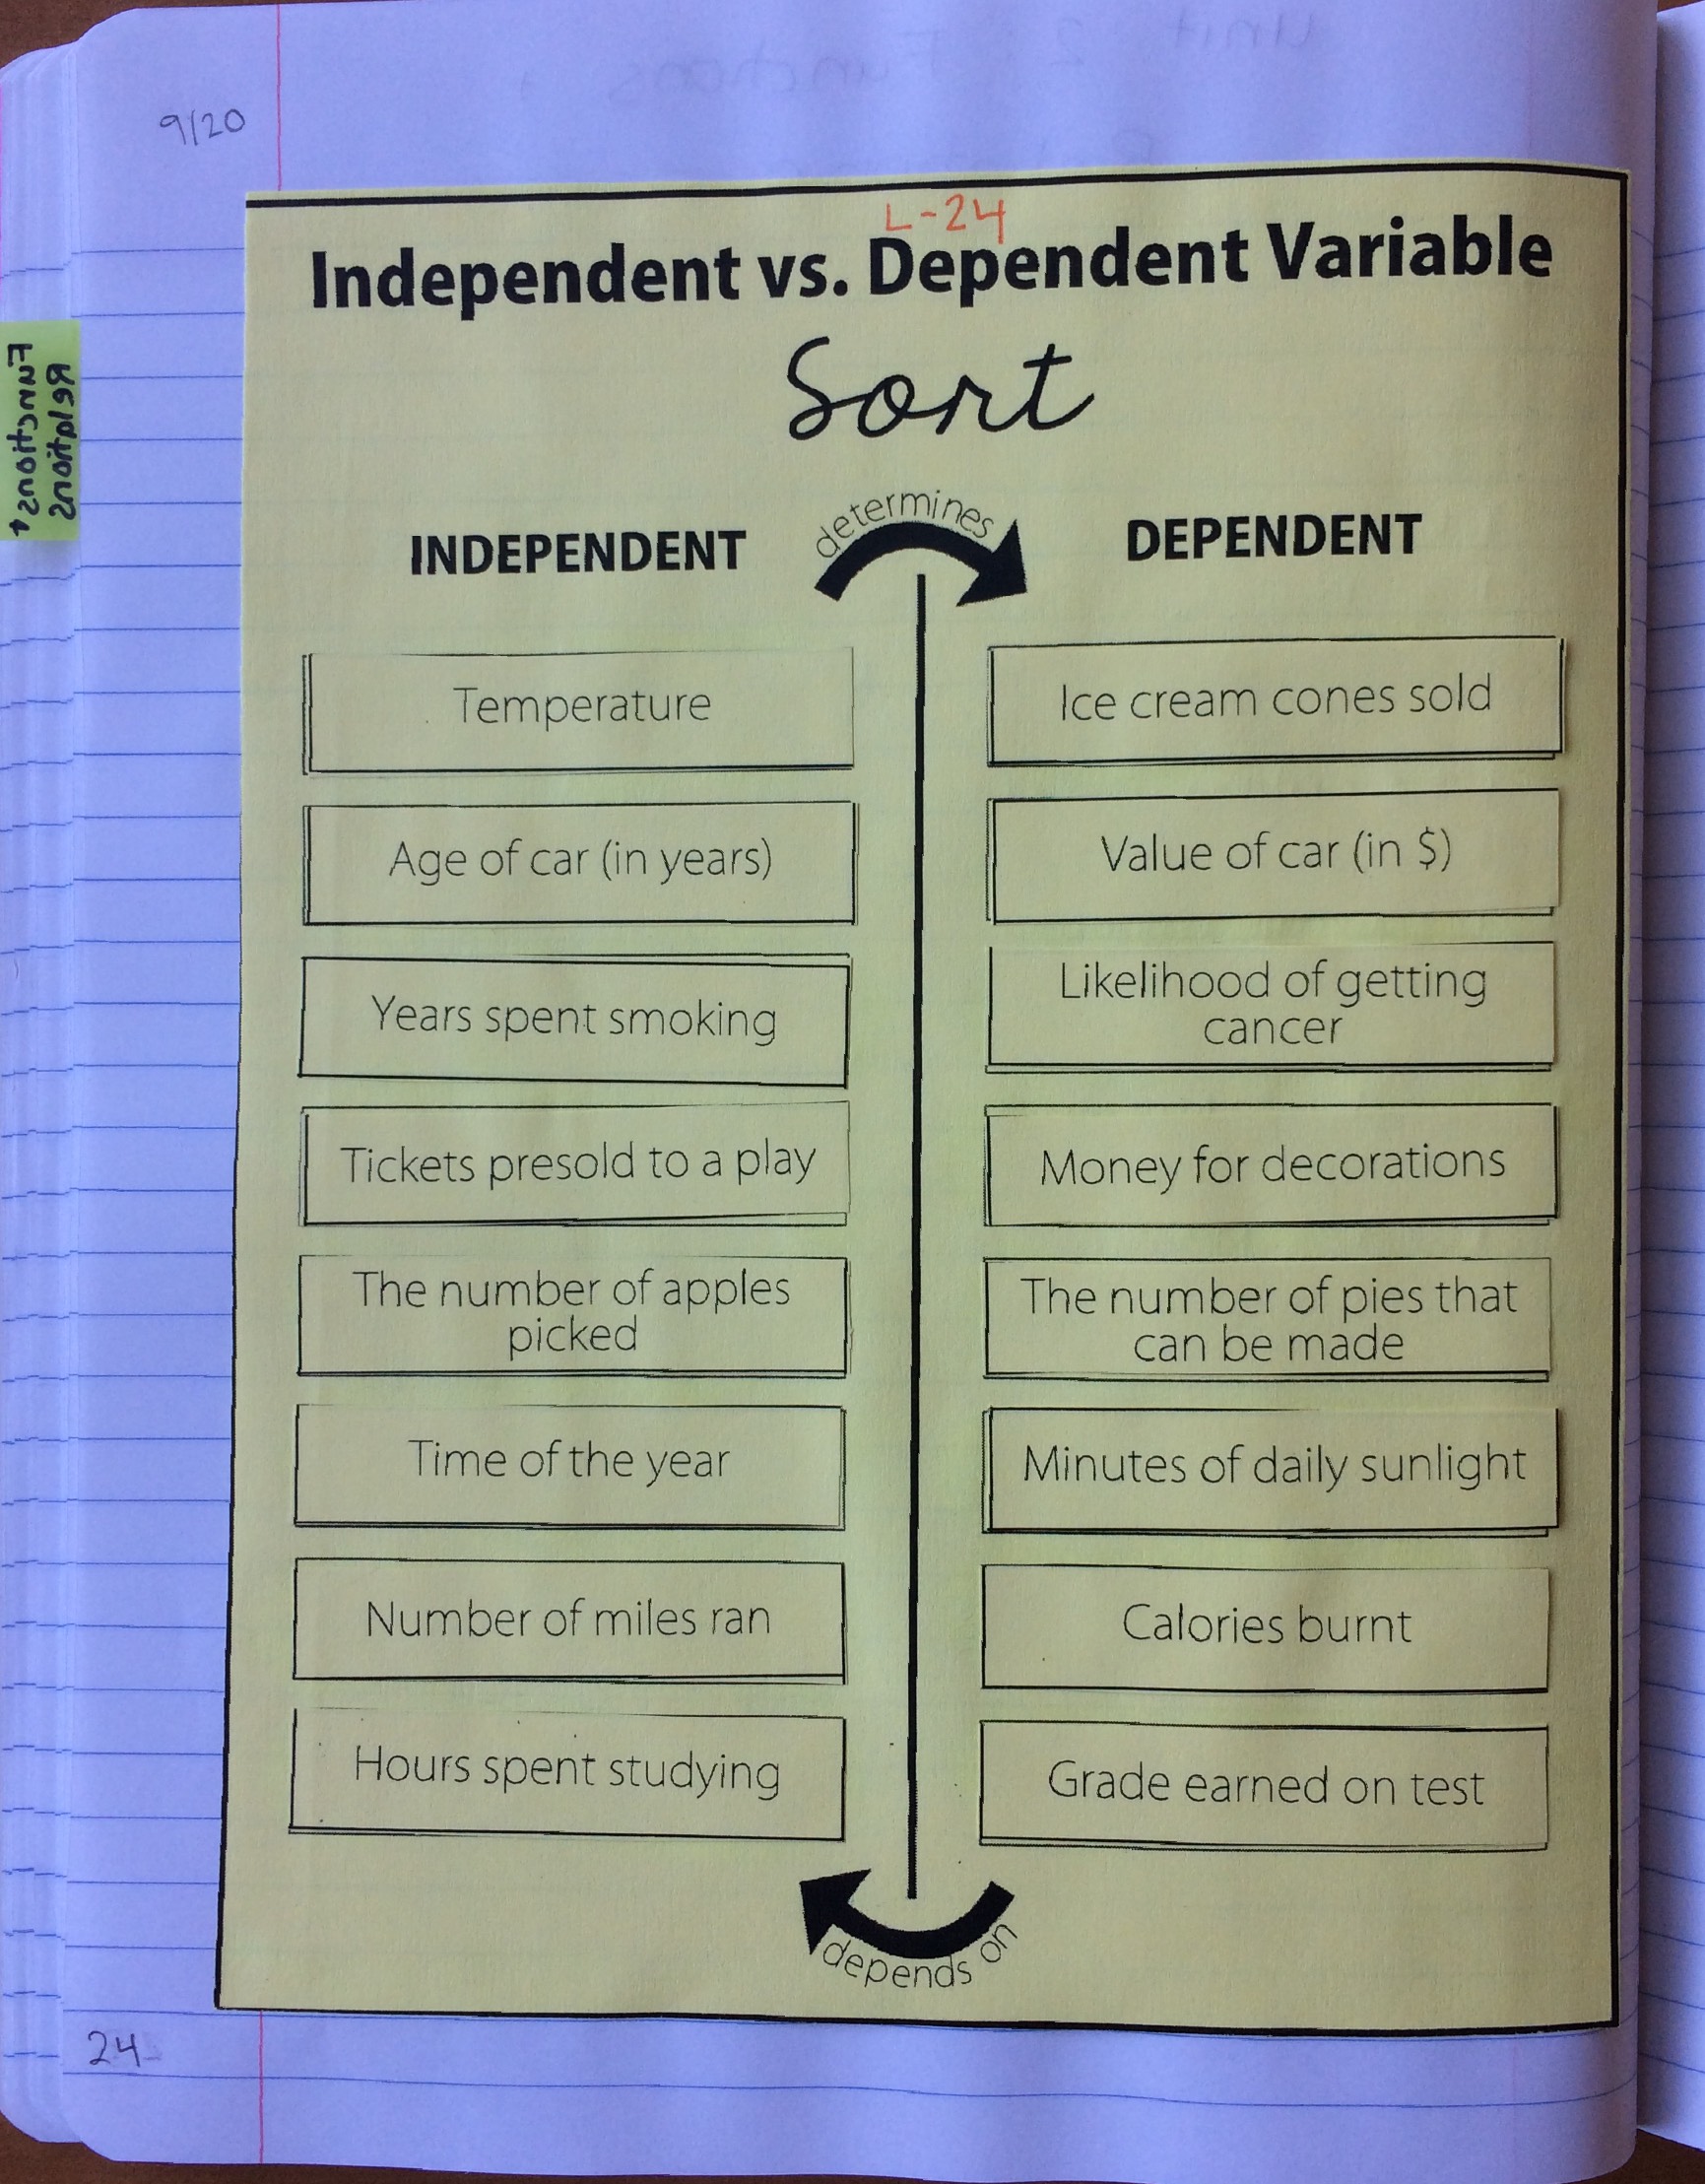
From there, we went into what a relation, domain, and range is, and how it relates to independent and dependent variables. 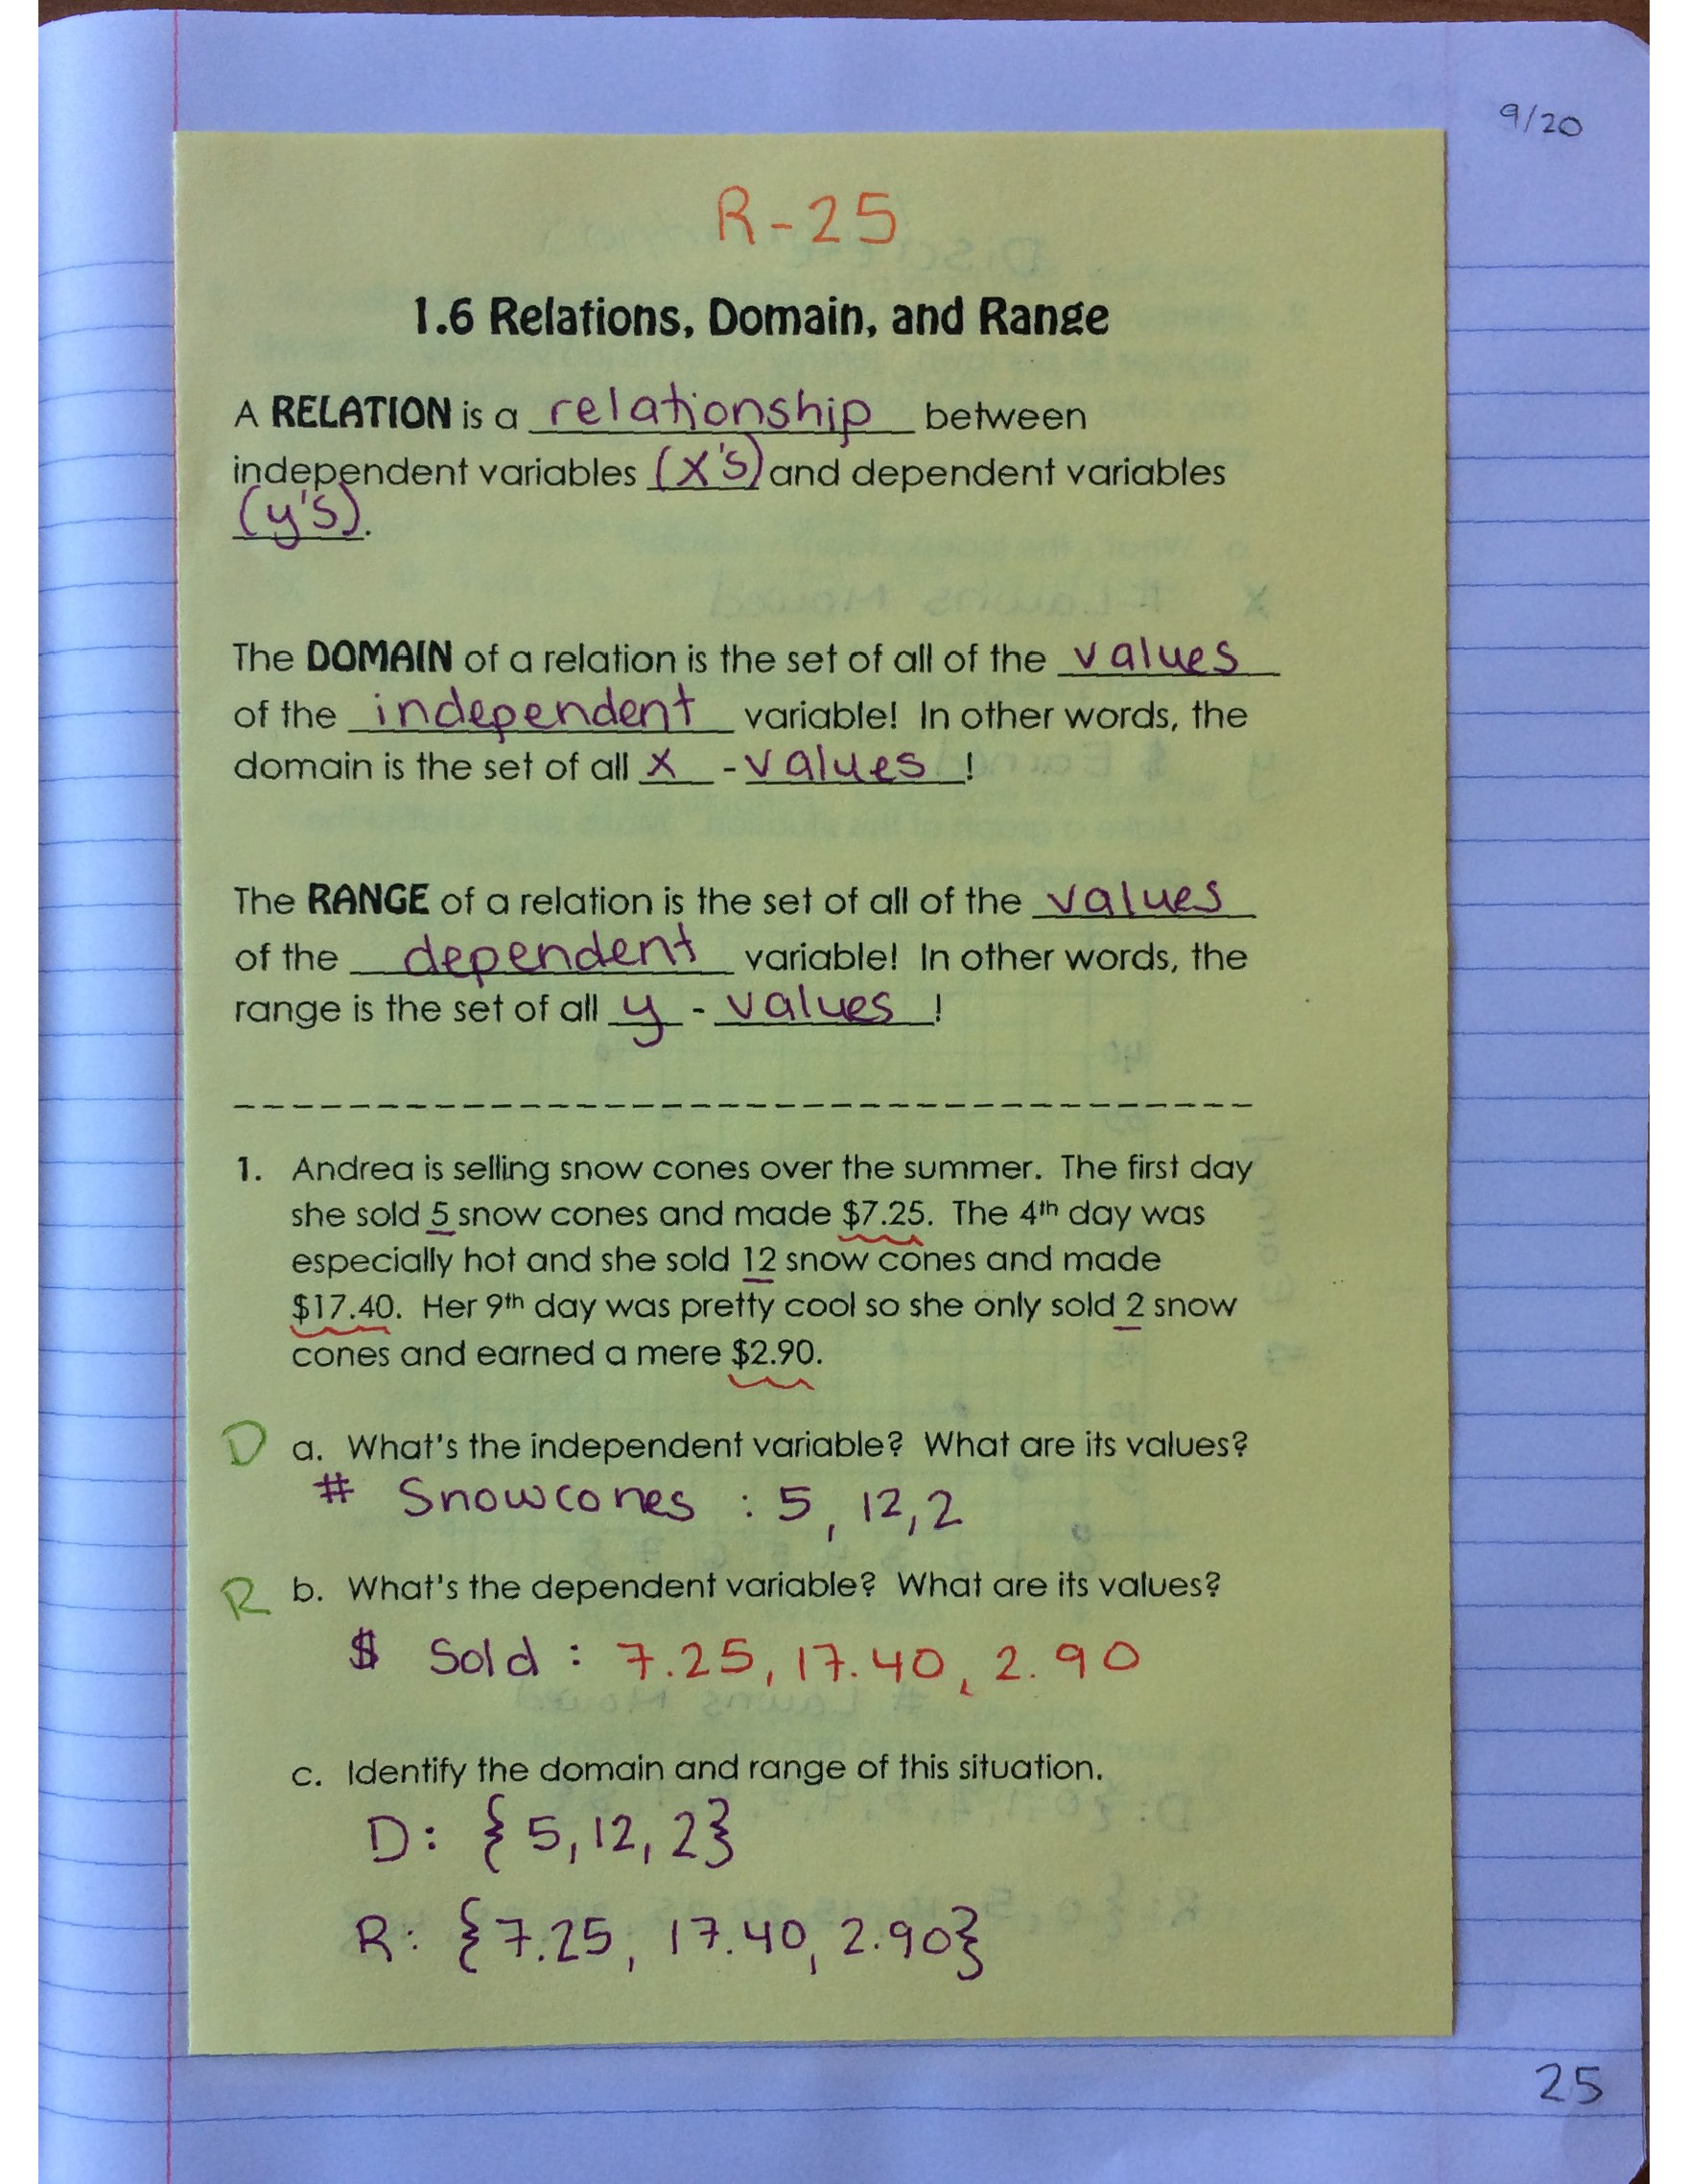
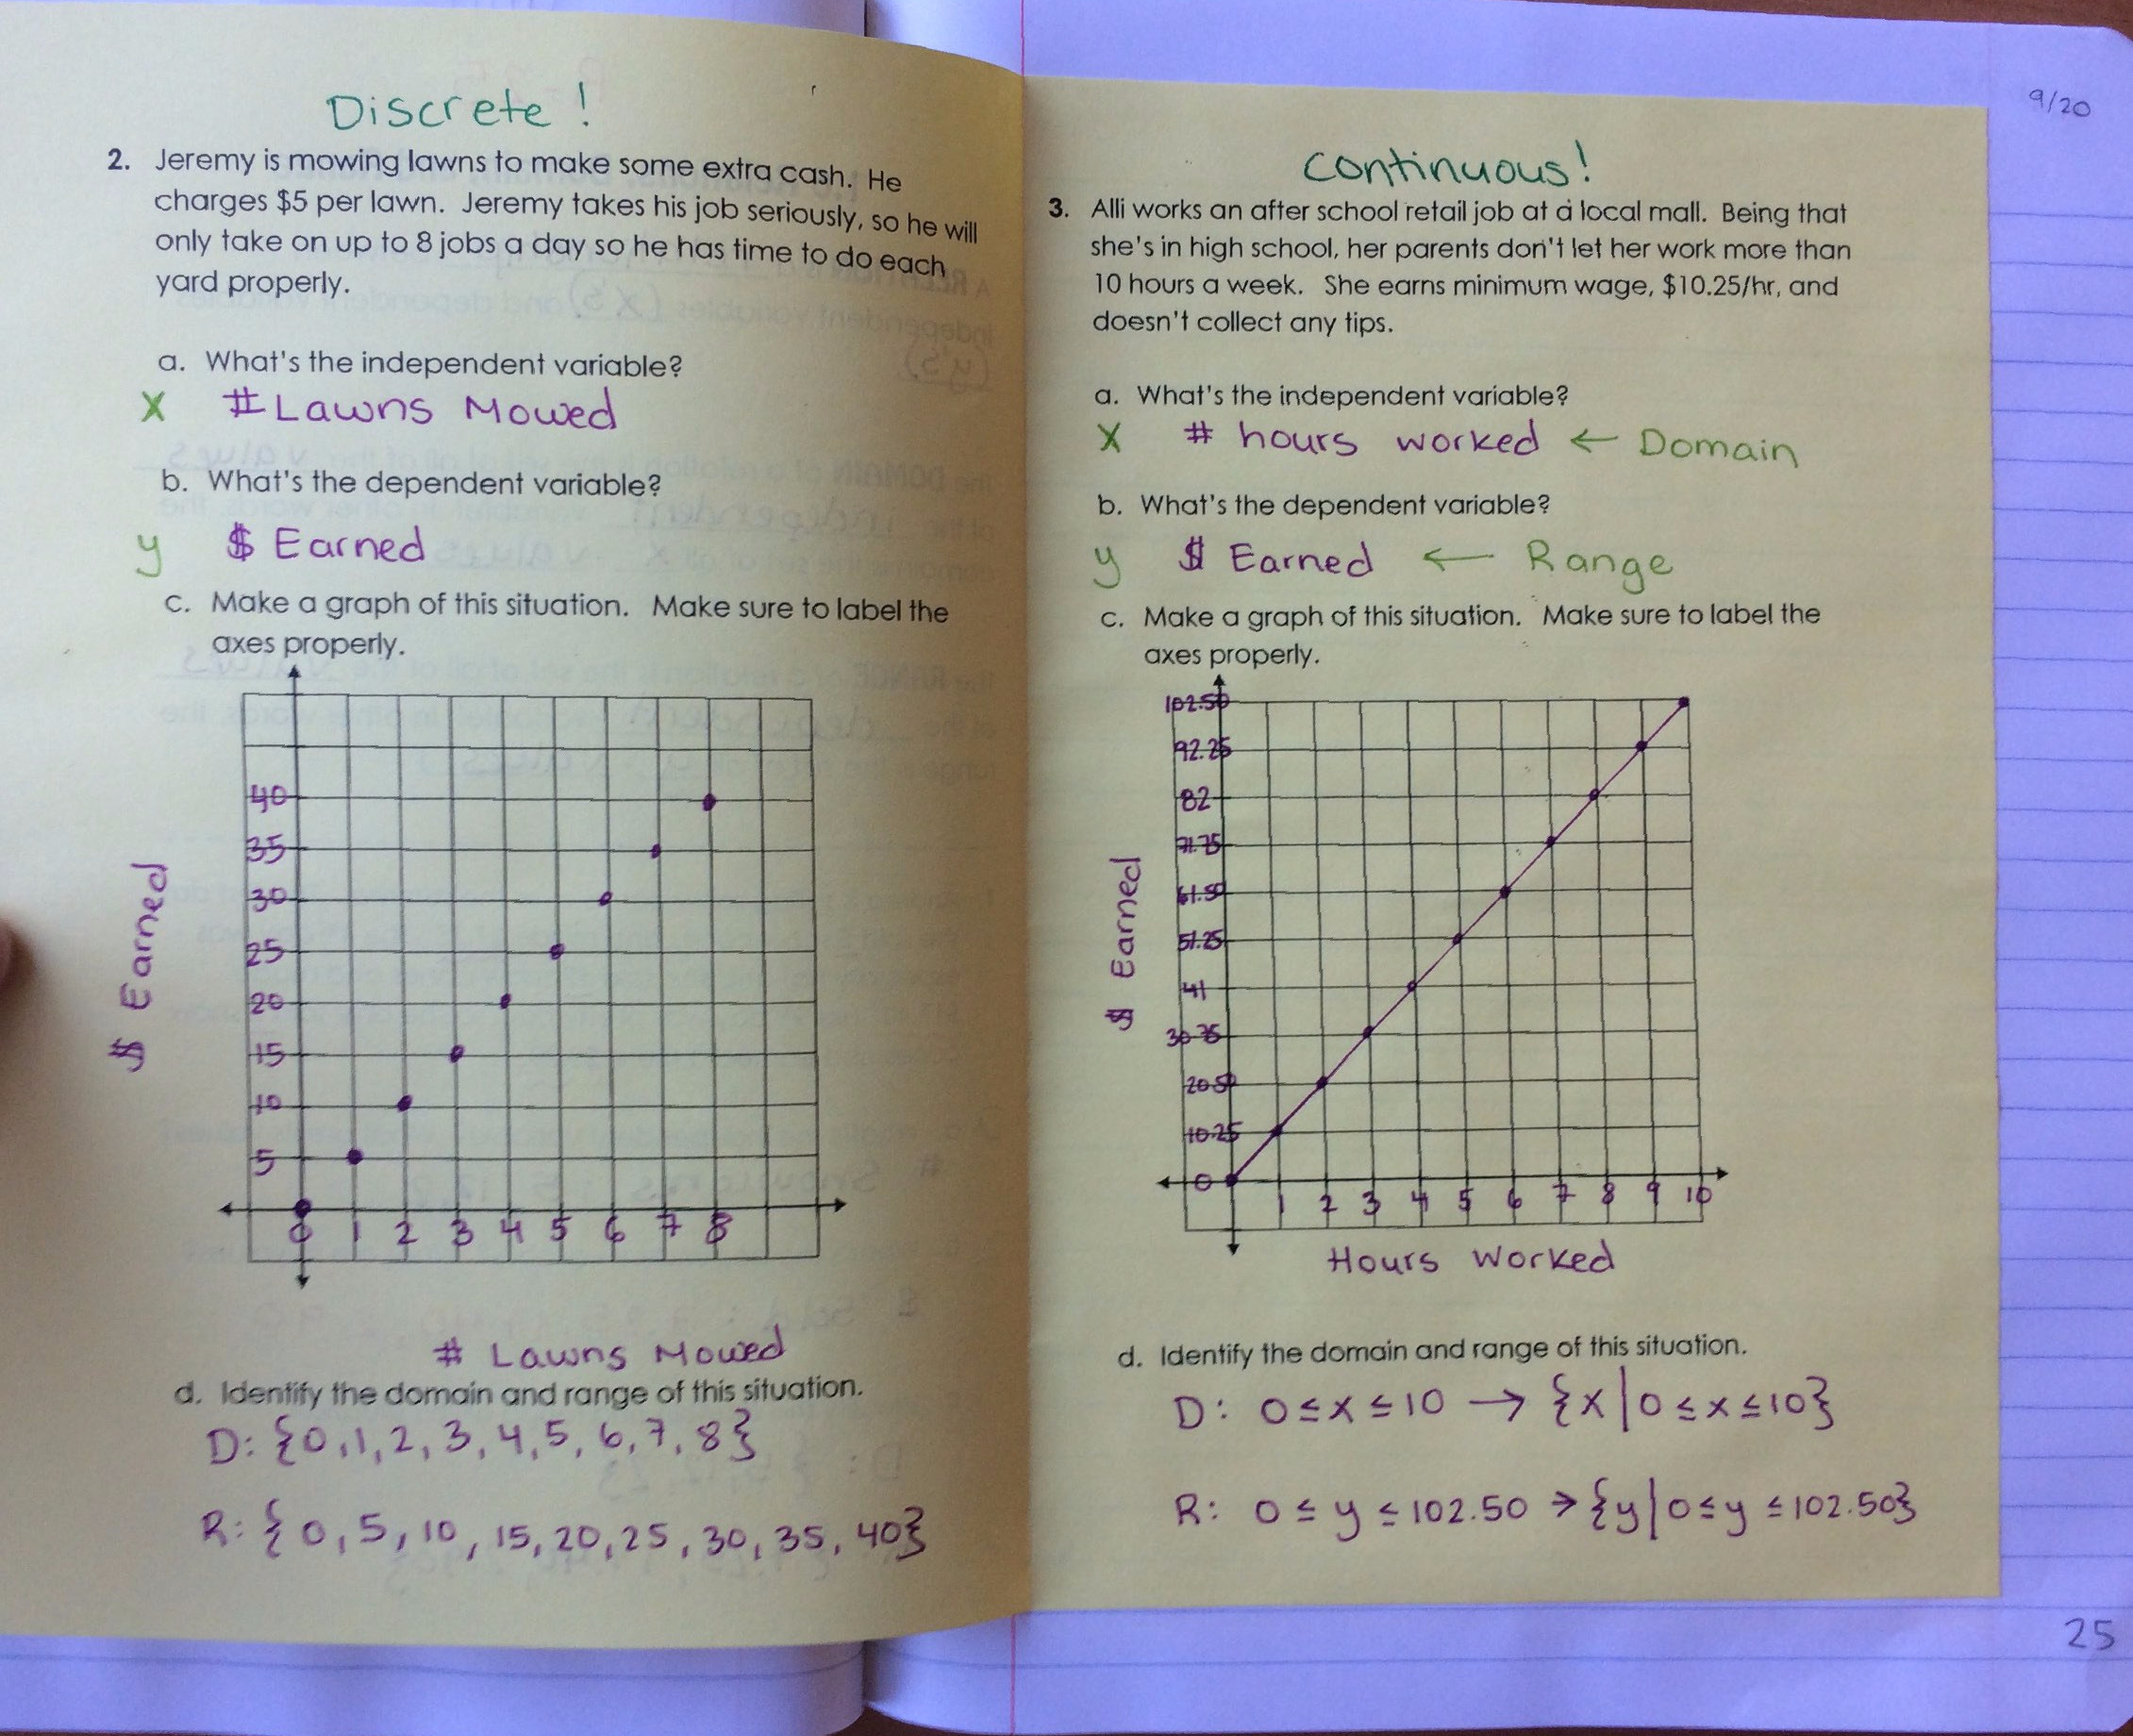
We then made the distinction that there are two types of relations, discrete and continuous, and we must pay attention to context to determine what type of relation we have. 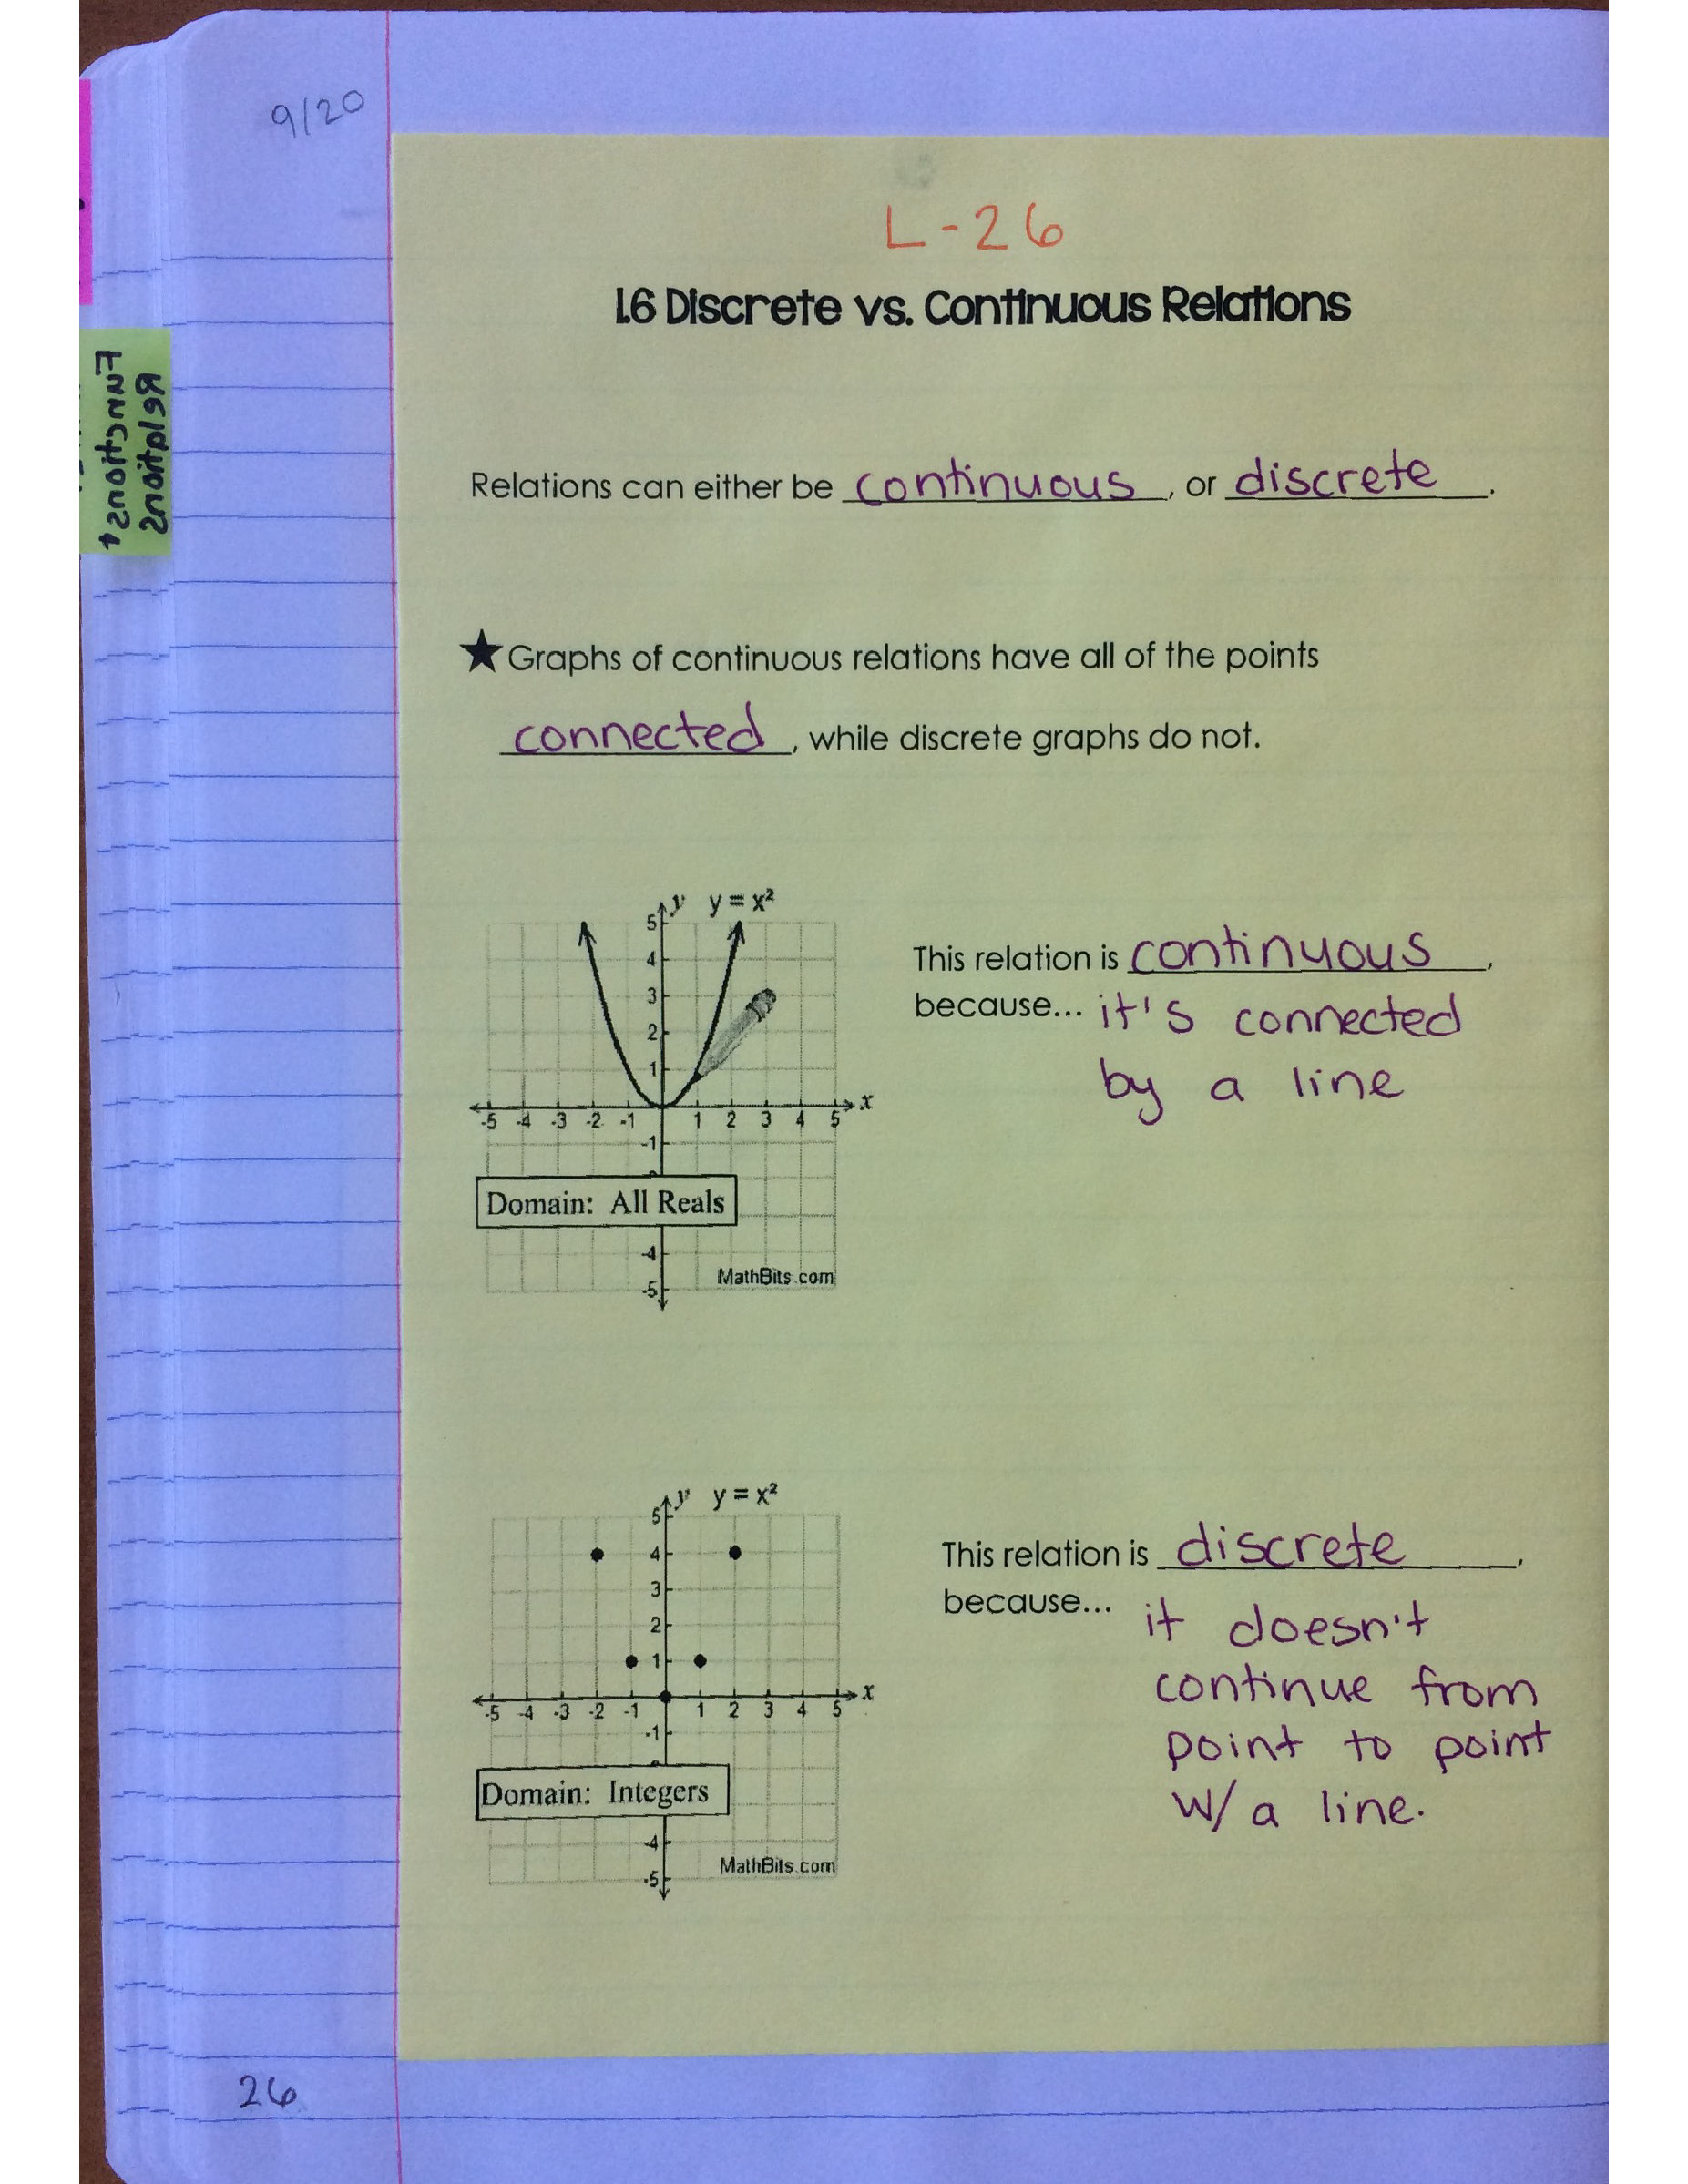
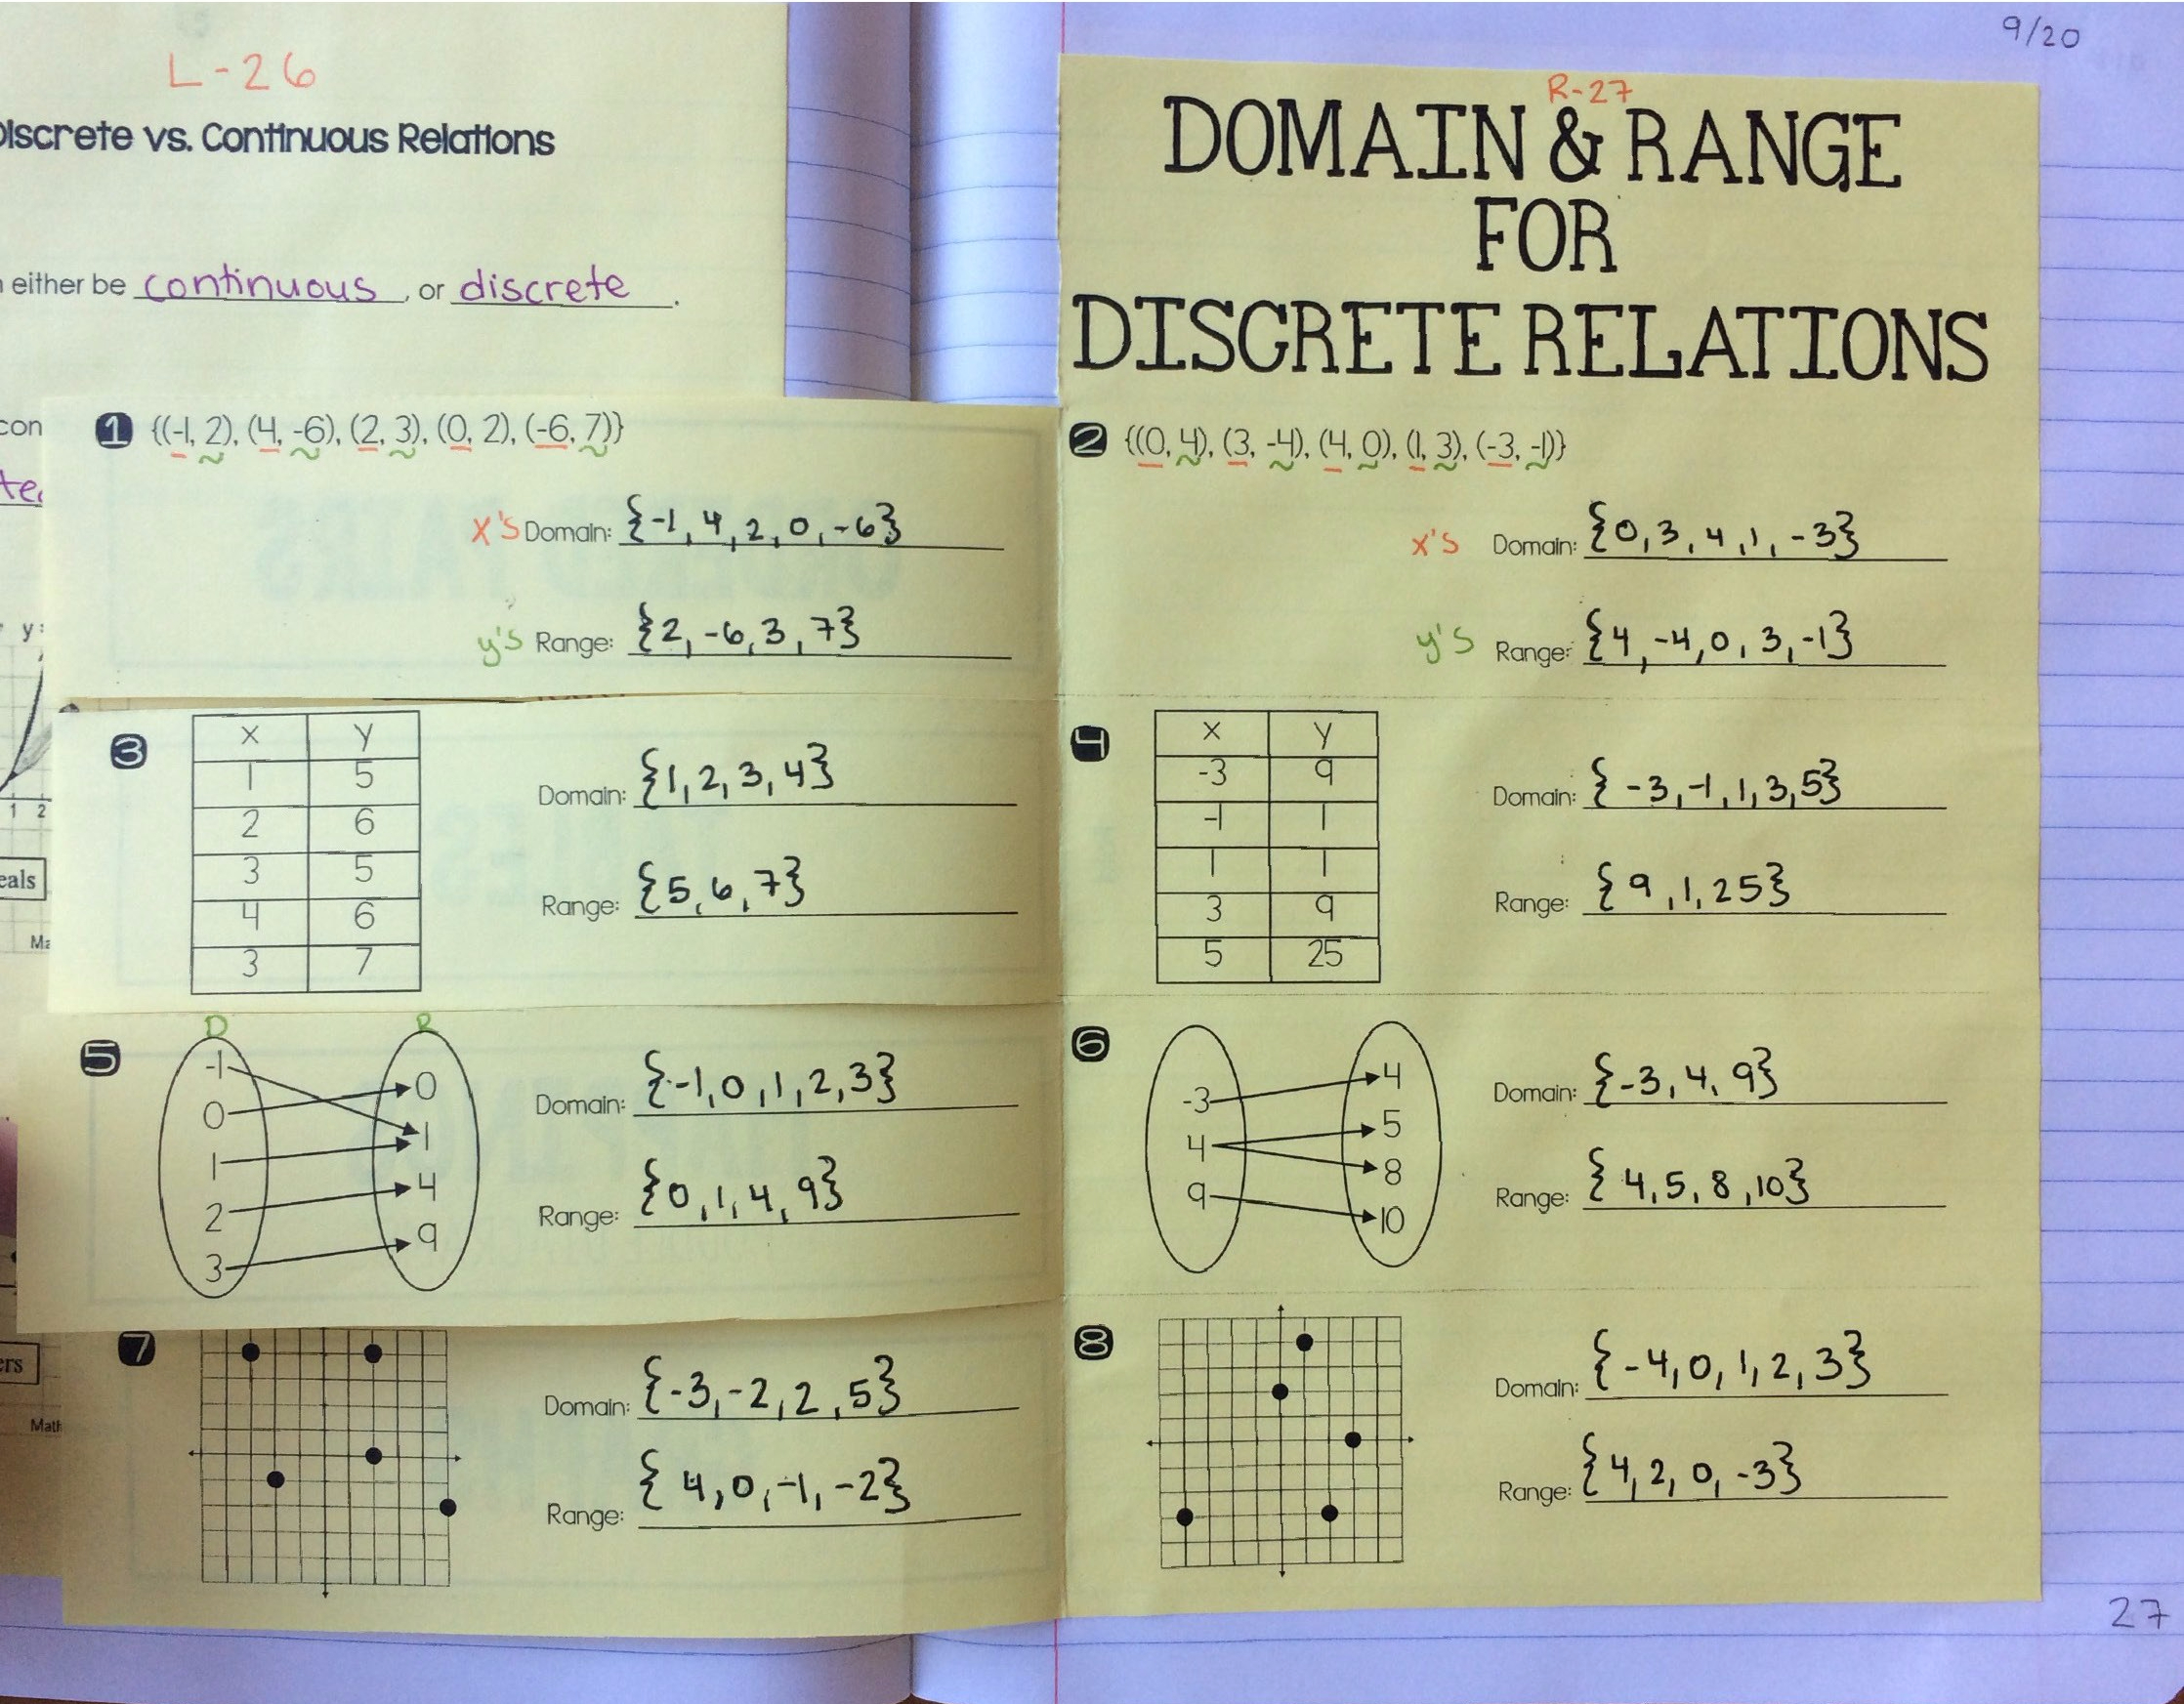
From there, we started to talk about all of the different ways we could represent a discrete relation, and how we find the domain and range from each representation. We used this foldable, which went over great with the students. They caught on super quickly, and they mentioned that they liked having one example to do together, and one to do on their own for each representation. 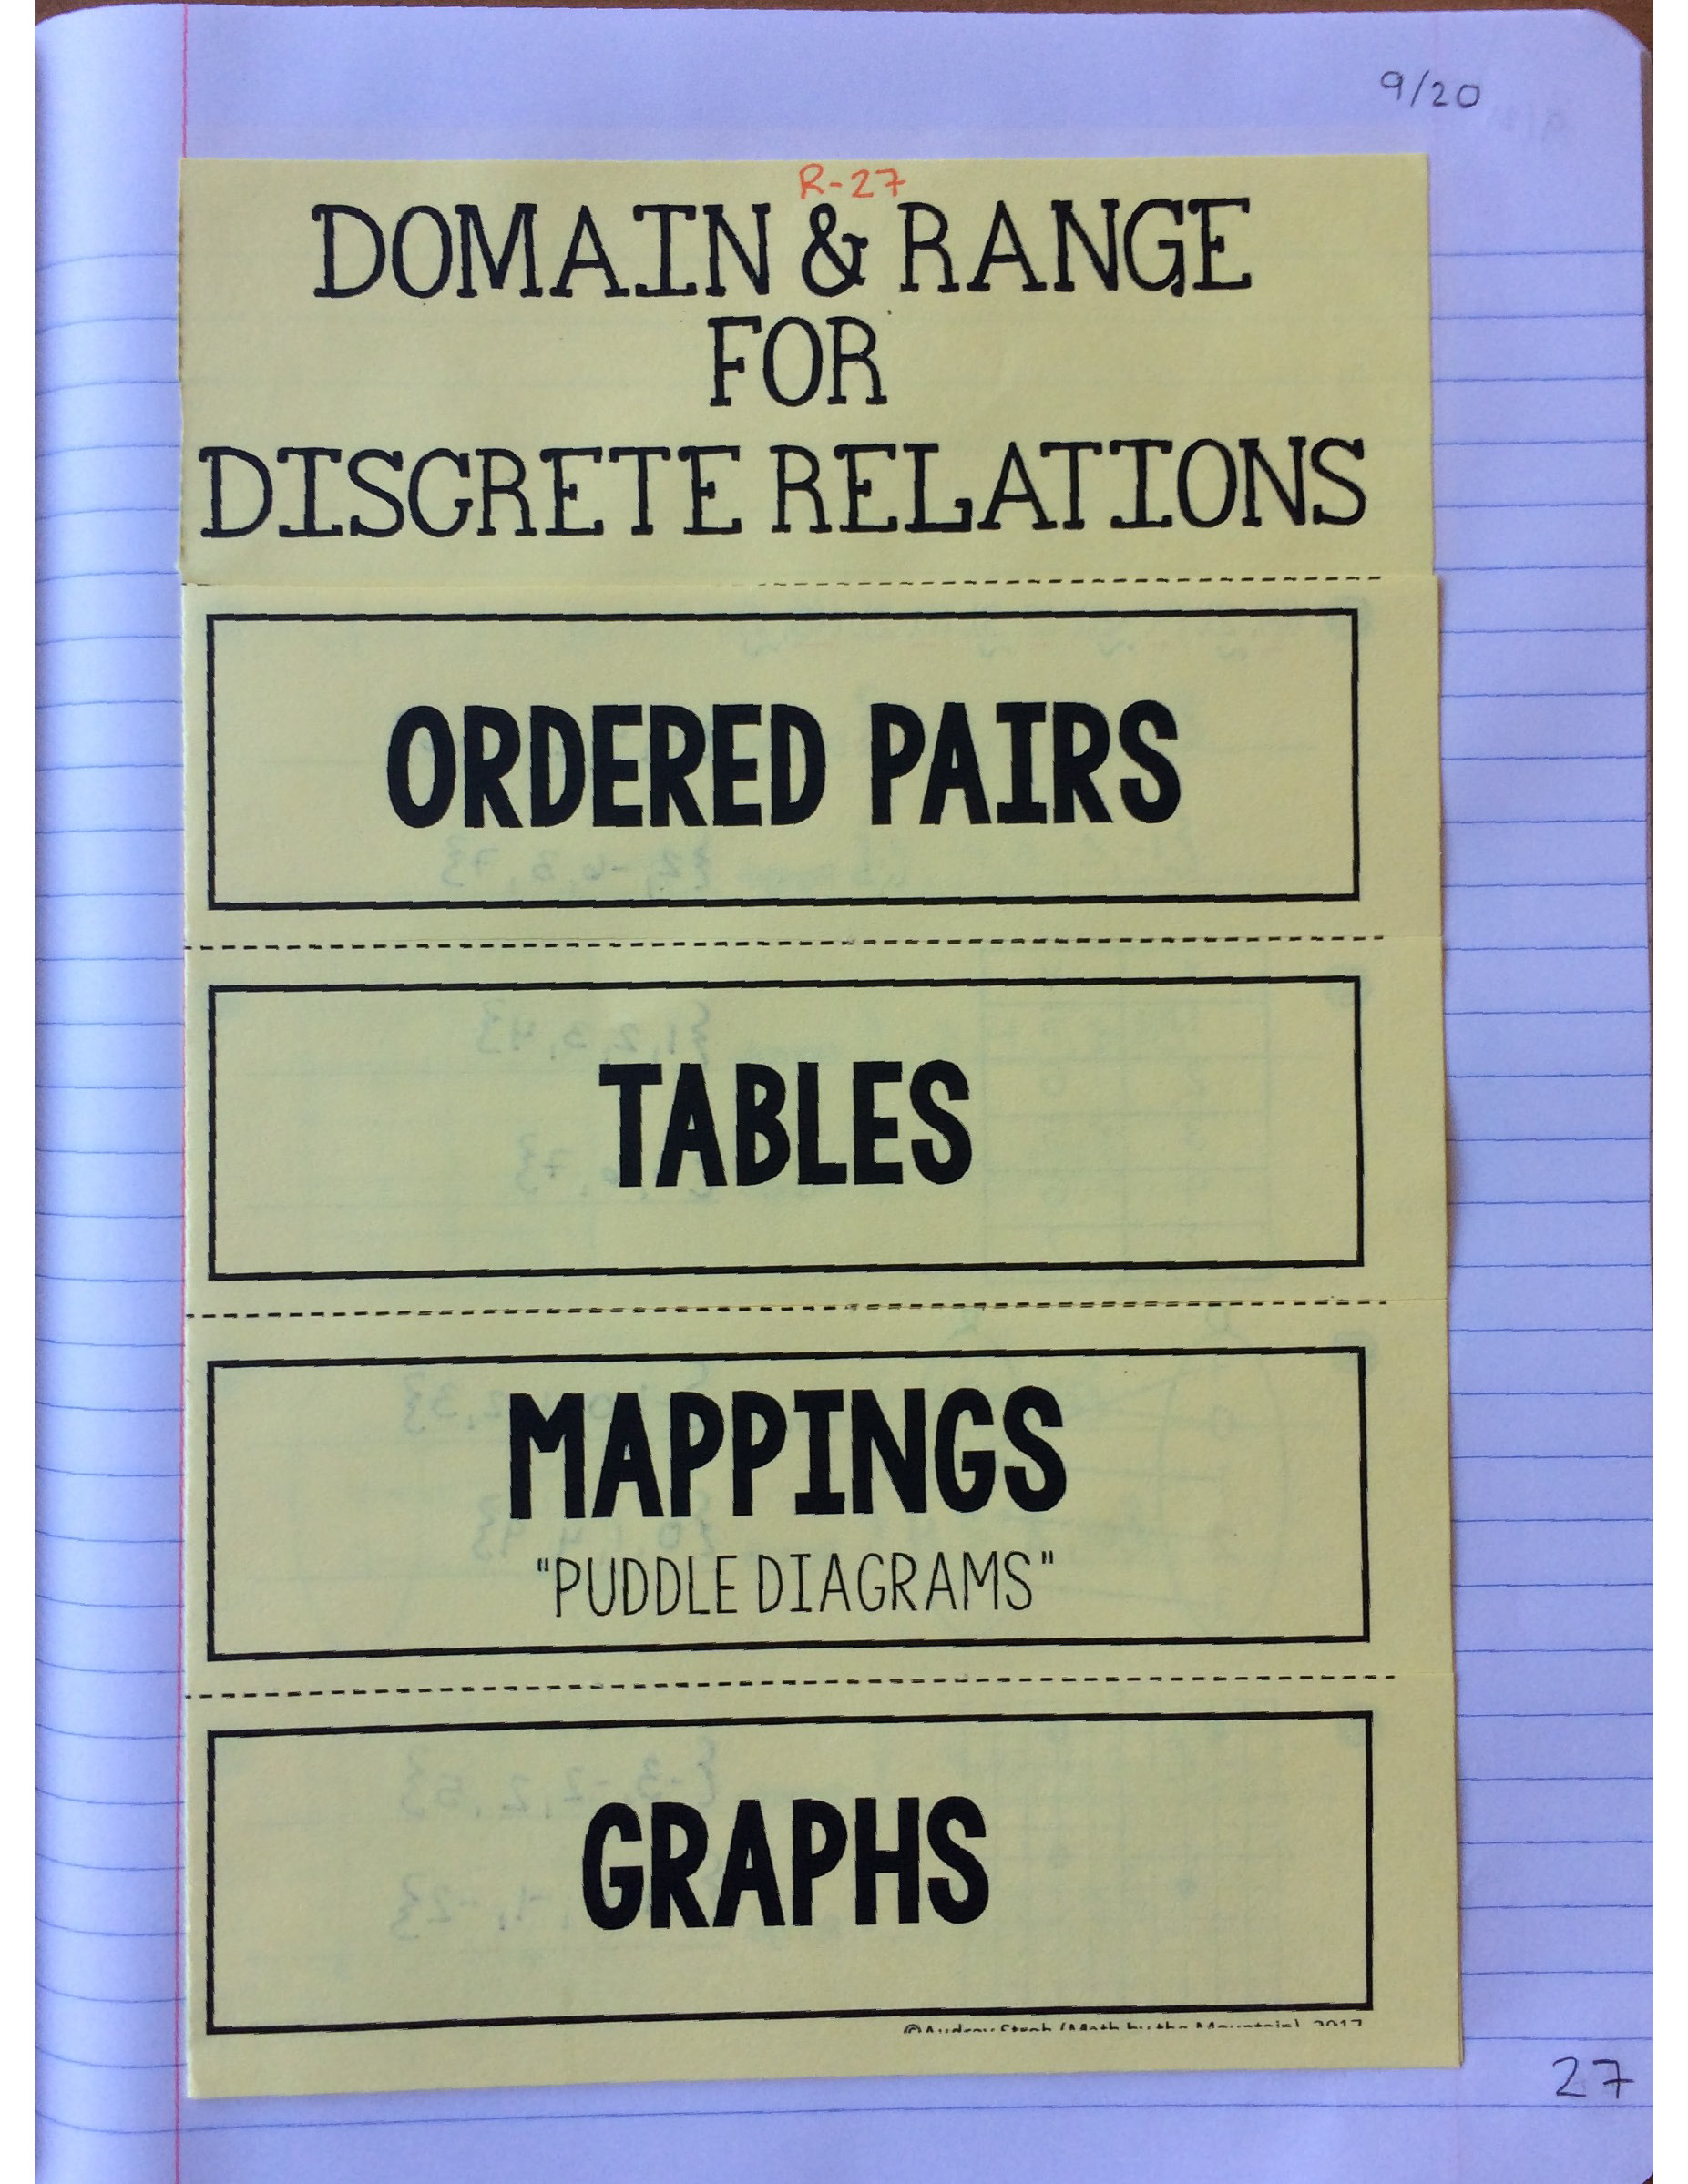
Day 2:
We started off with a word problem to review domain and range in a (discrete) relation. 
From there, we filled out a Frayer vocabulary model for functions, to make sure that students really understood what they are and aren’t. 
Then, using the definition for function we just wrote down on the Frayer model, we made a cheat sheet to refer back to that tells us all of the different ways a relation (discrete or continuous) would NOT be a function. 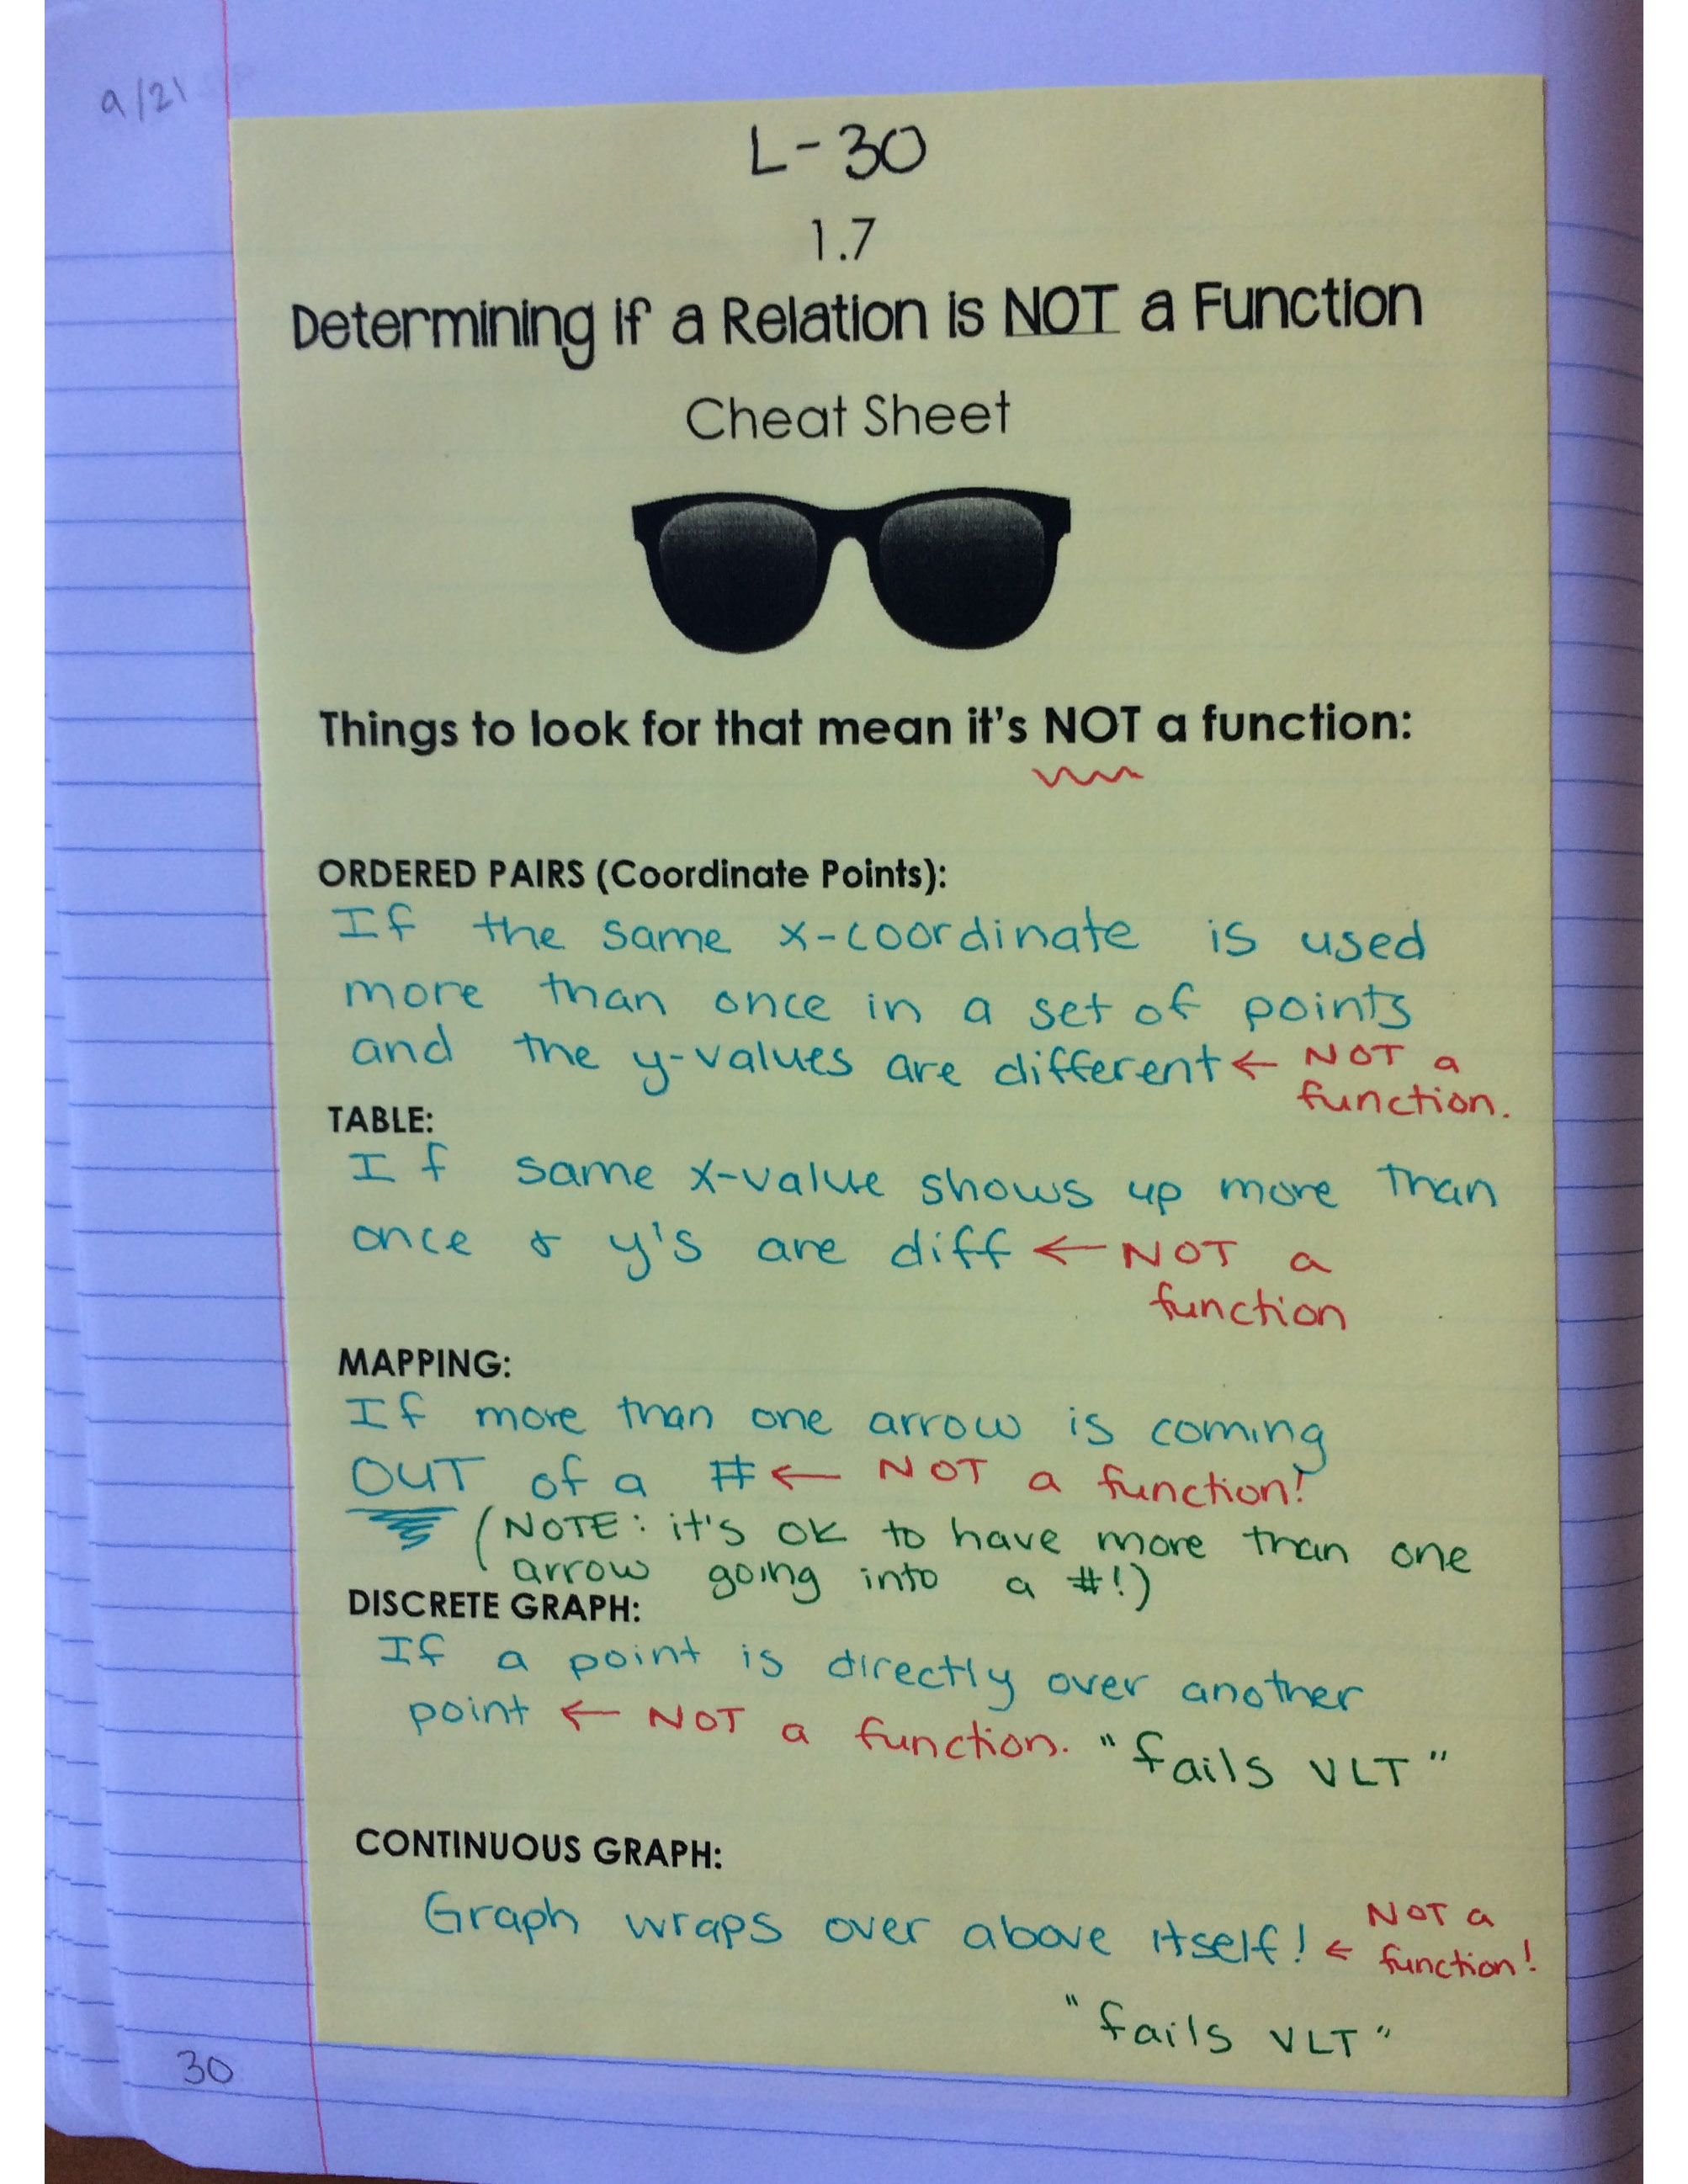
We practiced classifying functions using a card sort from Amazing Mathematics. Instead of cutting and pasting, we decided to color-code instead! Love it! (In the words of one of my students, this is the page that has “fourteen thousand graphs.”)
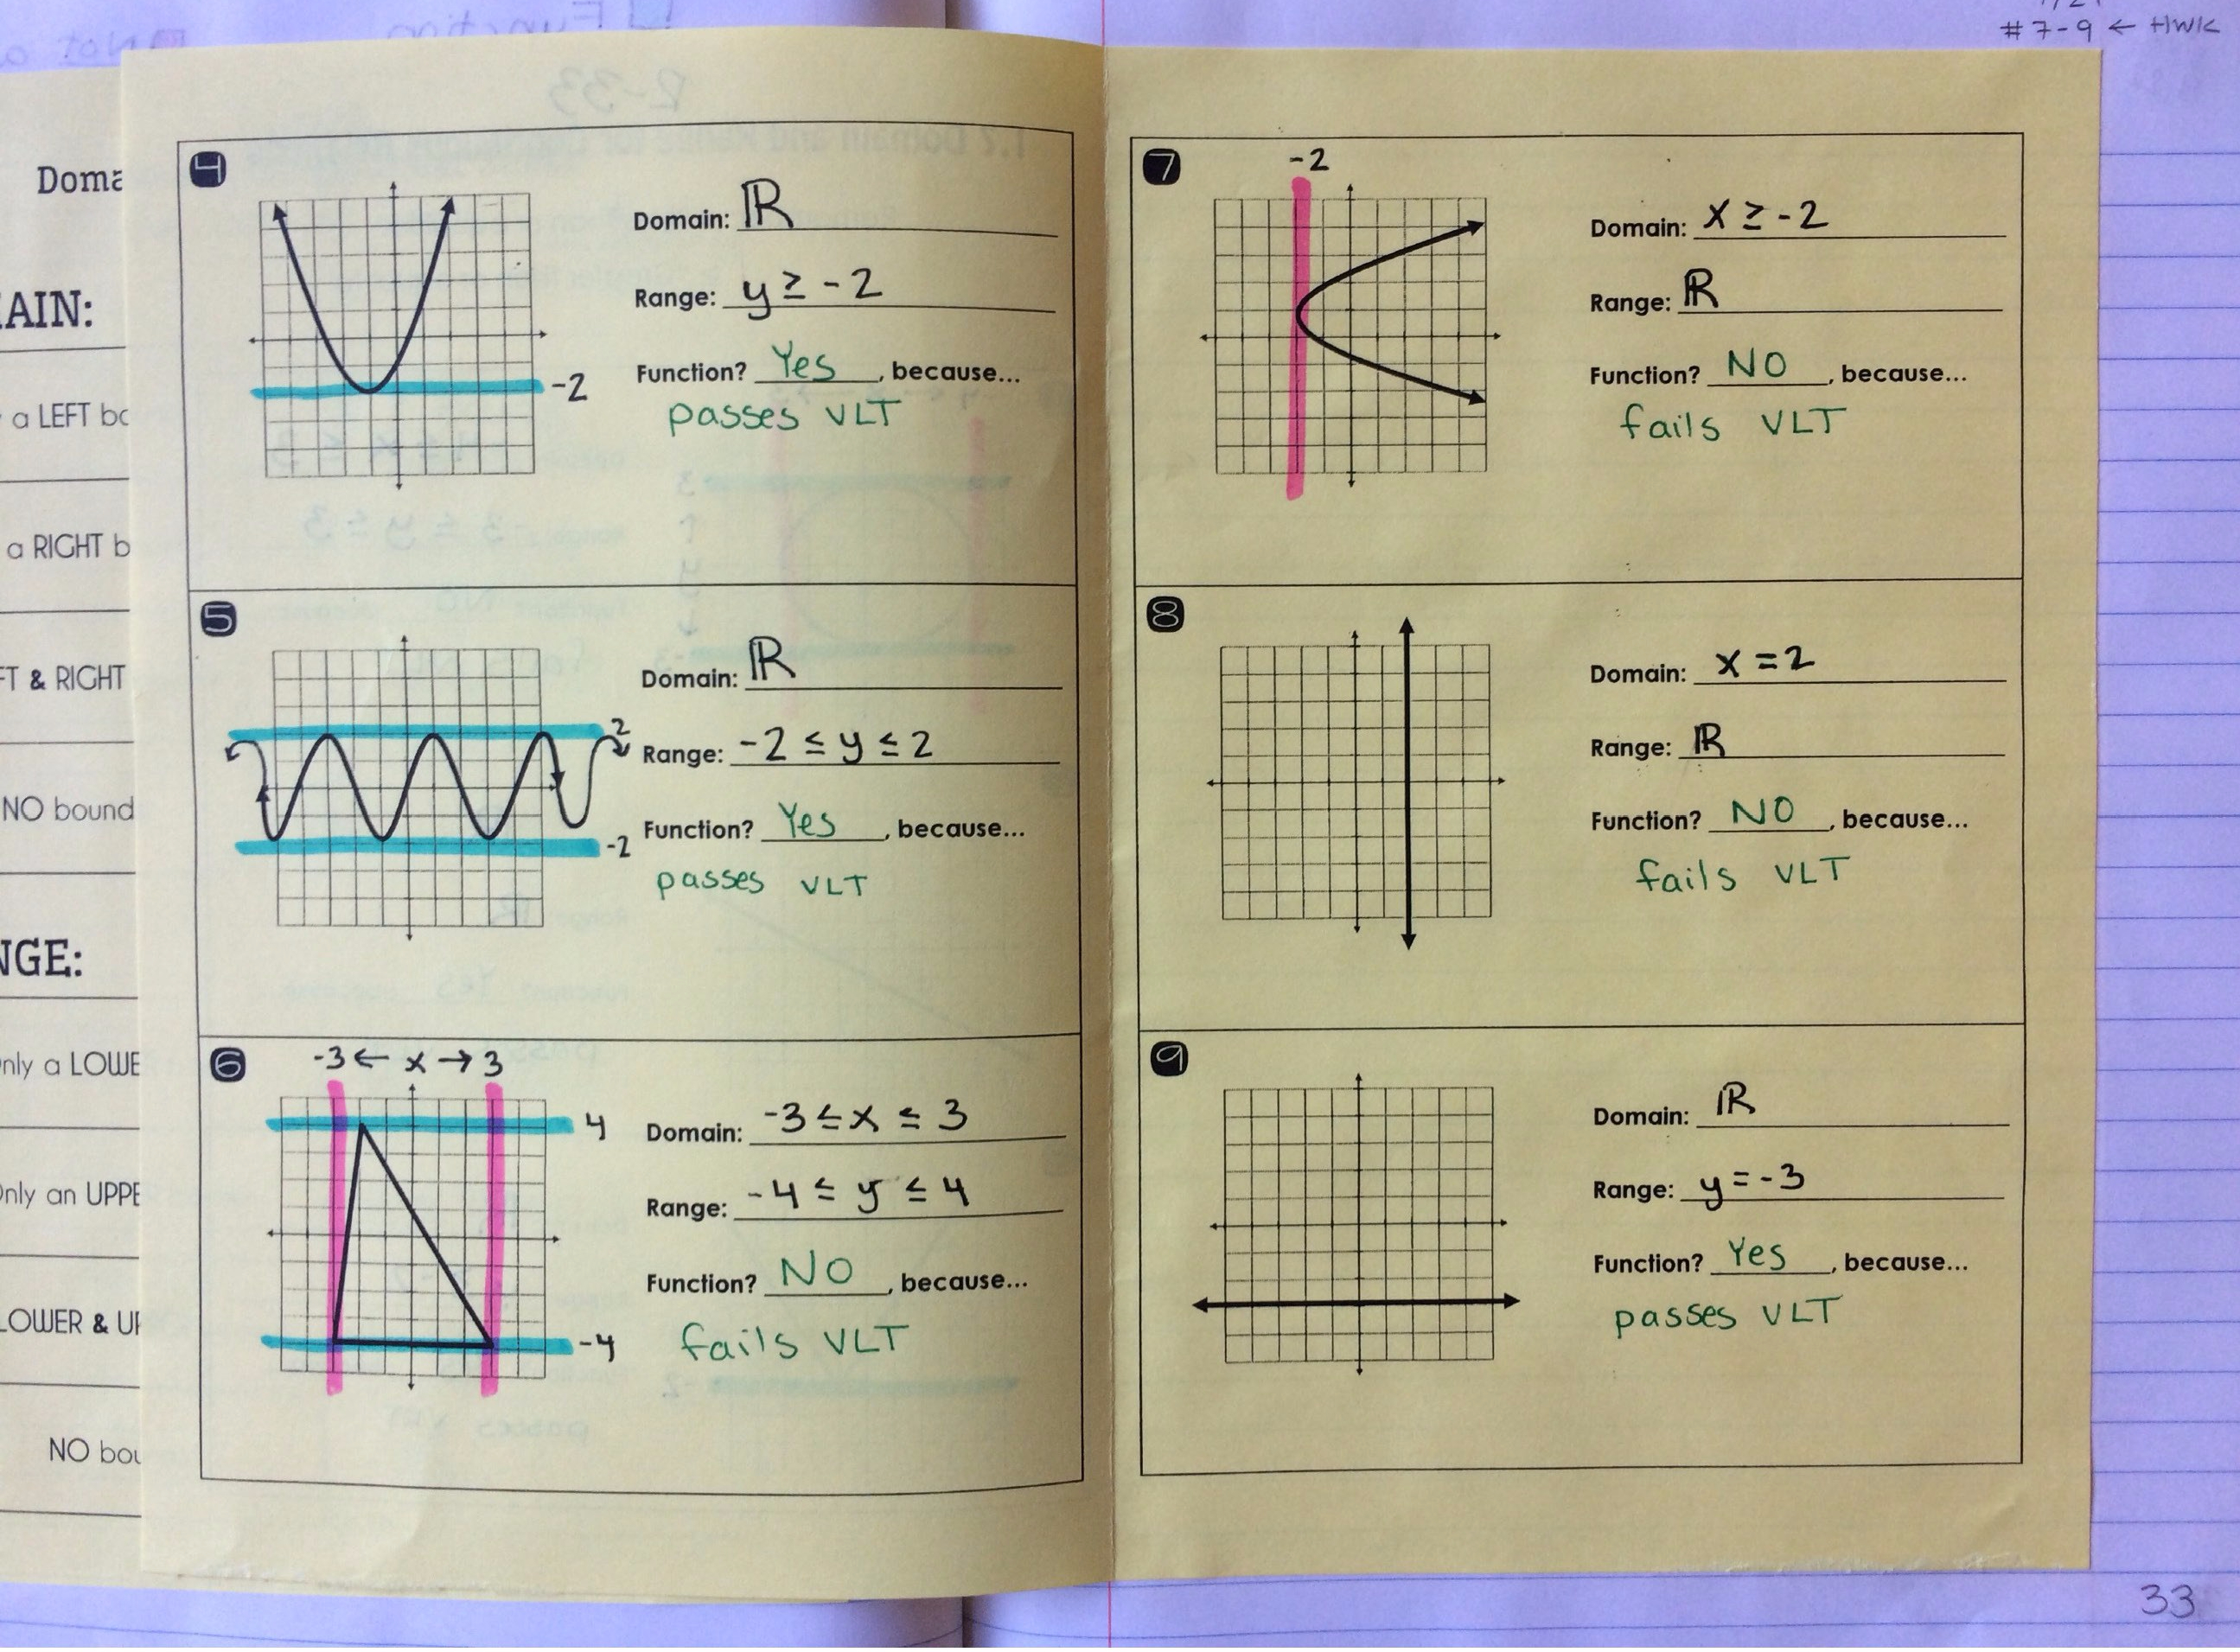
We then filled out another cheat sheet, this time for domain and range of continuous functions. Students reasoned together through the inequalities and we talked about what a bound actually means (we used a lot of basketball references). 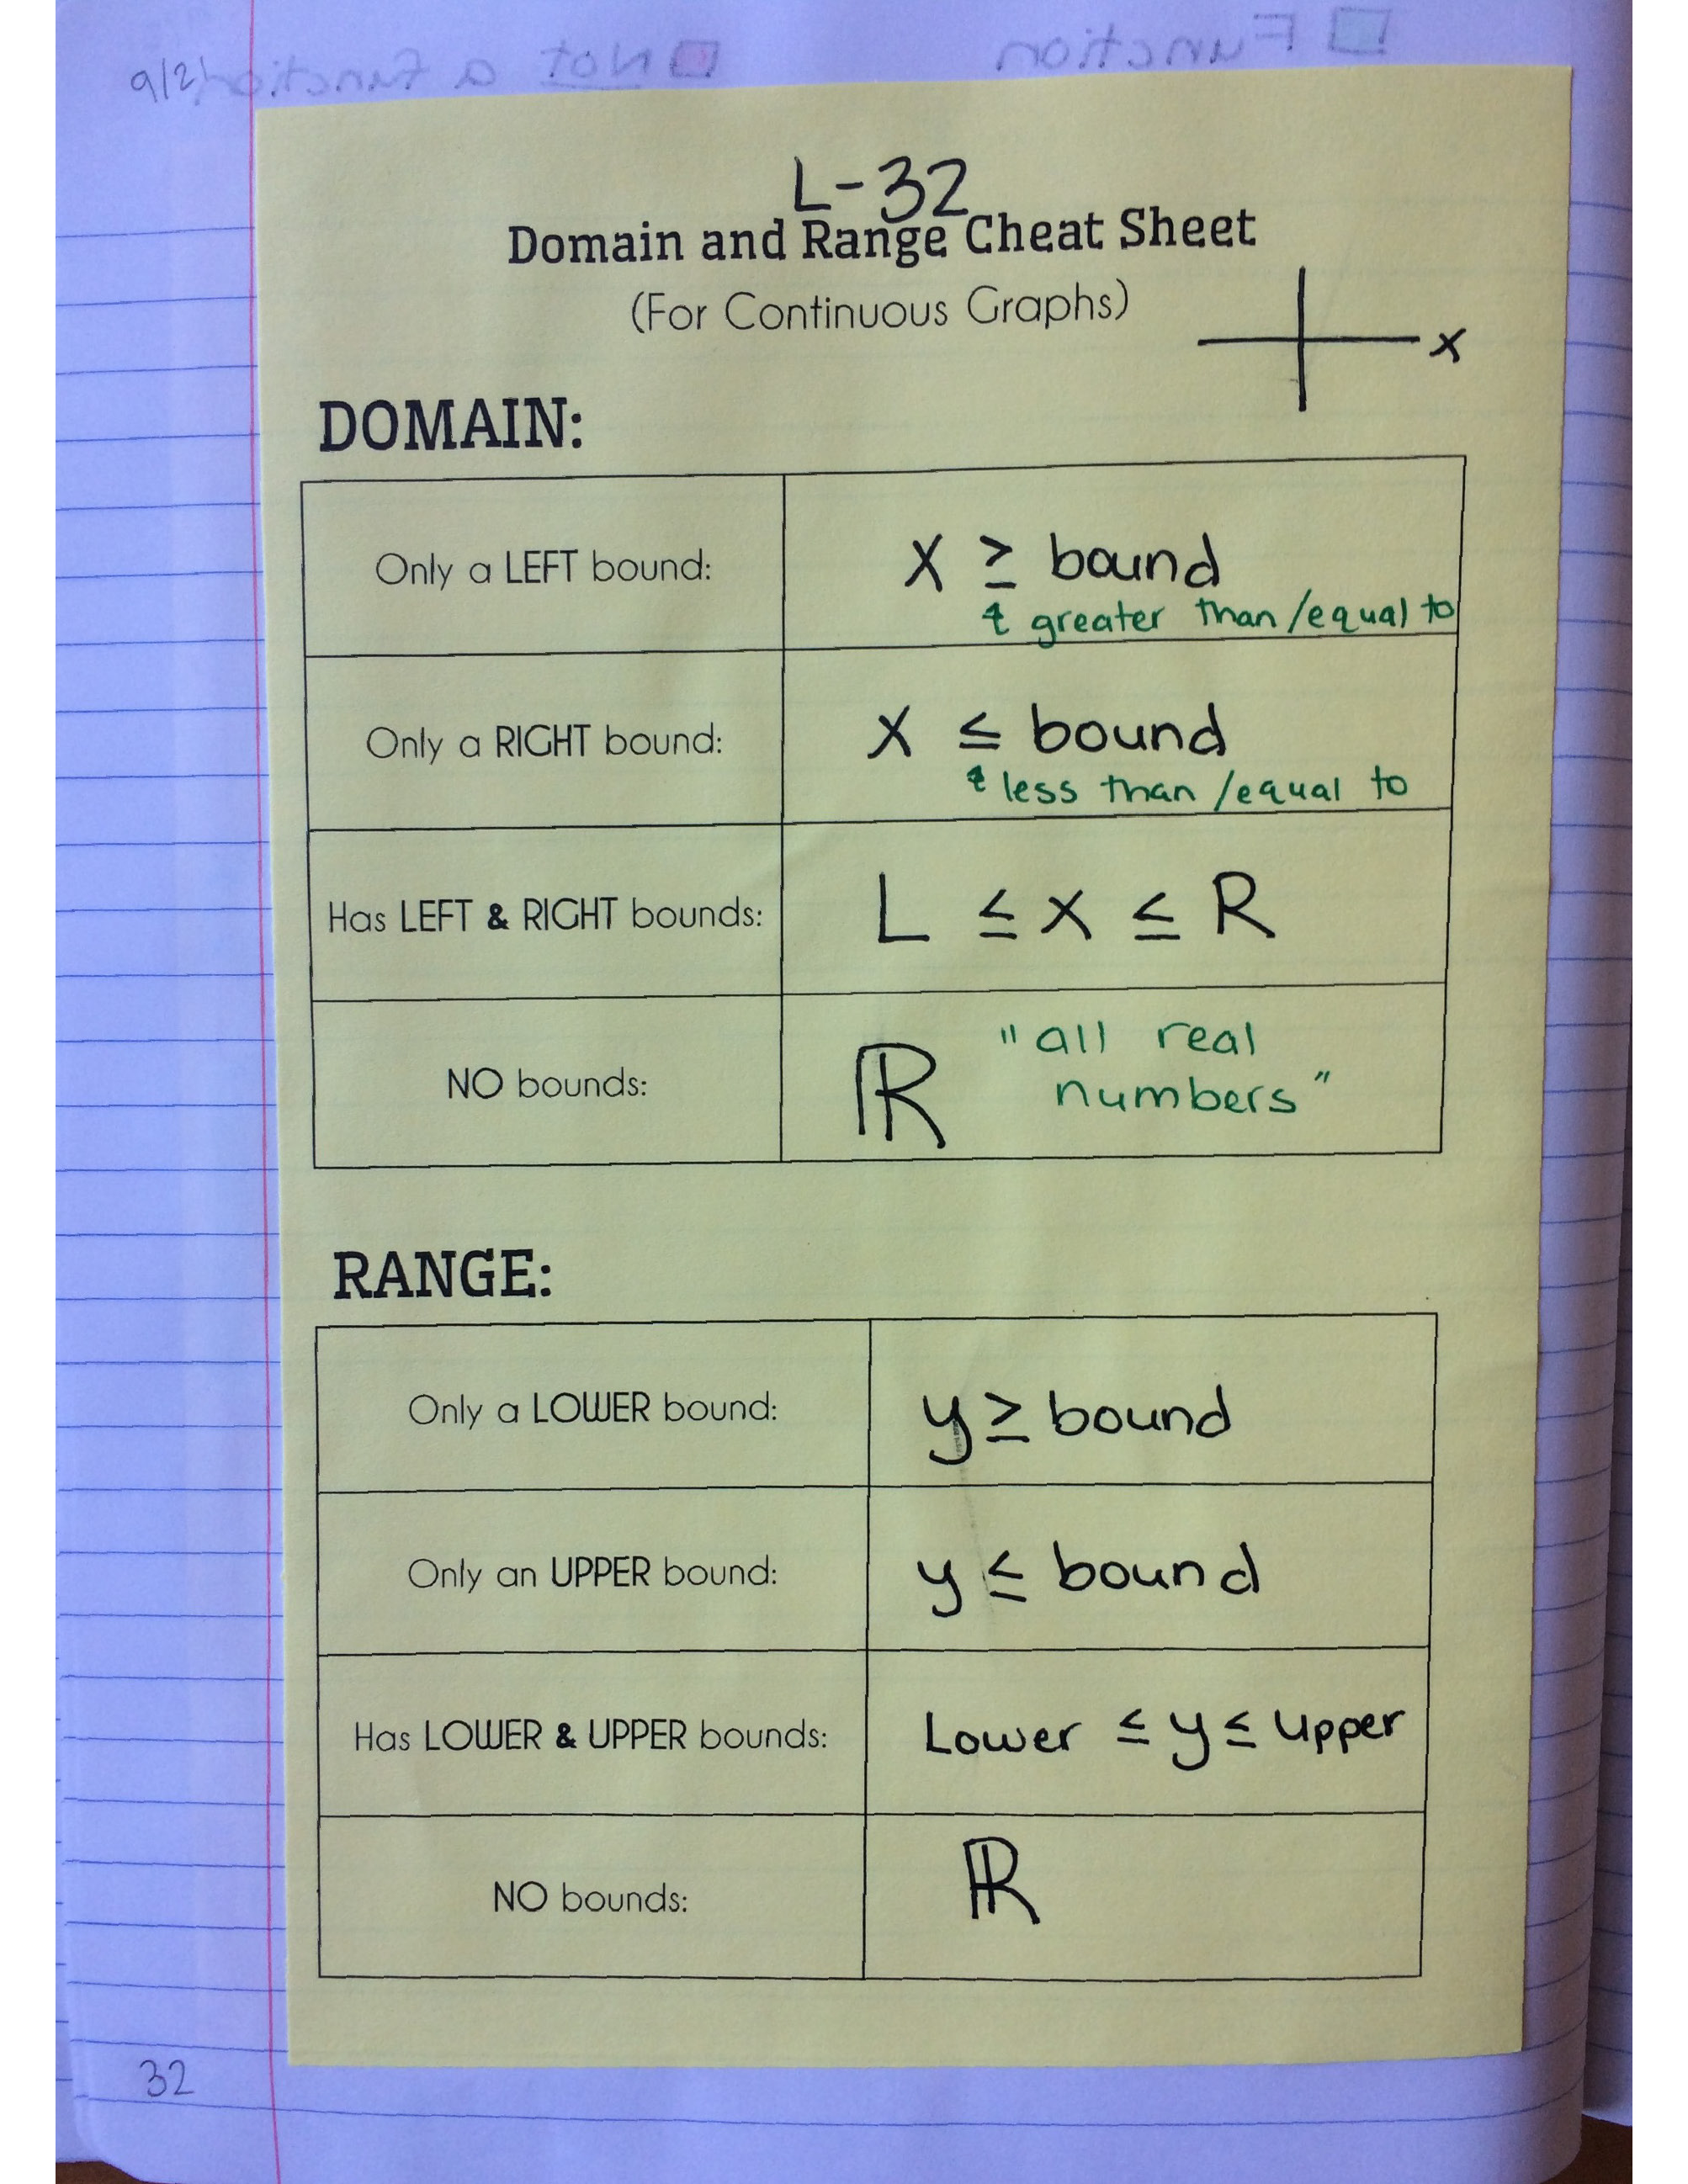
We practiced finding the domain and range for continuous relations (as well as determining whether or not they were a function), using the following set of notes. PS: It took me a LONG time to figure out how to make a parabola or a trigonometric wave using Microsoft’s shape tools. I feel overly proud of this set of notes! You can download them here! 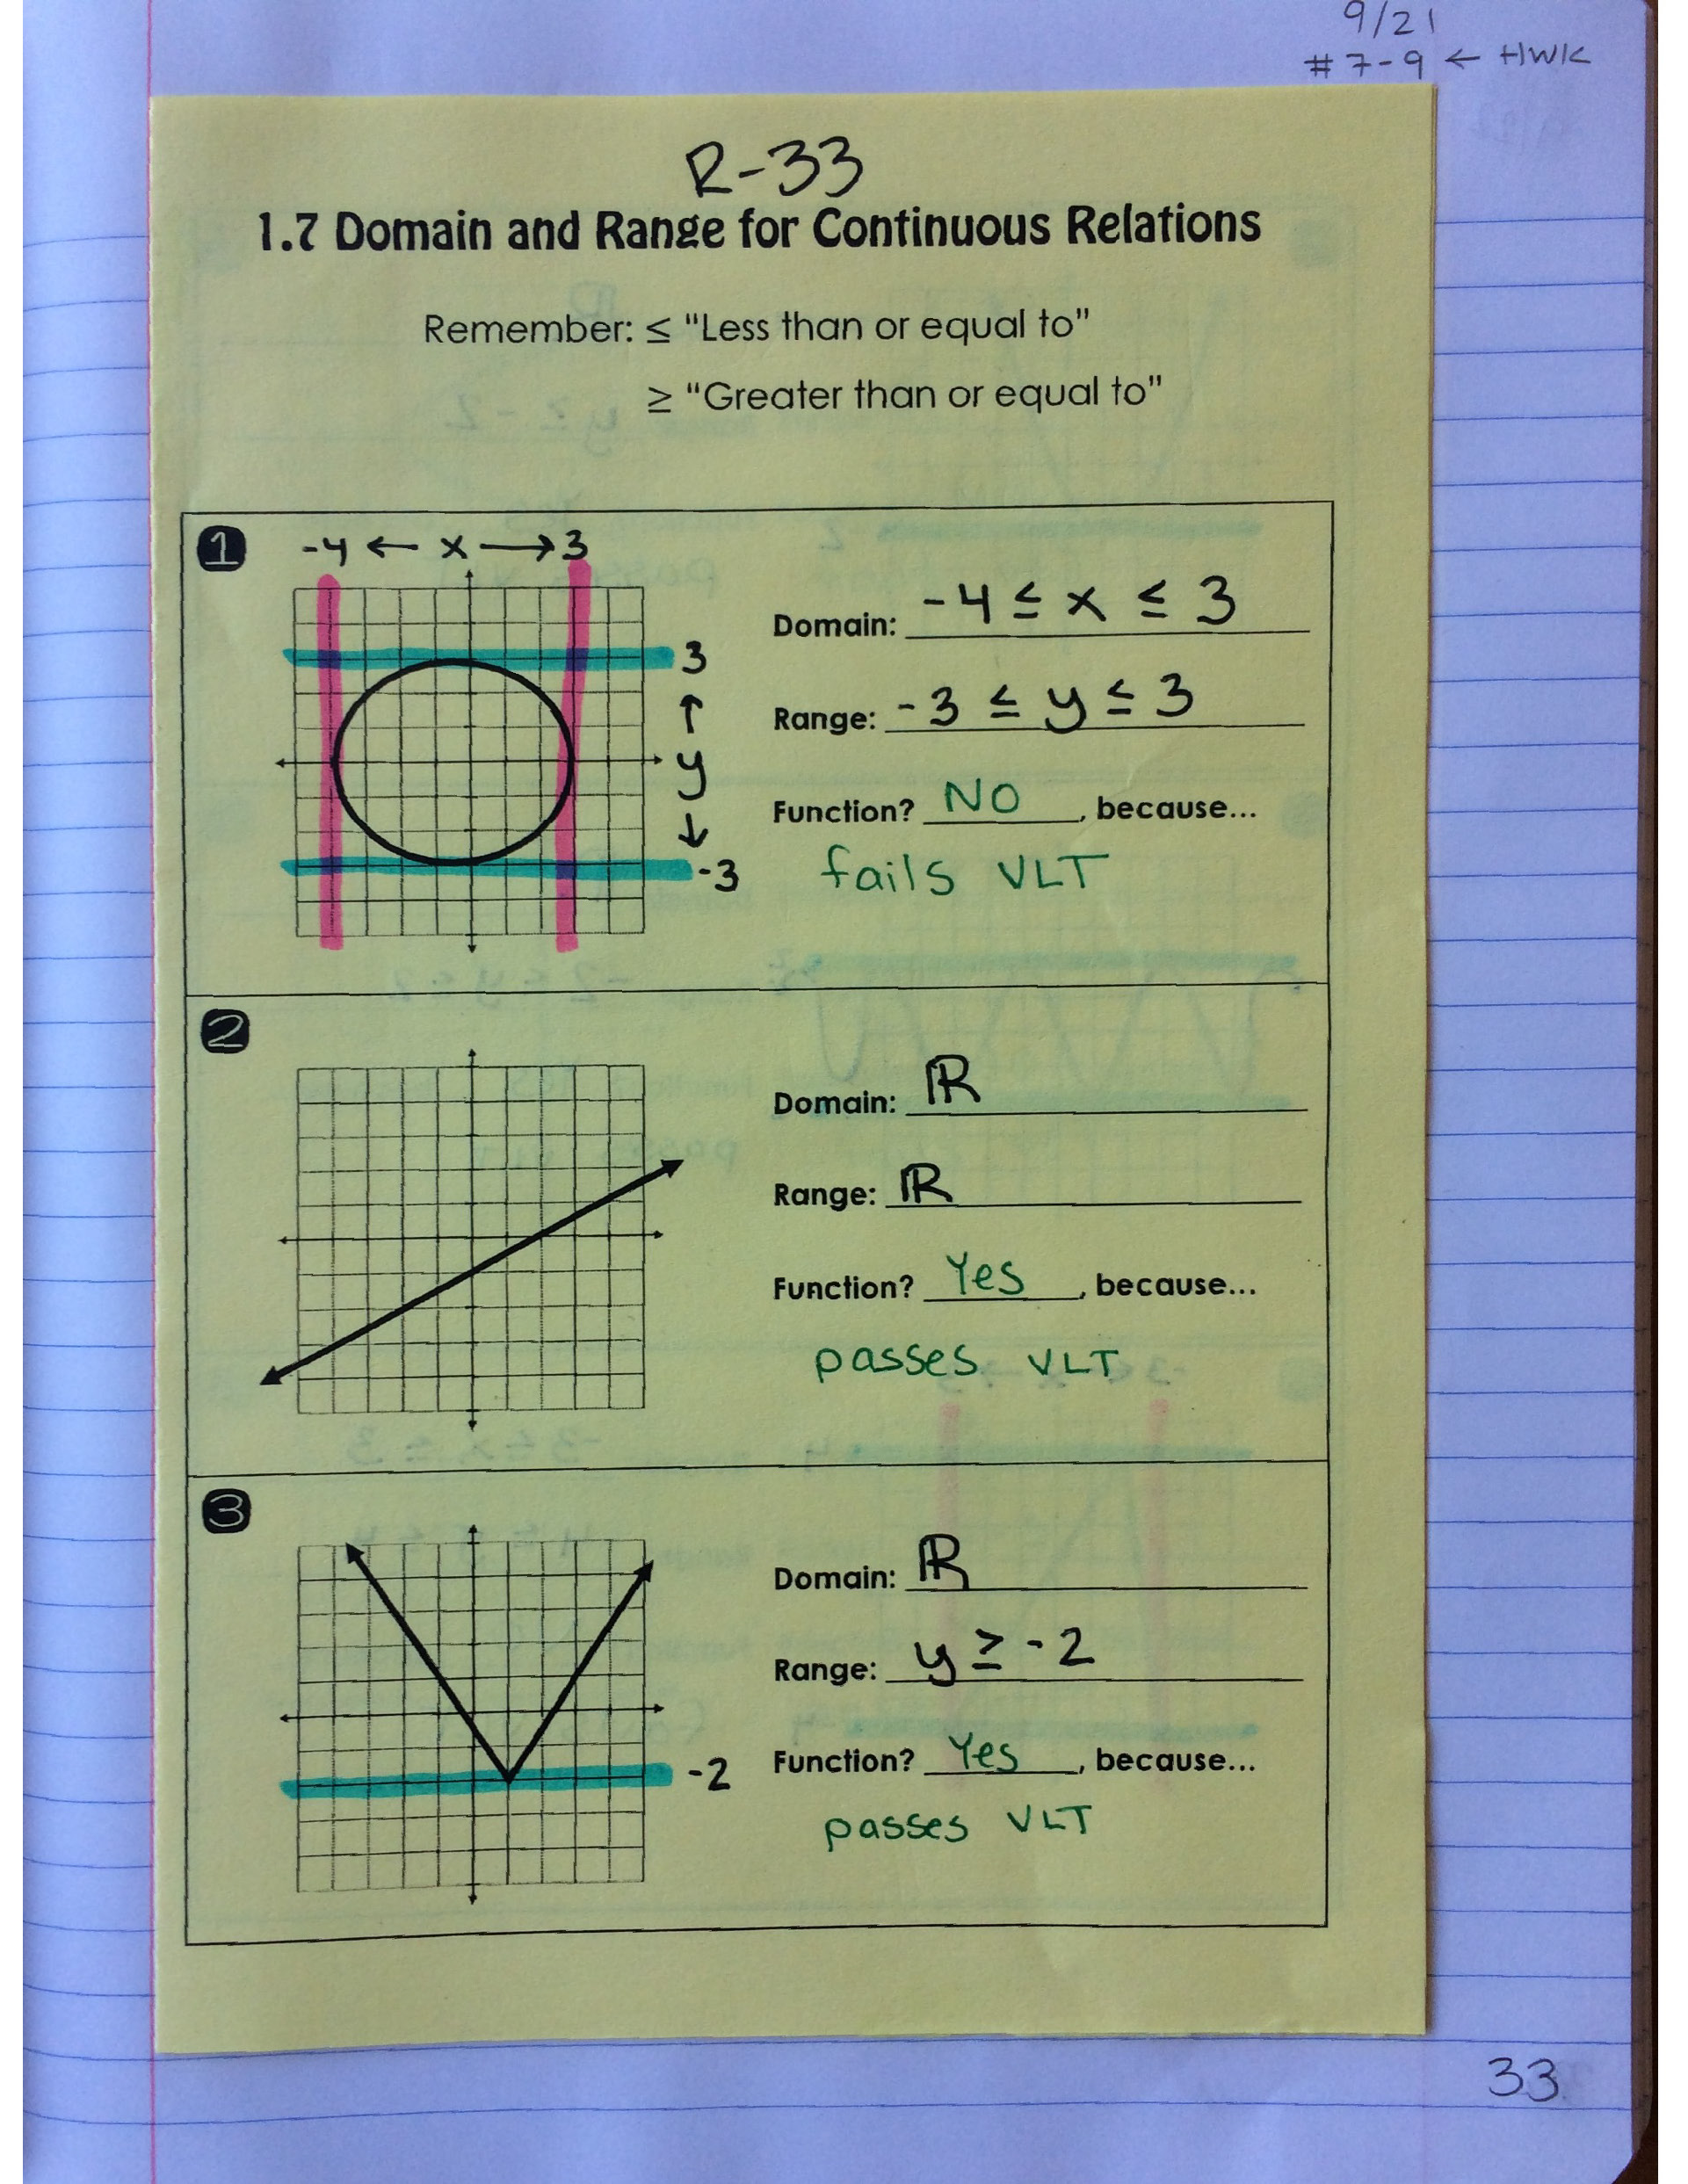
Day 3:
We began with a recap warm-up on domain and range for continuous relations. 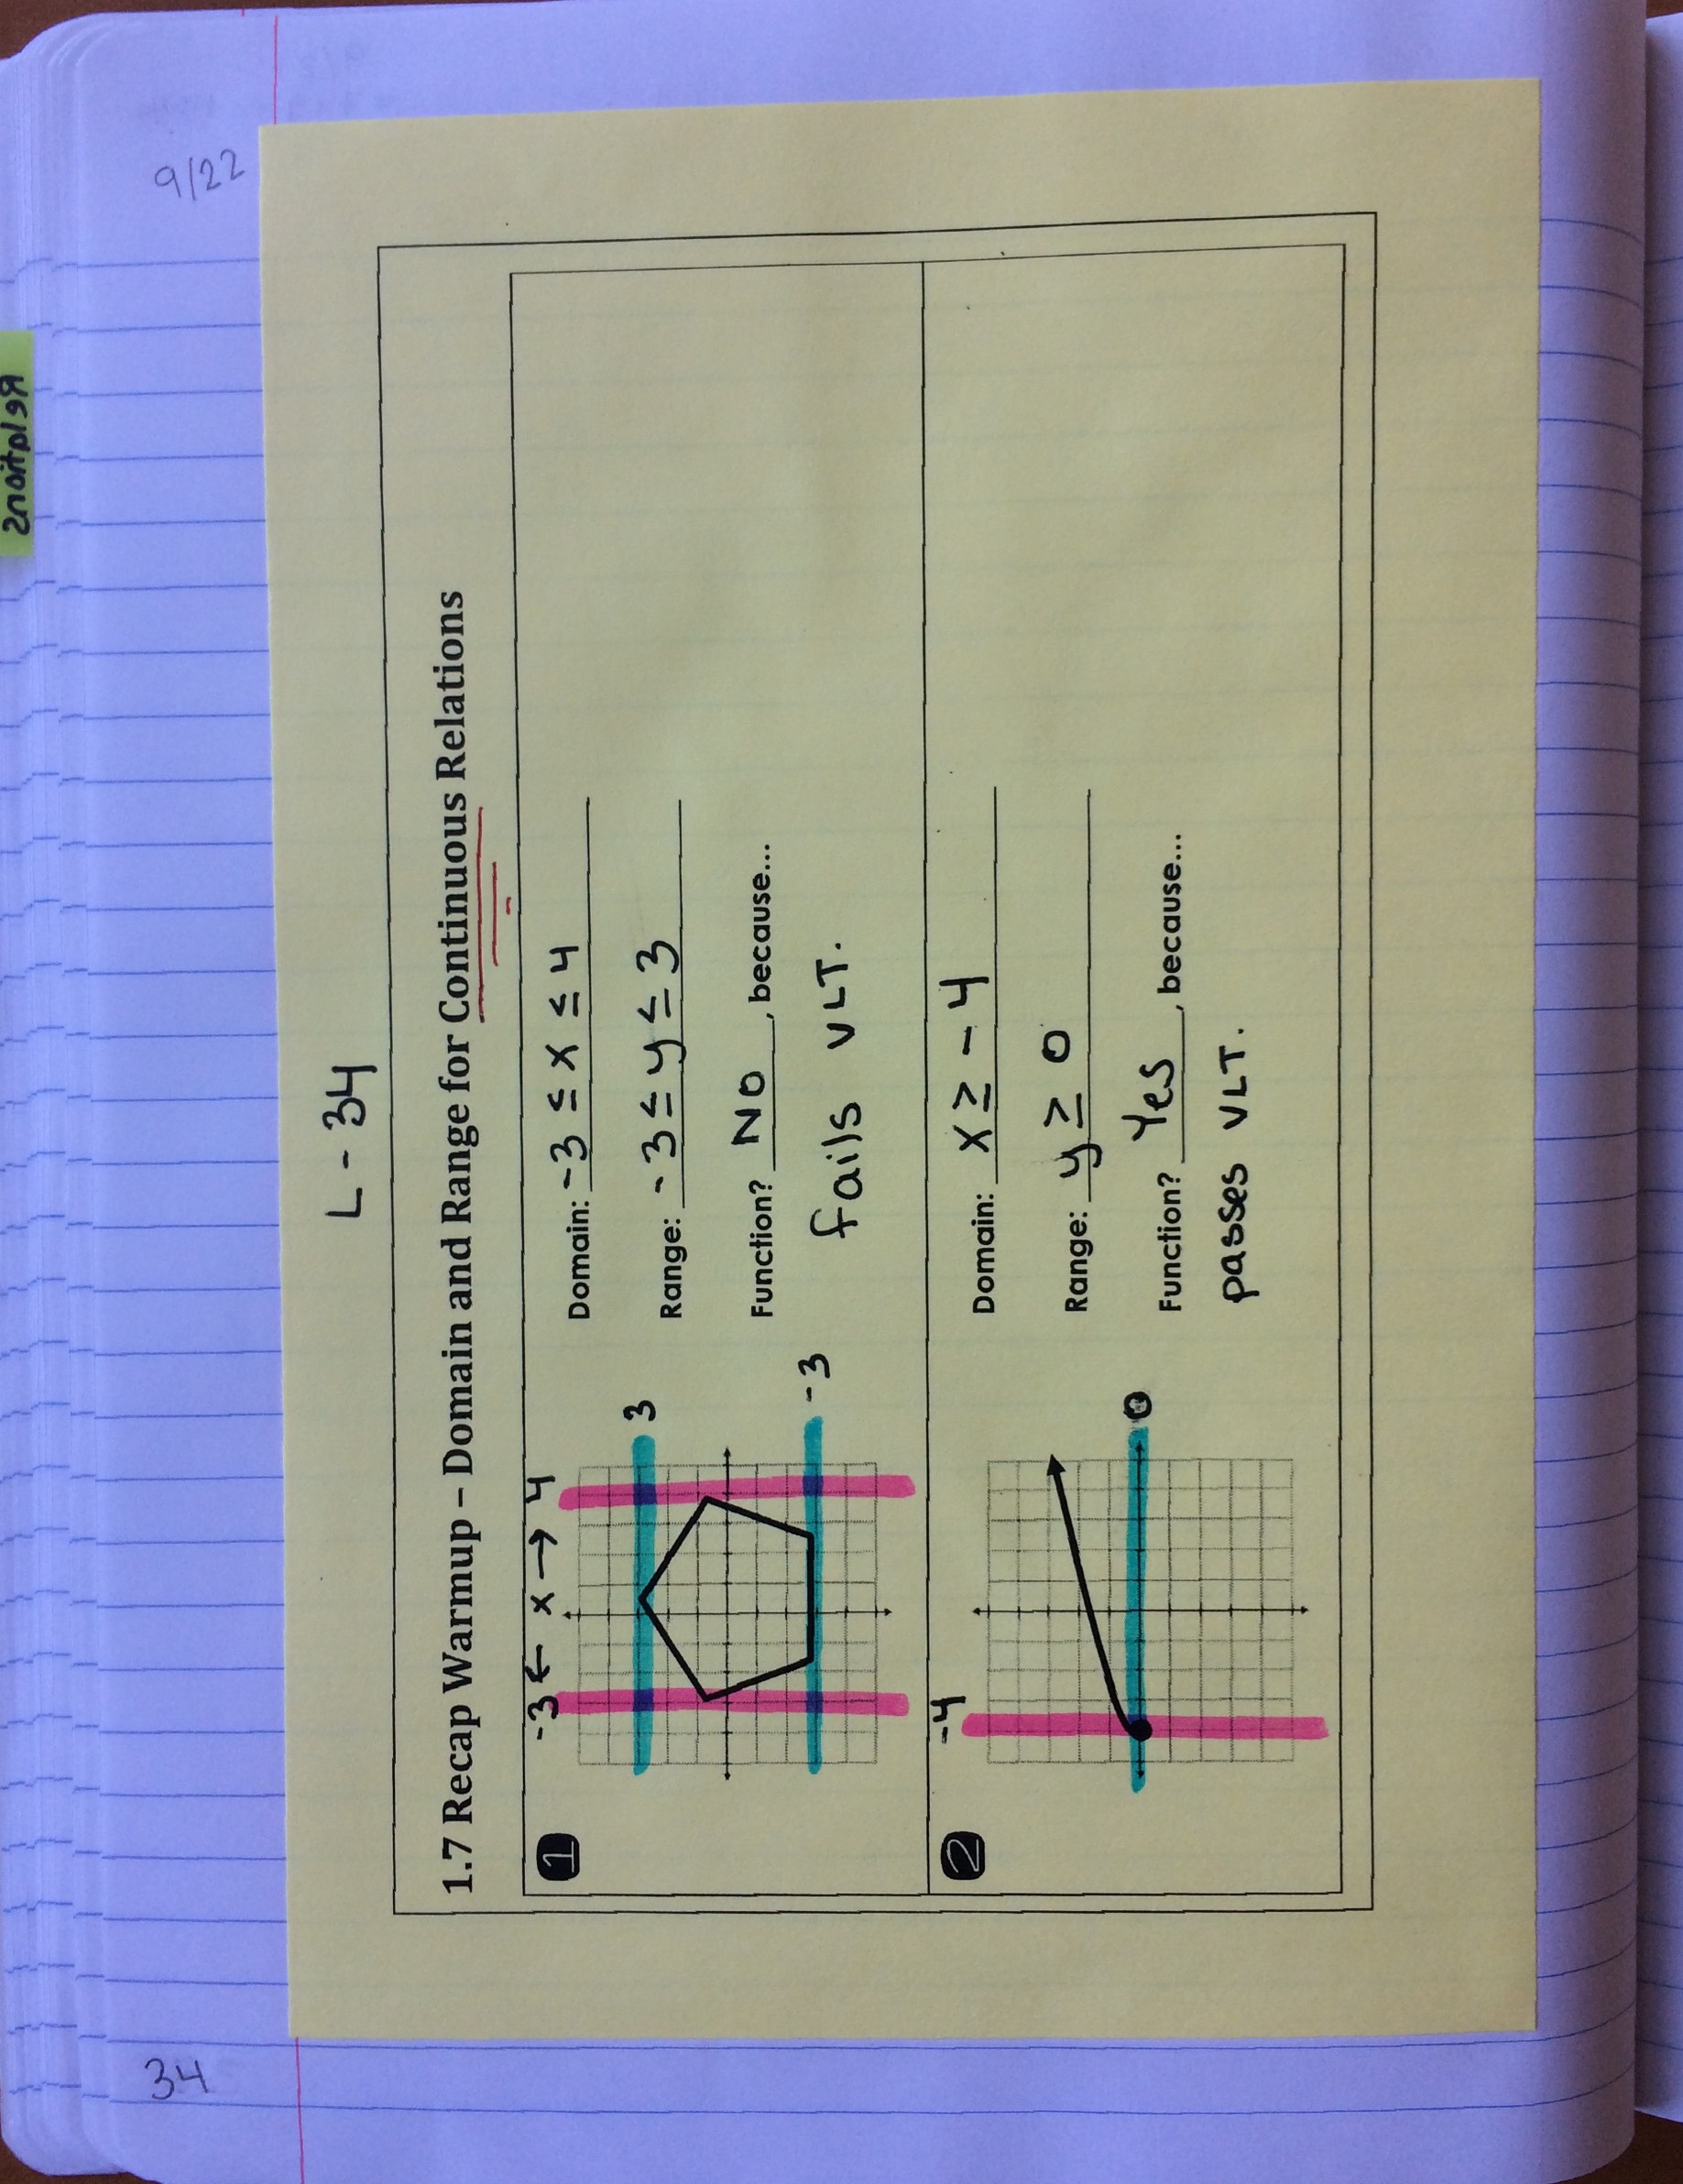
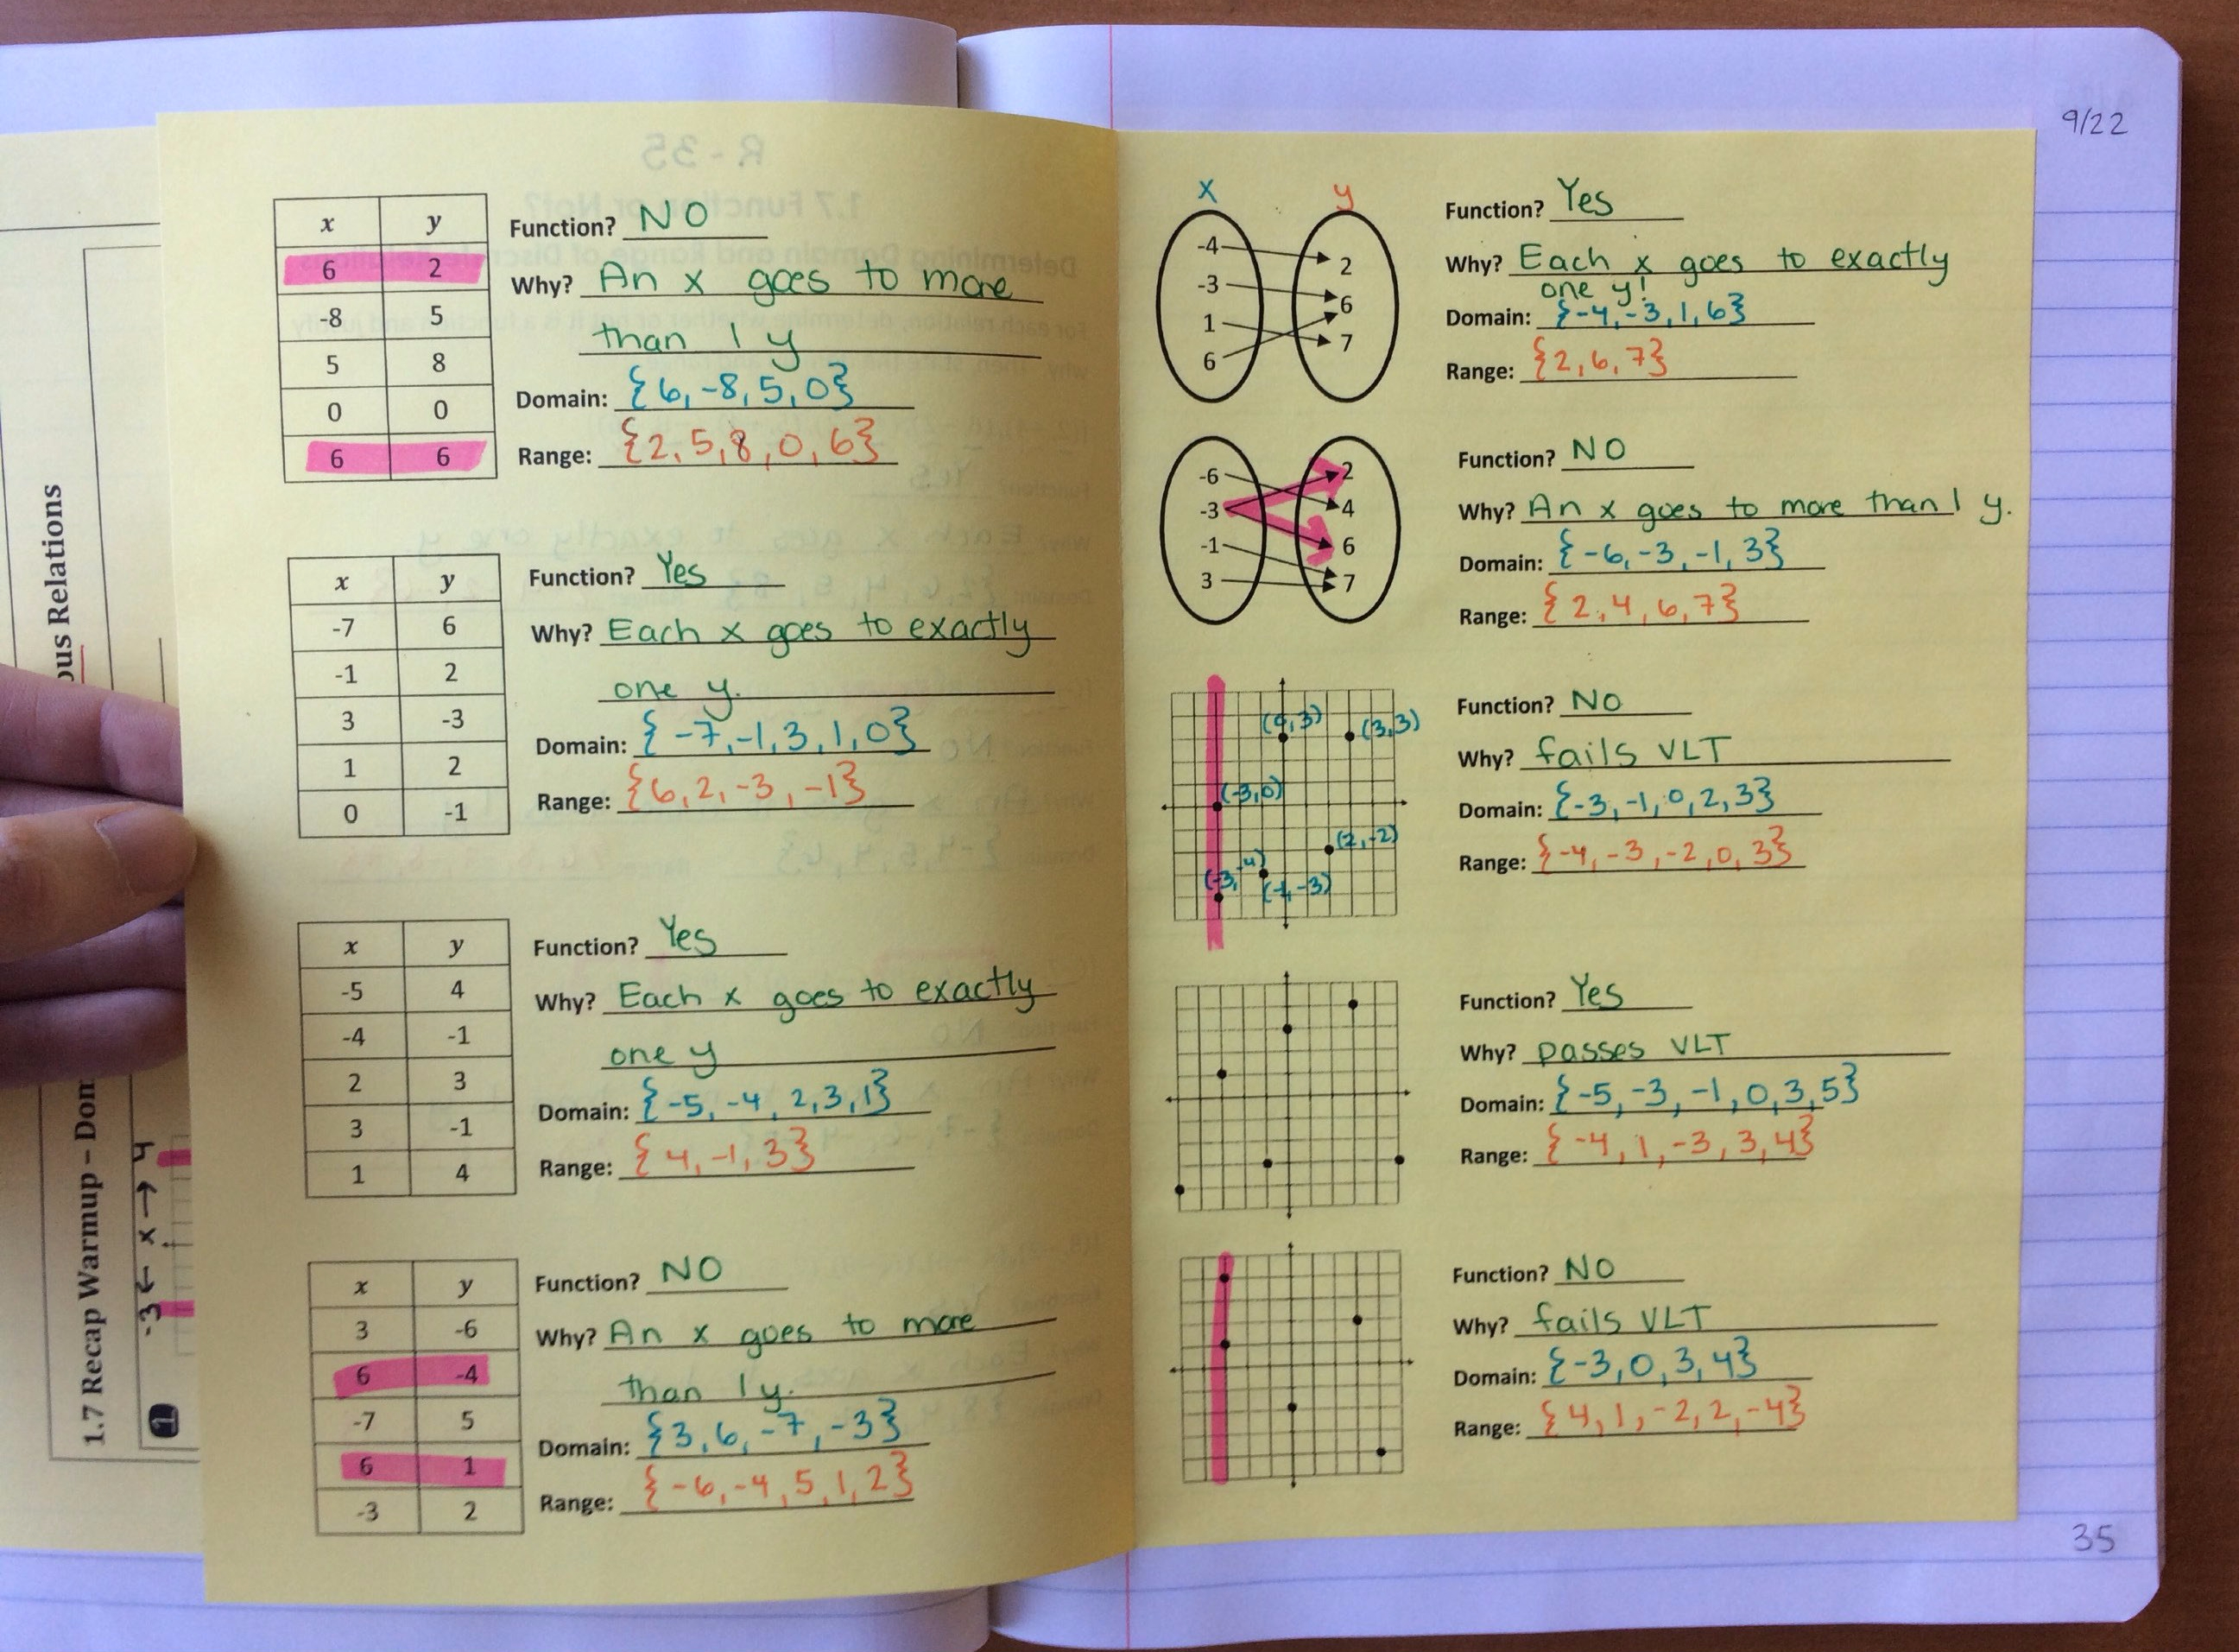
To make sure that students didn’t forget about discrete relations, we went back and did more practice with determining their domain and range, and also stating whether or not the relations were functions. 
Day 4:
We started off with a reference sheet on function notation and how to read/say it. 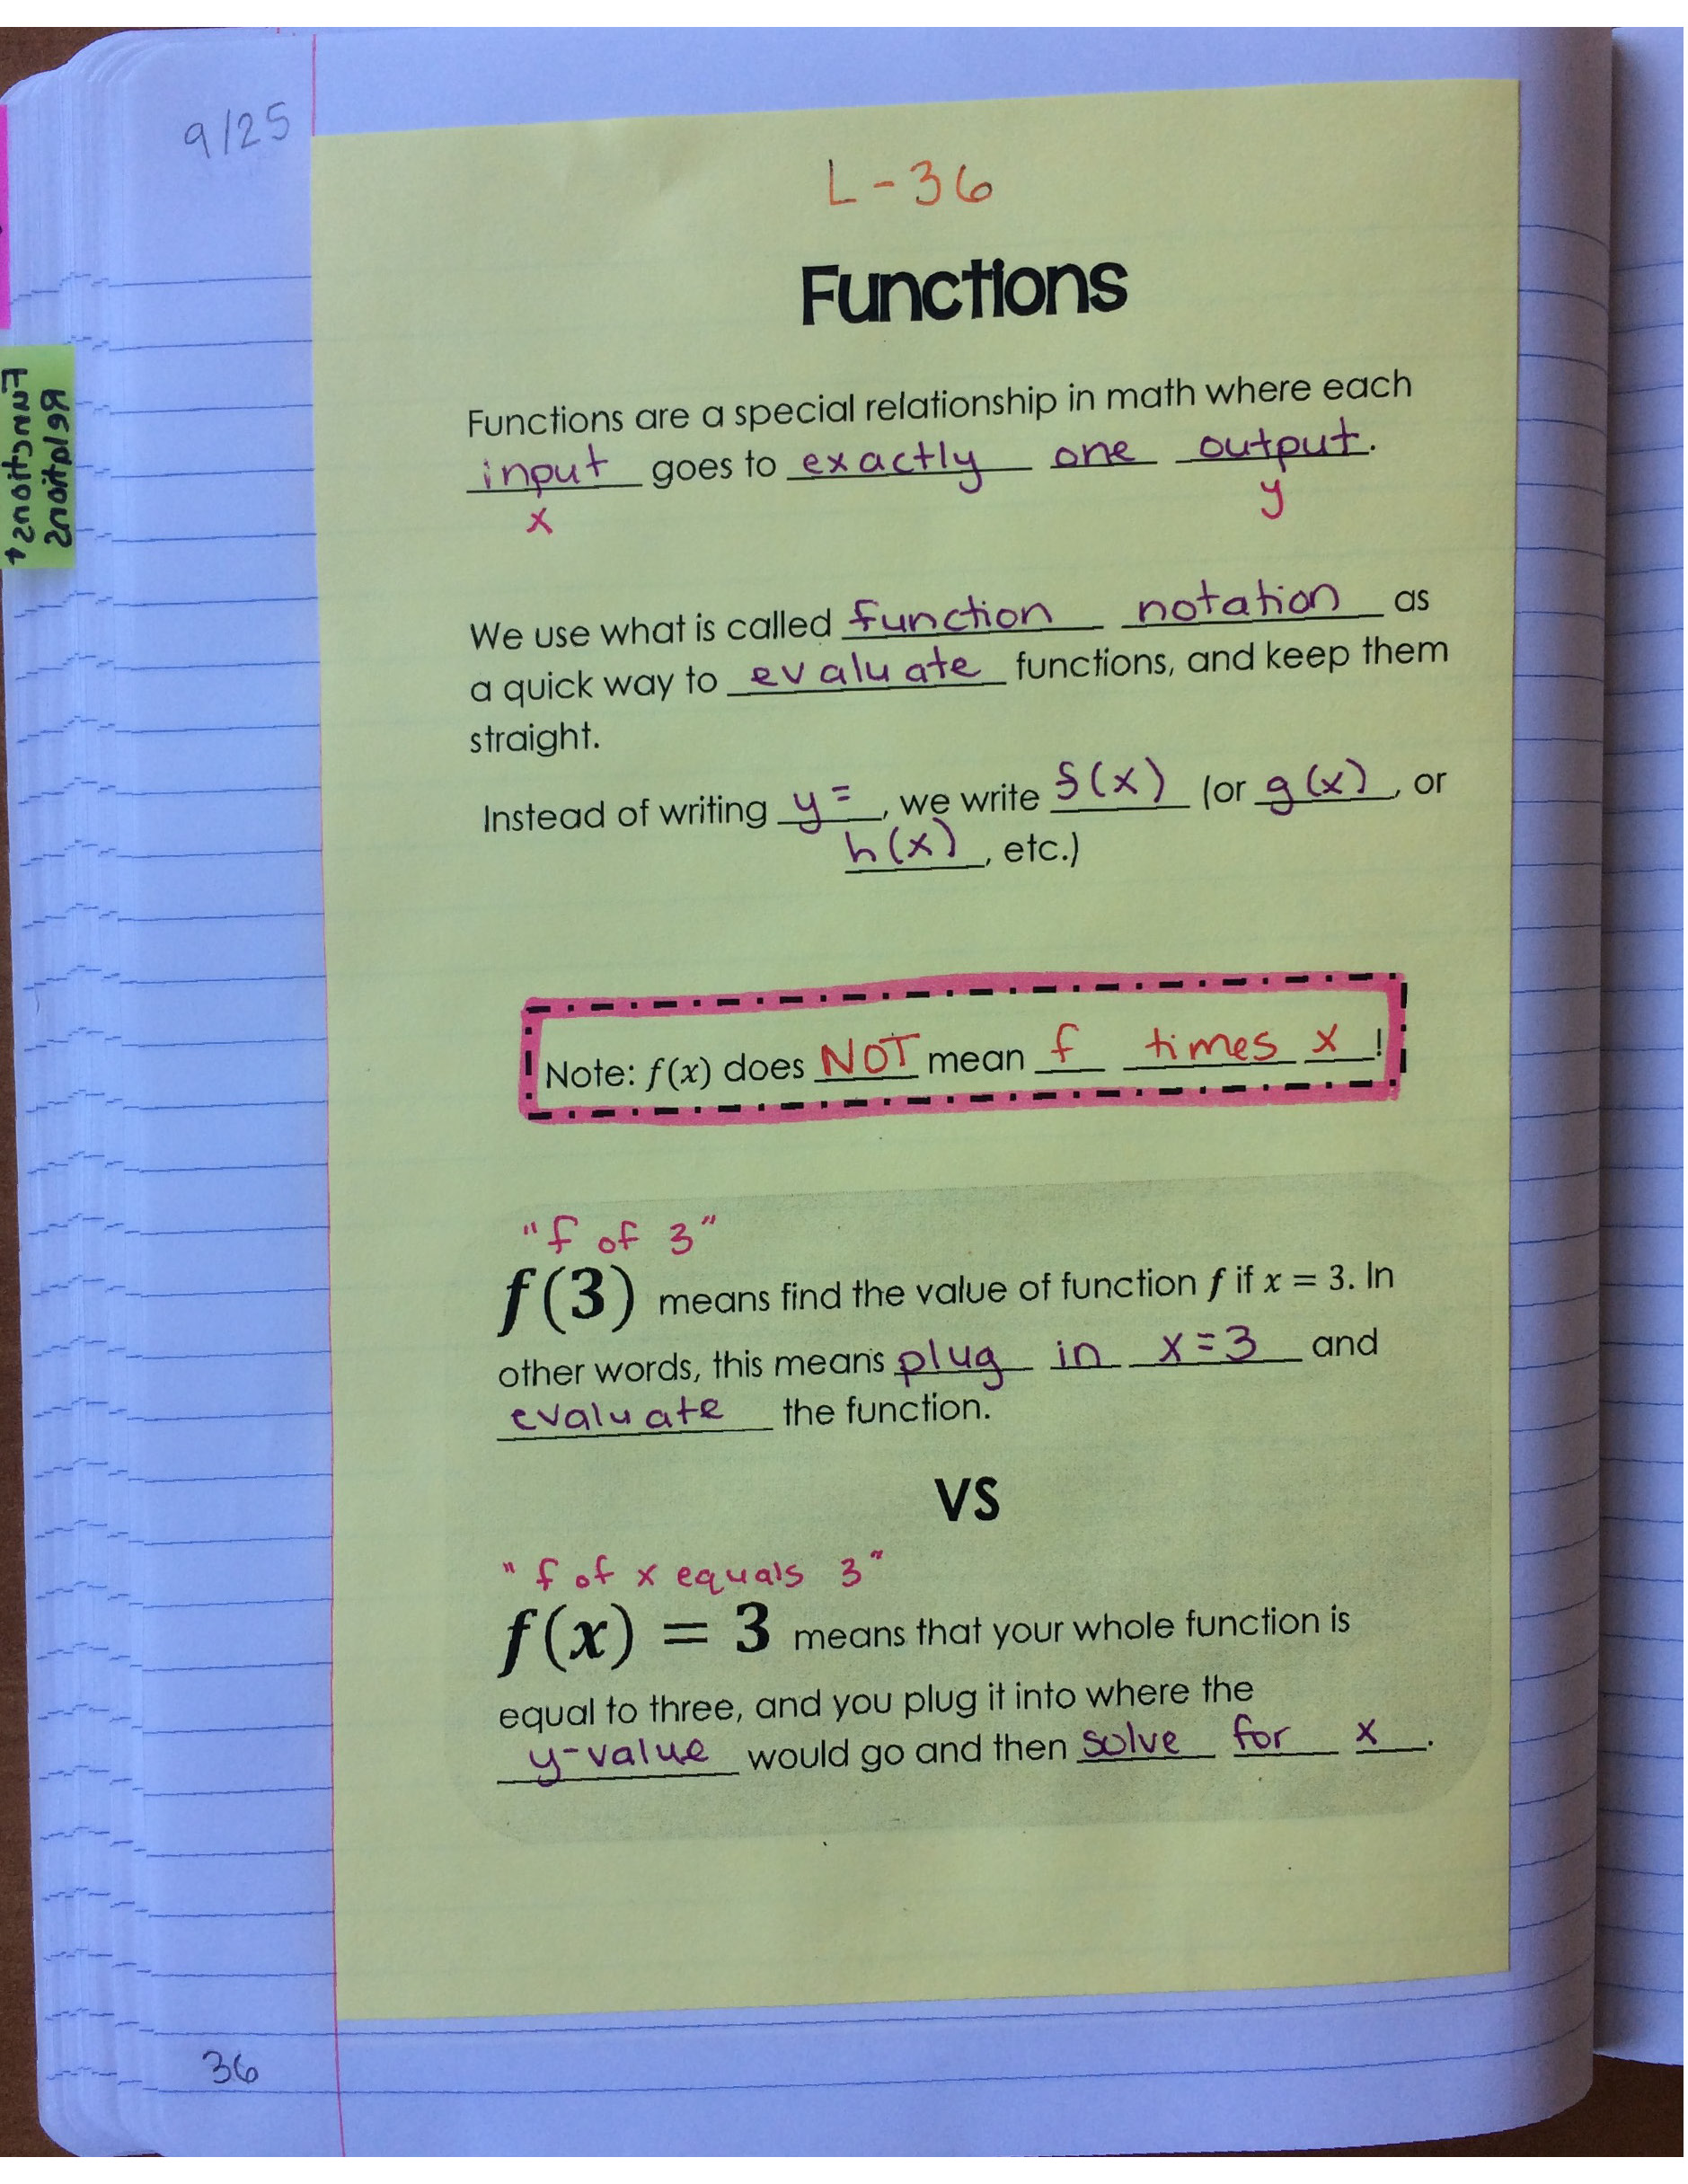
From there, we did a lot of practice with function notation. 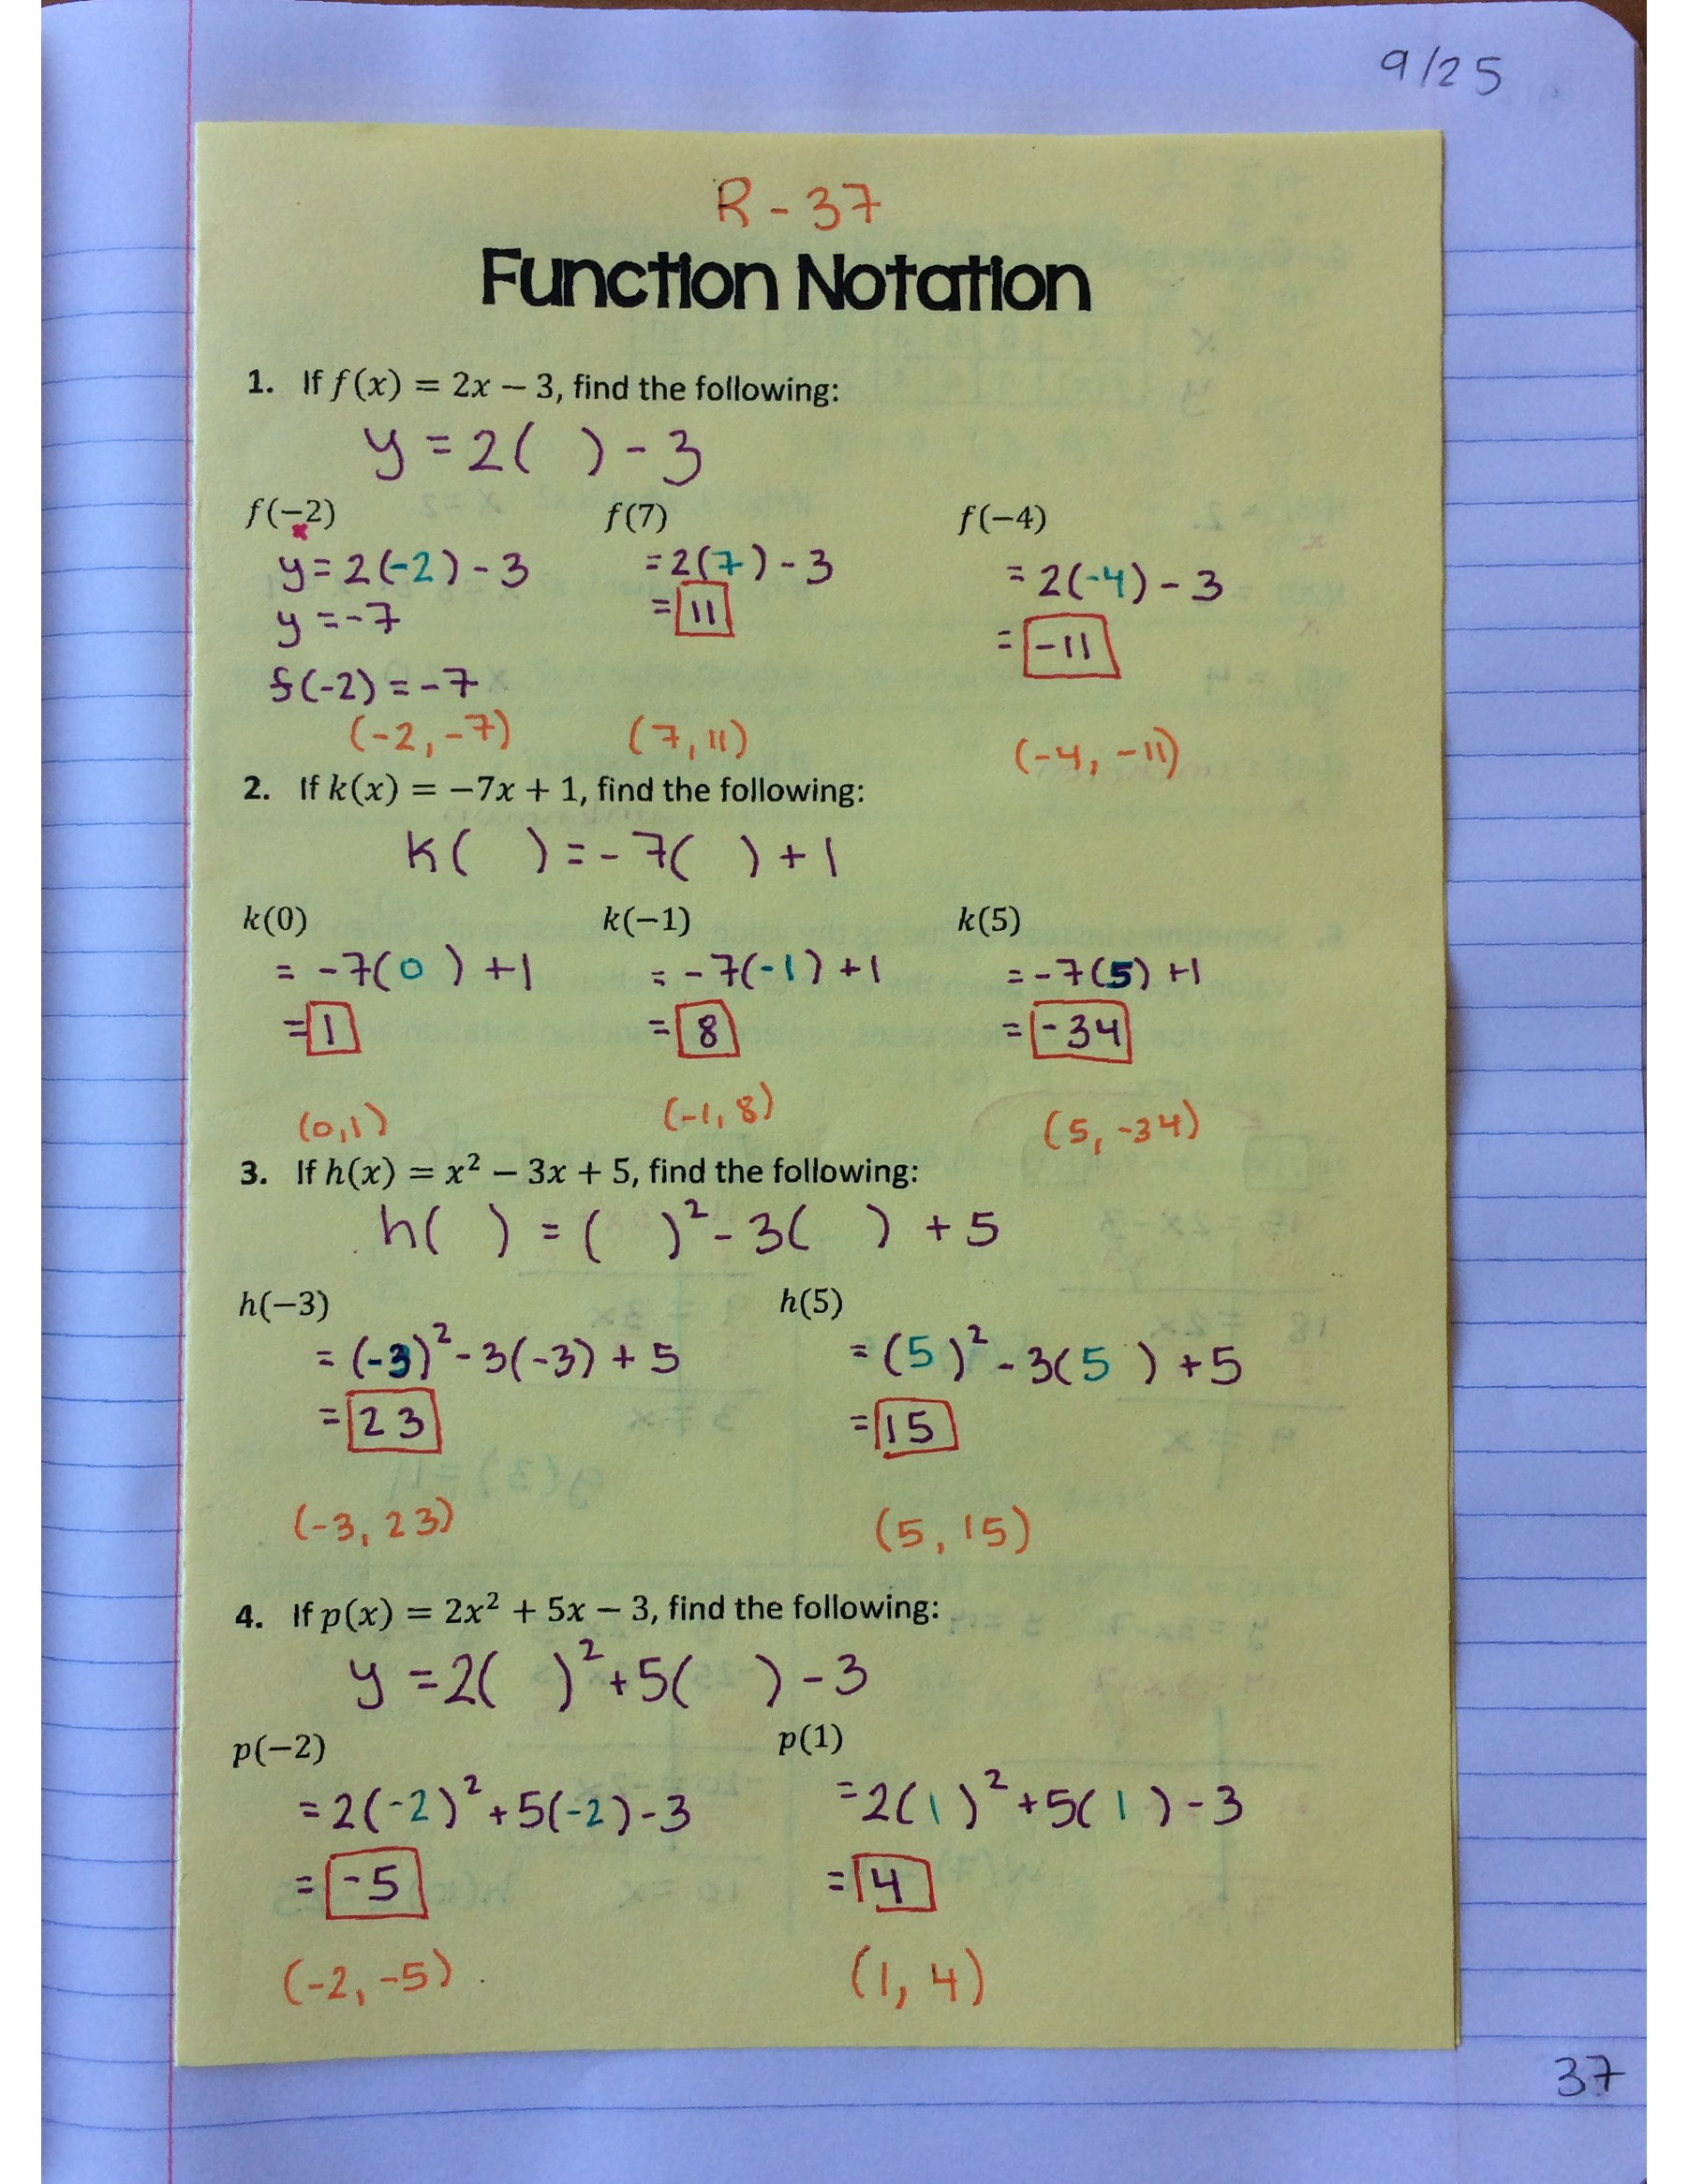
Inside this set of notes, we really emphasized interpreting what we were being given in a problem (input or output value) and what the problem was actually asking us to find (input or output value), before starting the problem. This helped students from making a lot of careless mistakes. After we practiced function notation in both directions (evaluating a function, and solving for an input given the function’s output), we mixed up the problems and even threw a few variables and function compositions in there!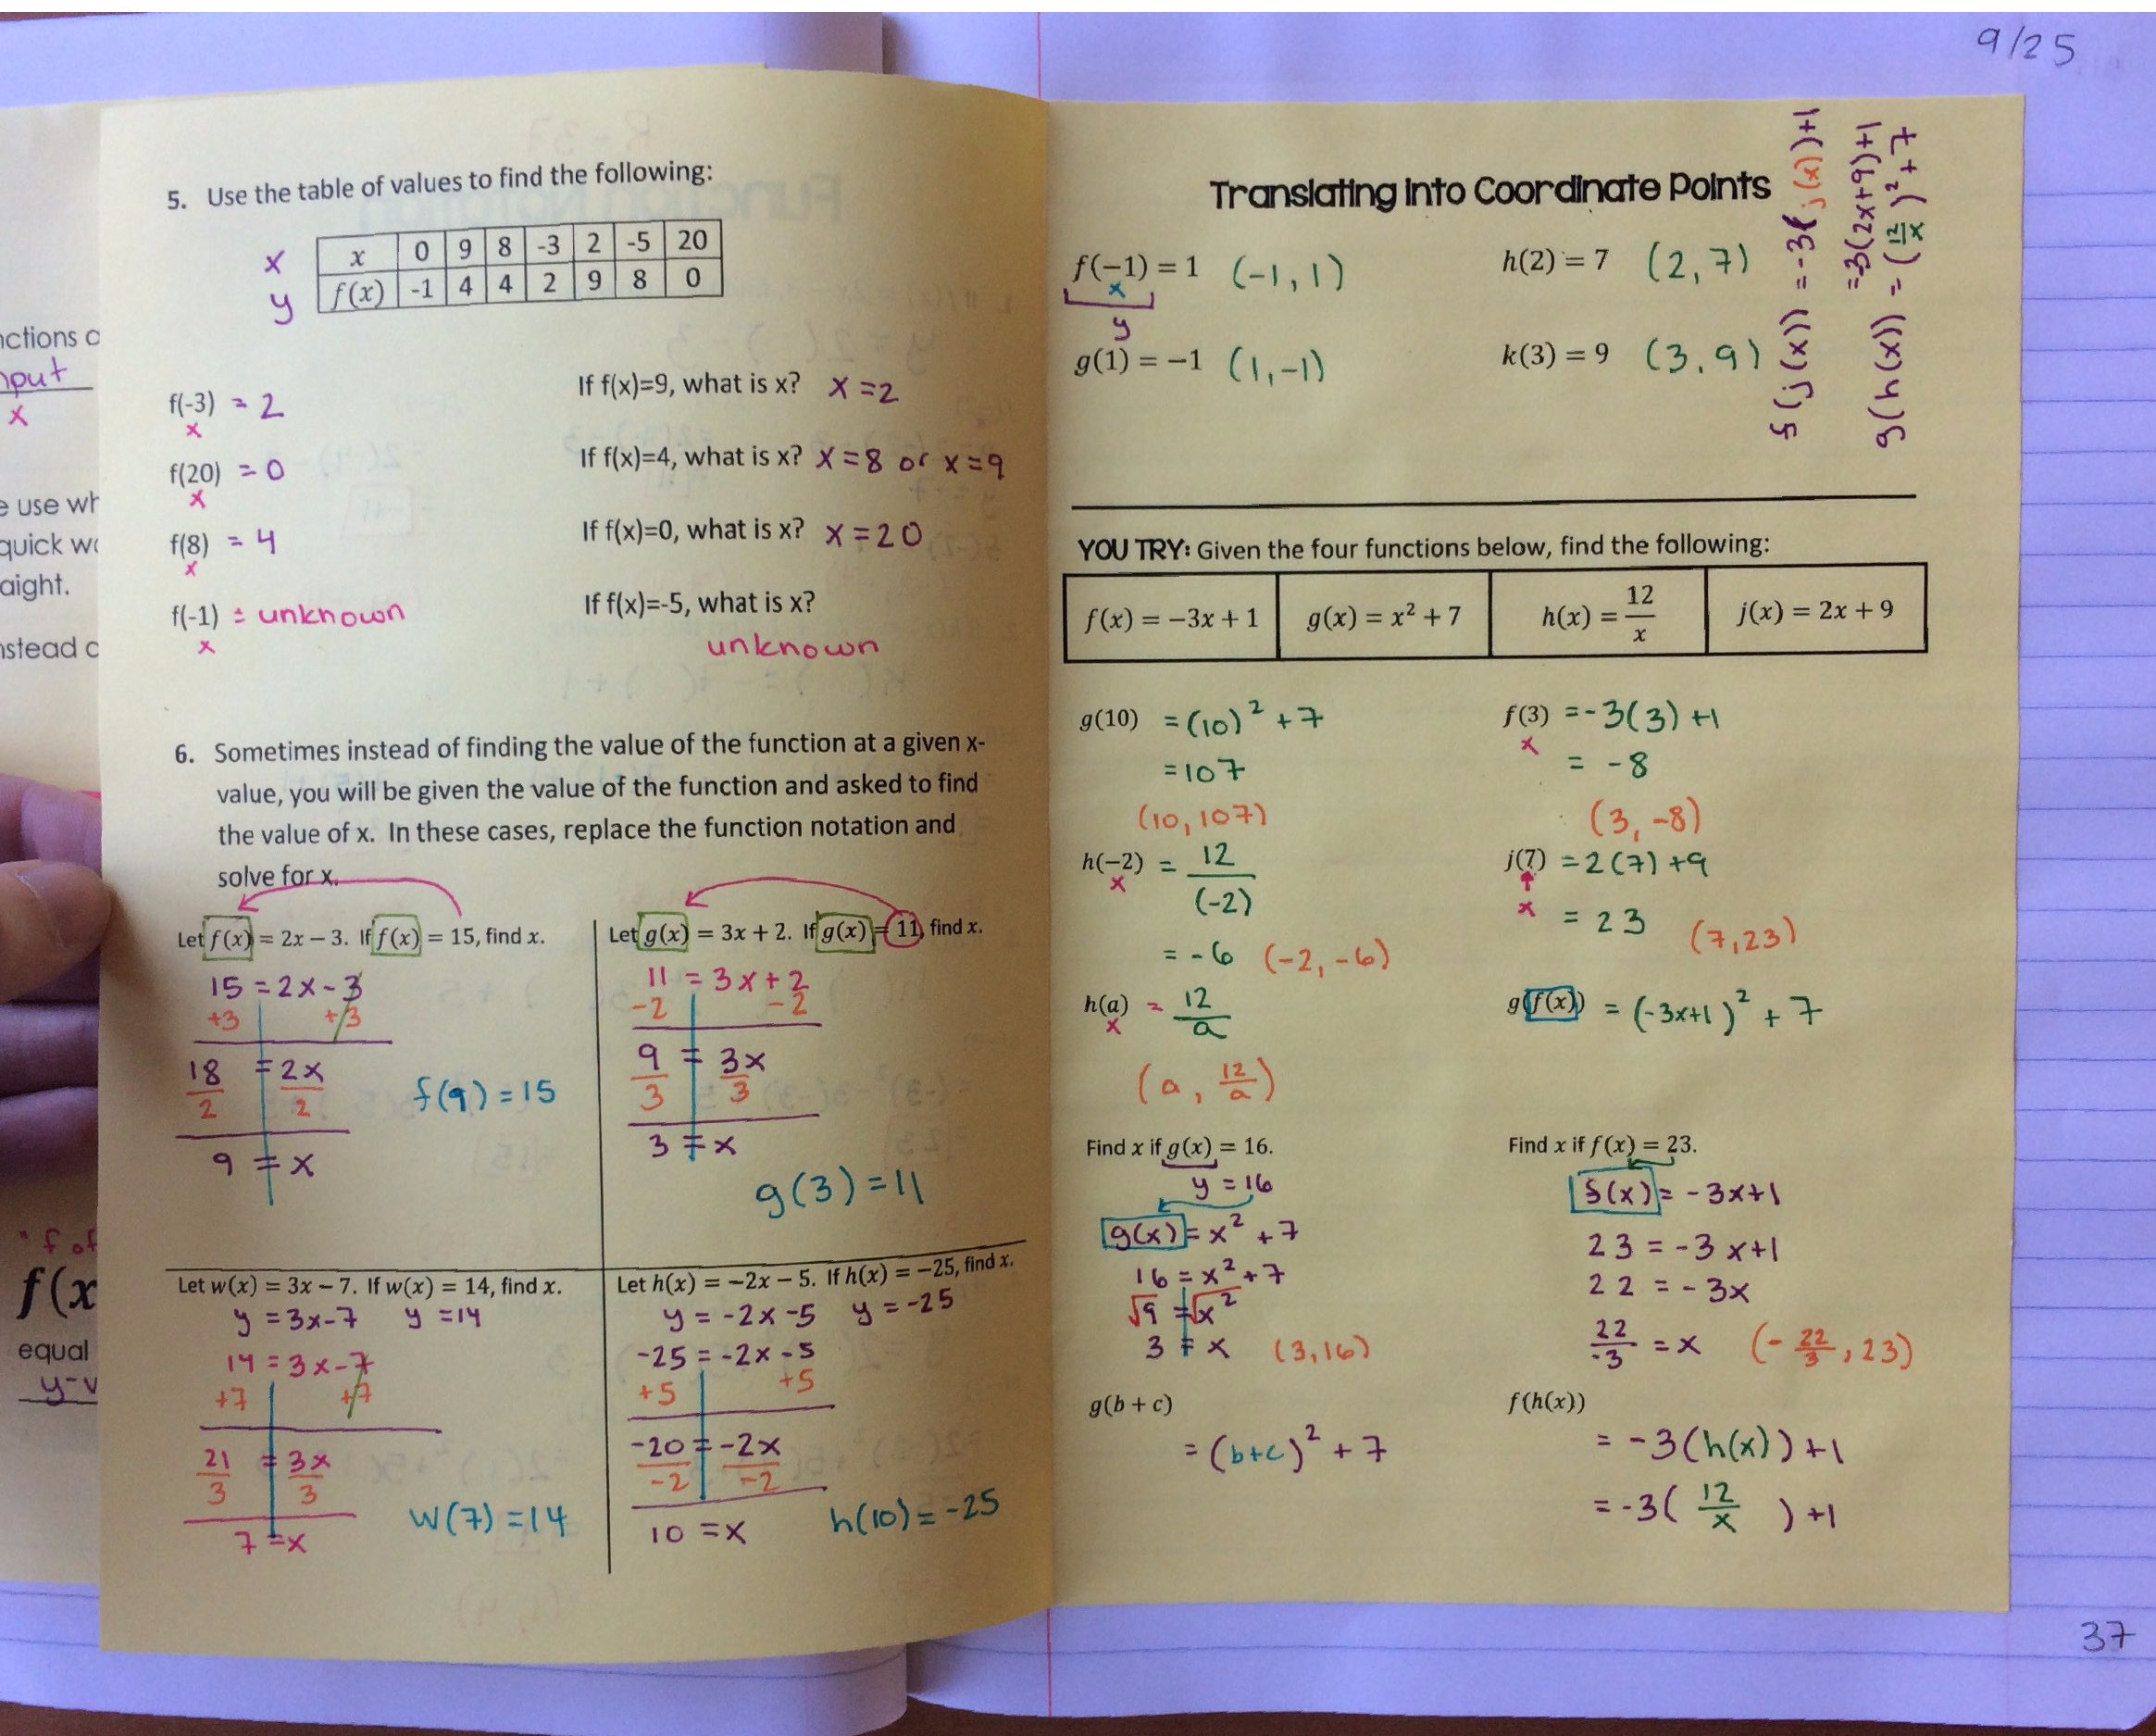
Day 5:
Recap warm-up on function notation. Problems 5 and 6 both spurred amazing conversations about order of operations. 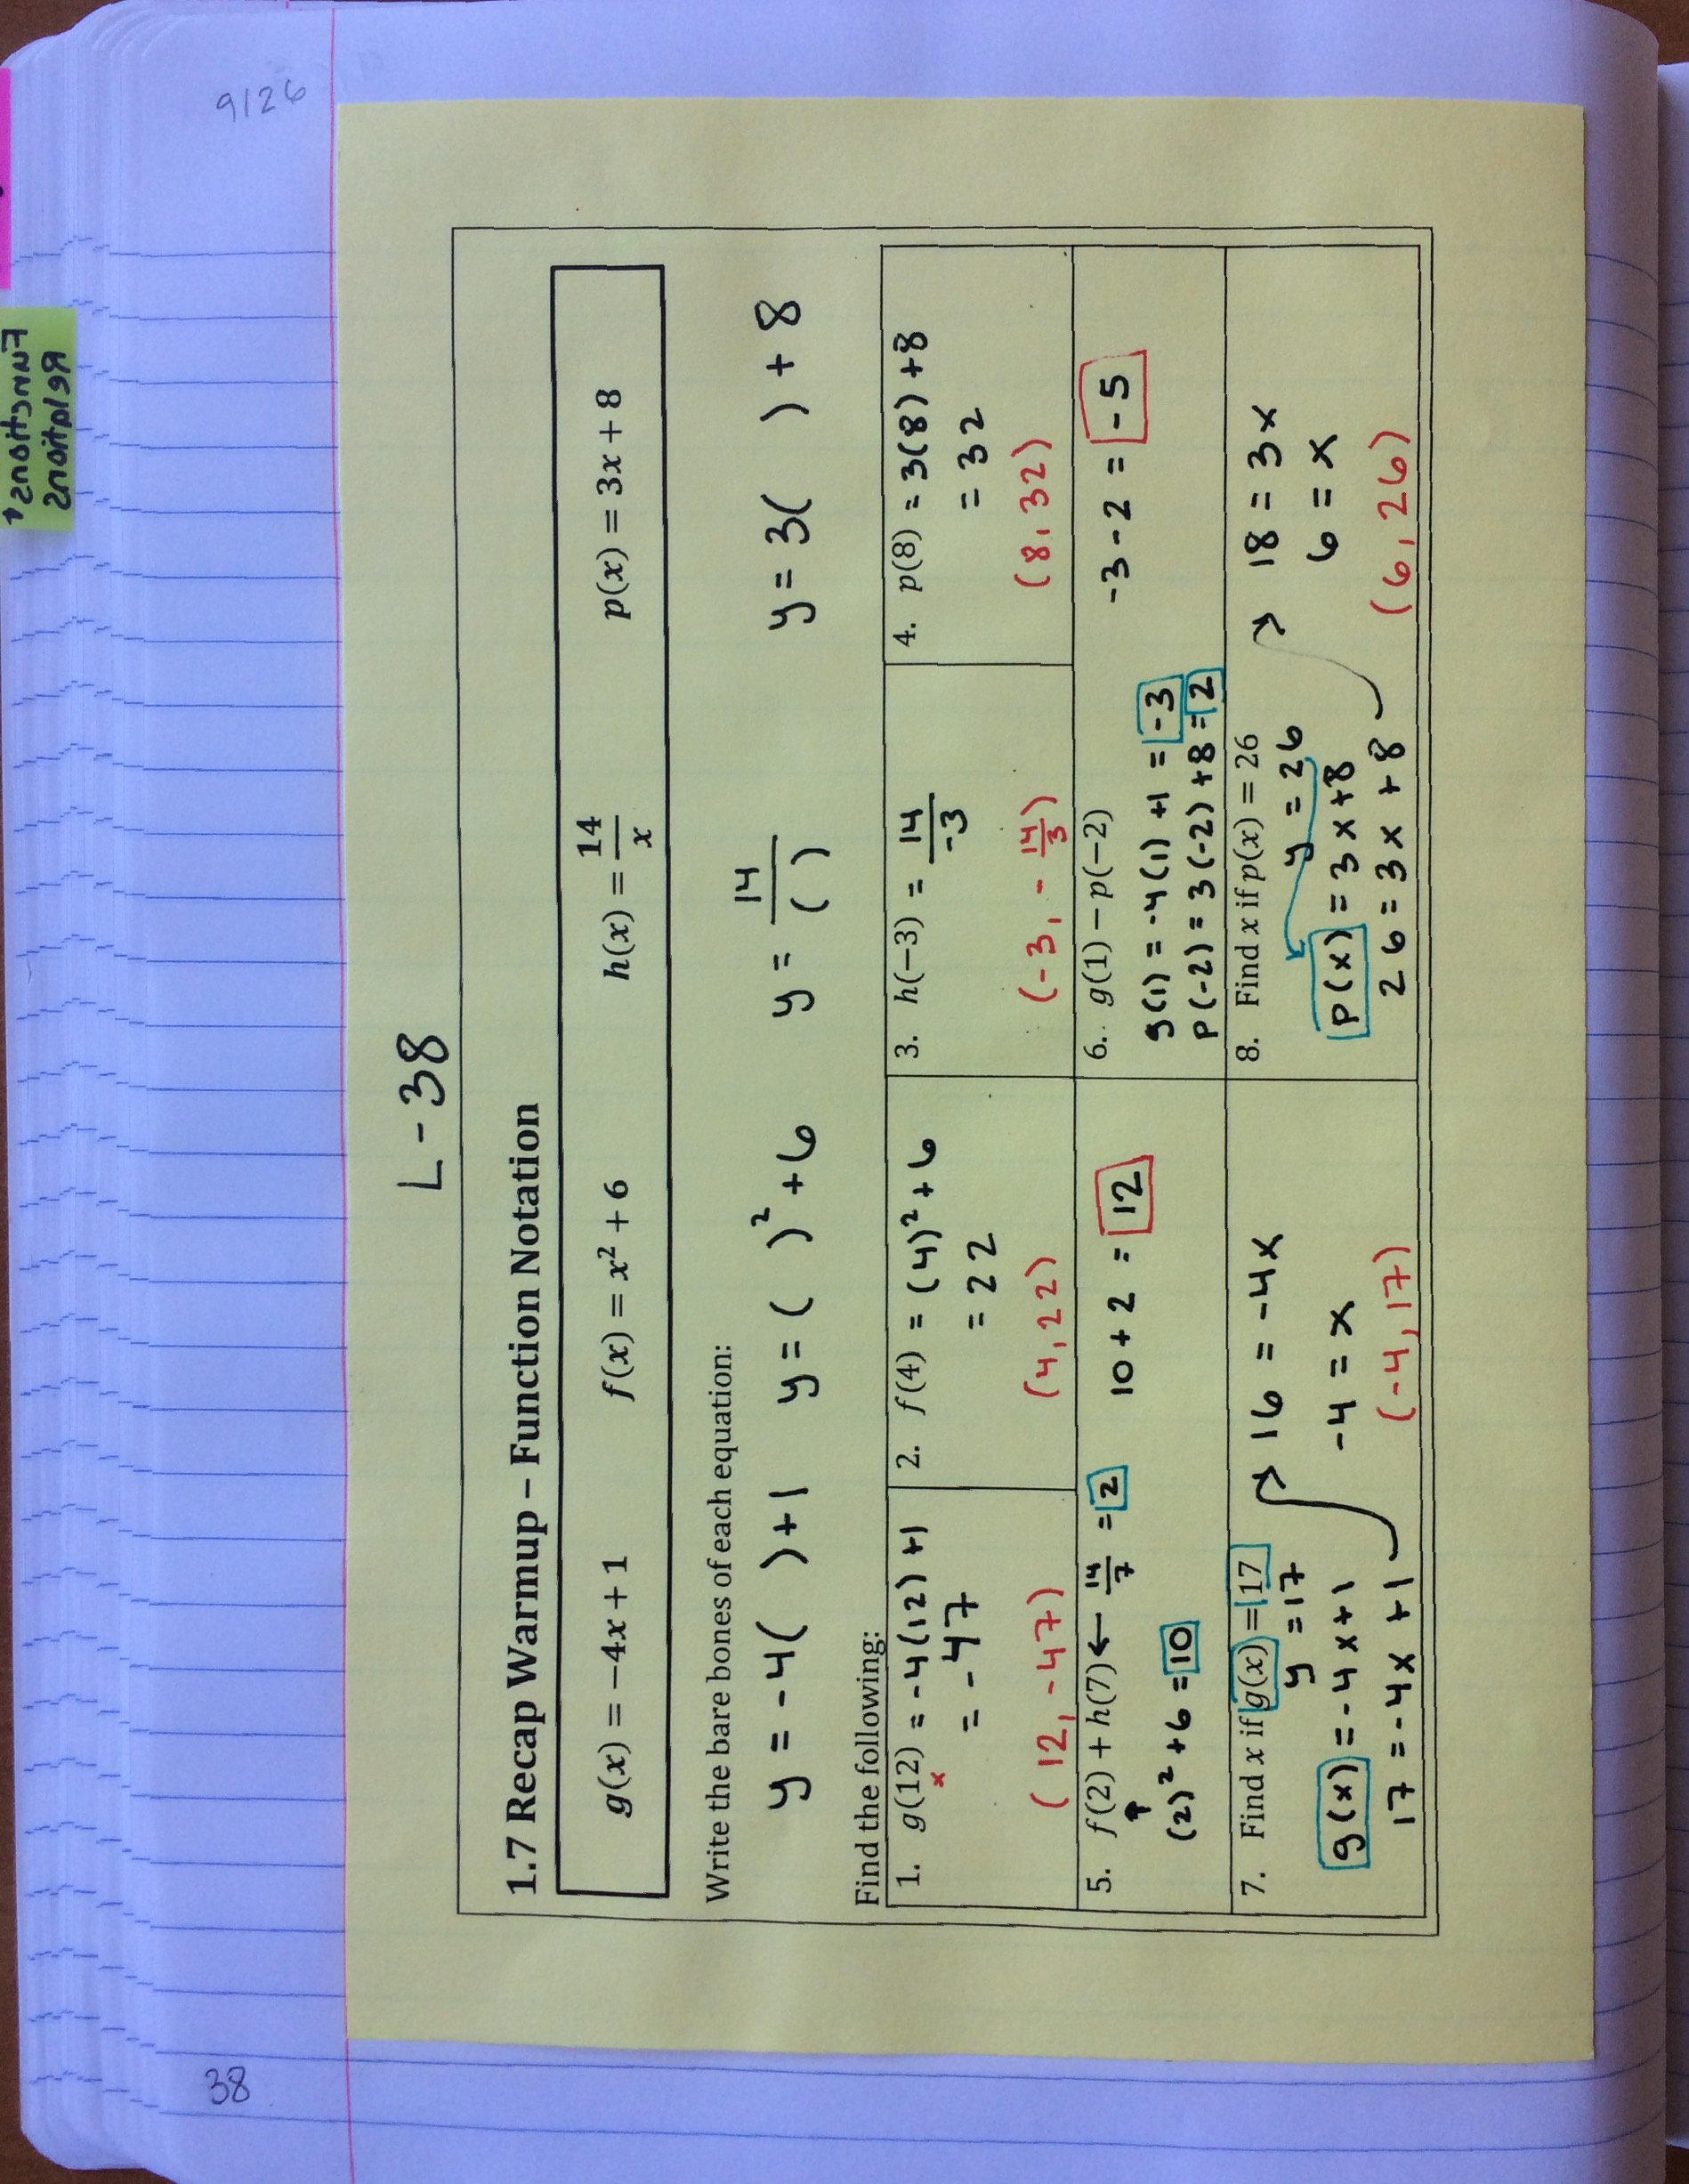
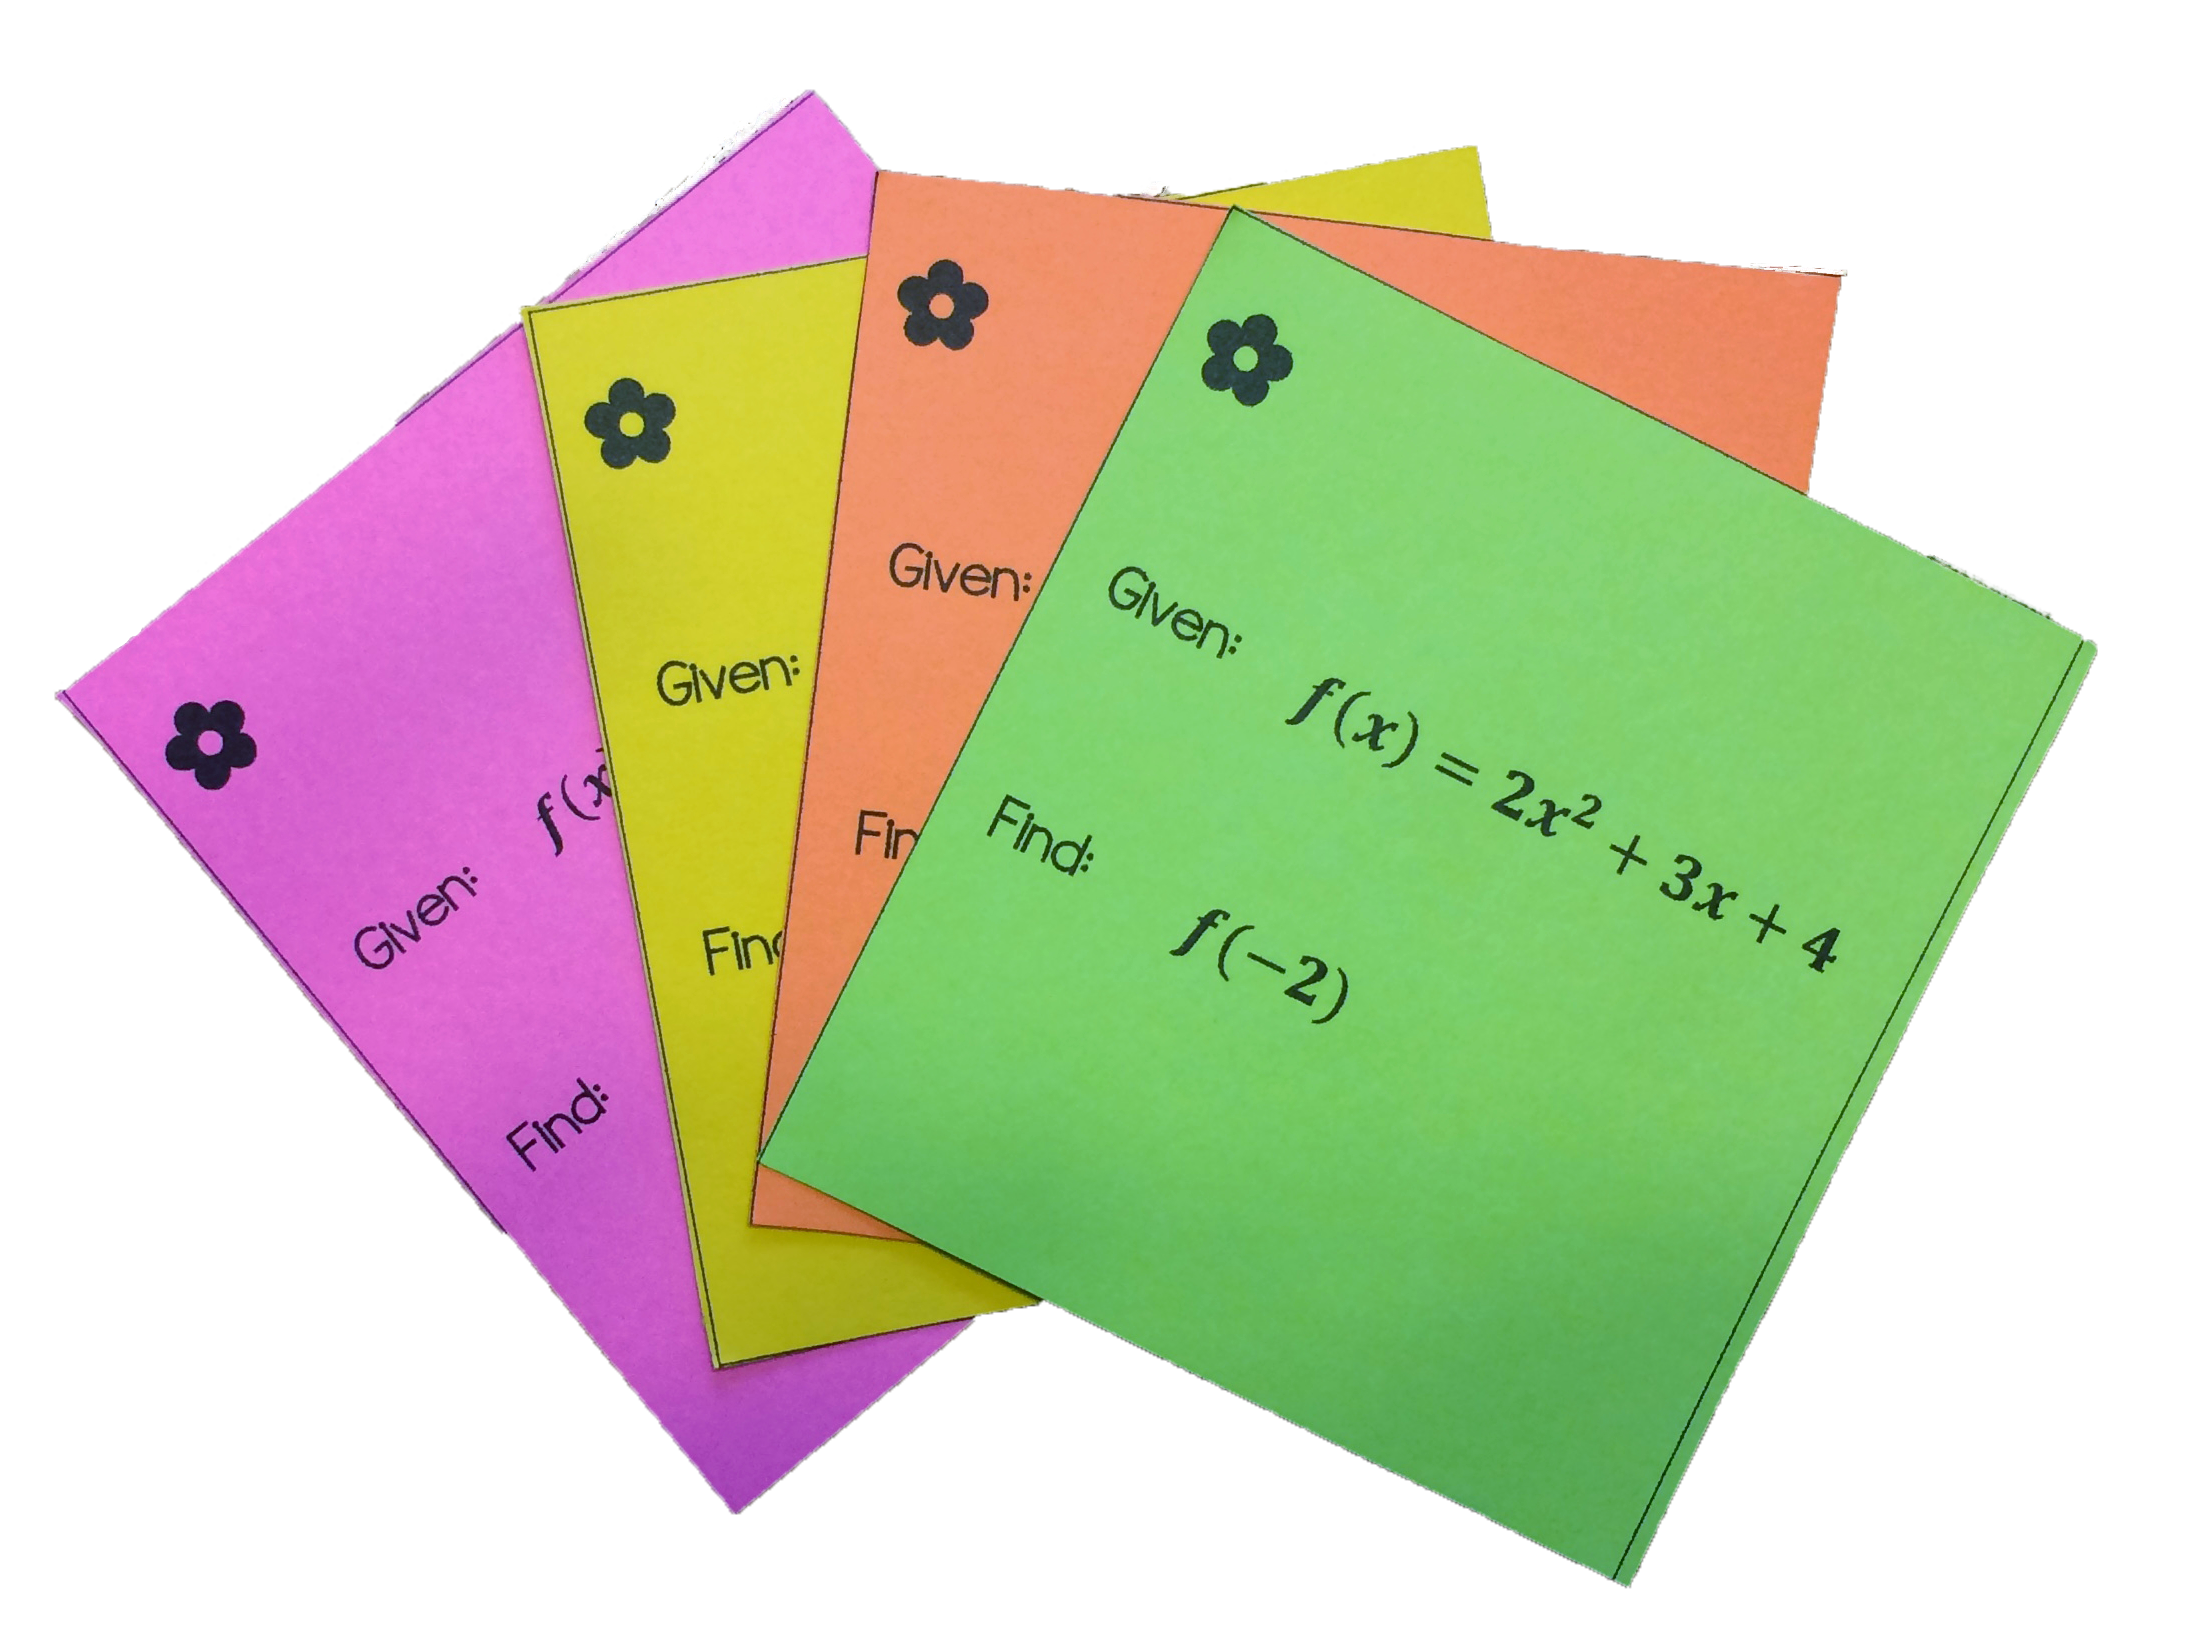
After doing this recap warm-up, we did my function notation mystery sum activity, which was a blast. It encourages students to collaborate together and it’s really high engagement each time.
From there, we continued talking about function notation, but now in terms of a graph. Interpreting what the function notation was telling us was such a huge part of the previous day’s lesson, that I wanted to see how they could do when we attached a context to the problem. 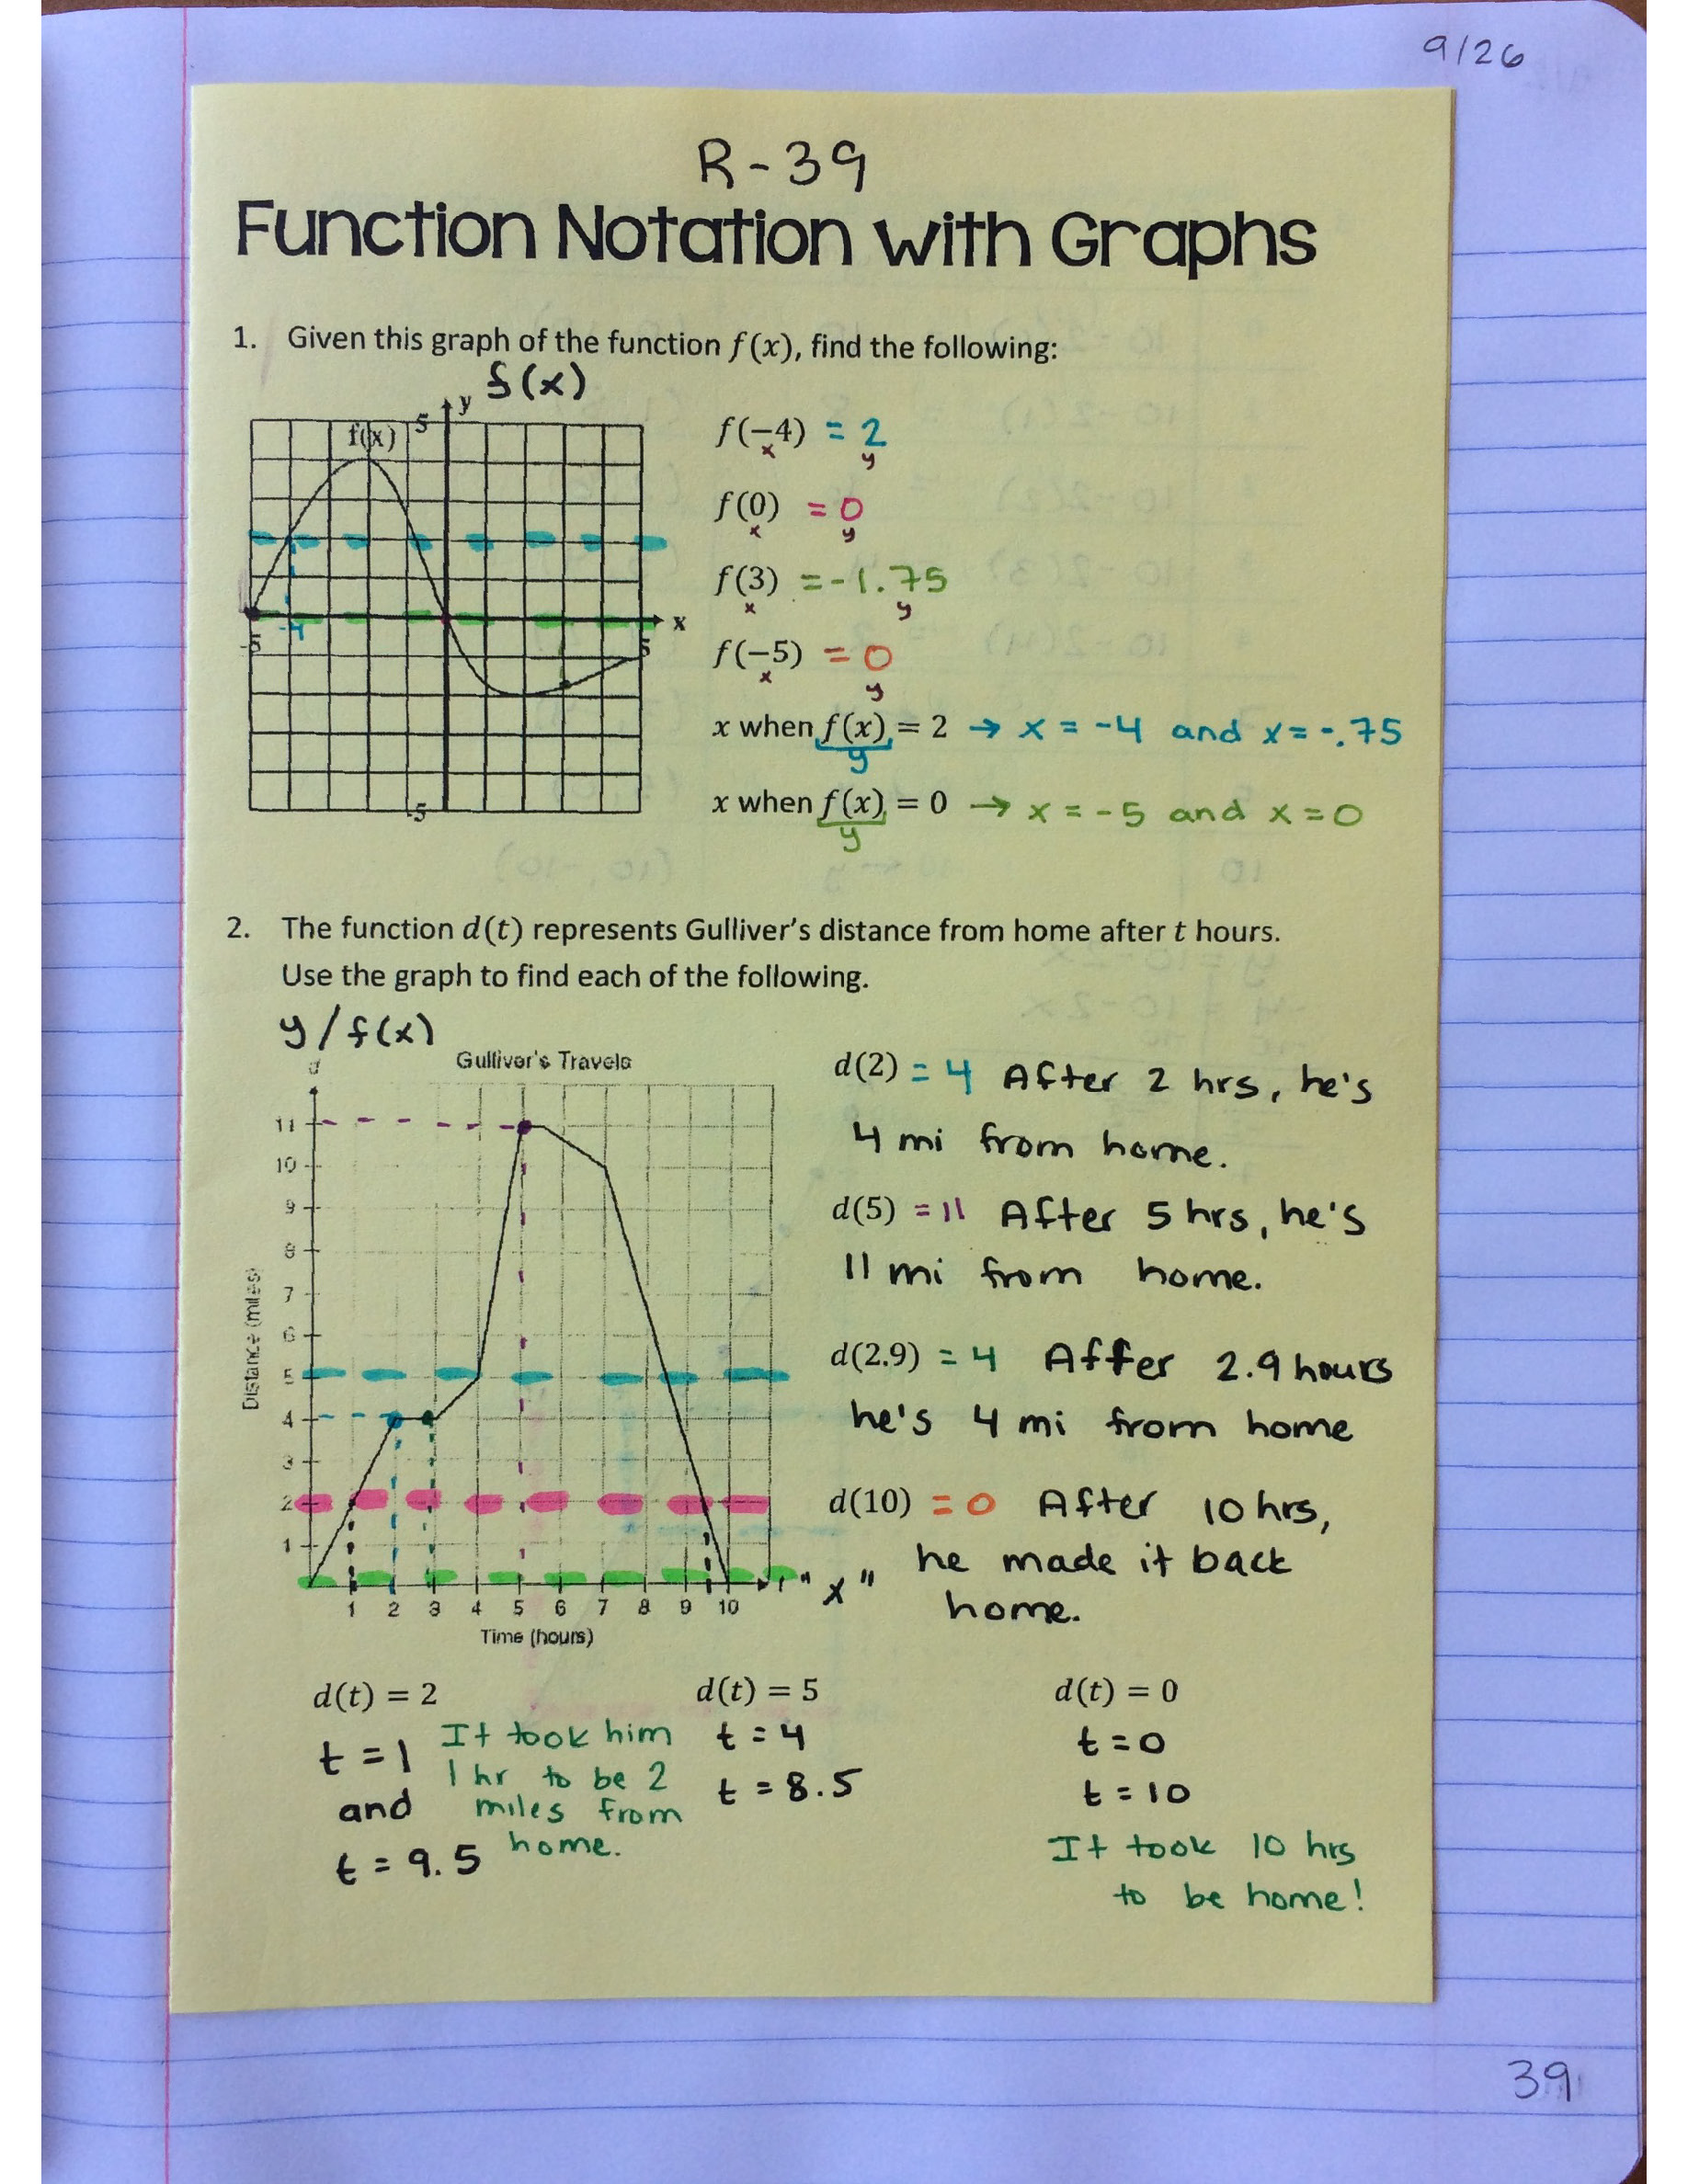
Inside, we worked on graphing functions, and using the graph to find an x-value. Some students preferred solving for x, but others were impressed by my tracing over on the graph method. To each their own–that’s the beauty of math, in my opinion. 
Day 6:
Recap warm-up over function notation with graphs, and then we reviewed for the test. 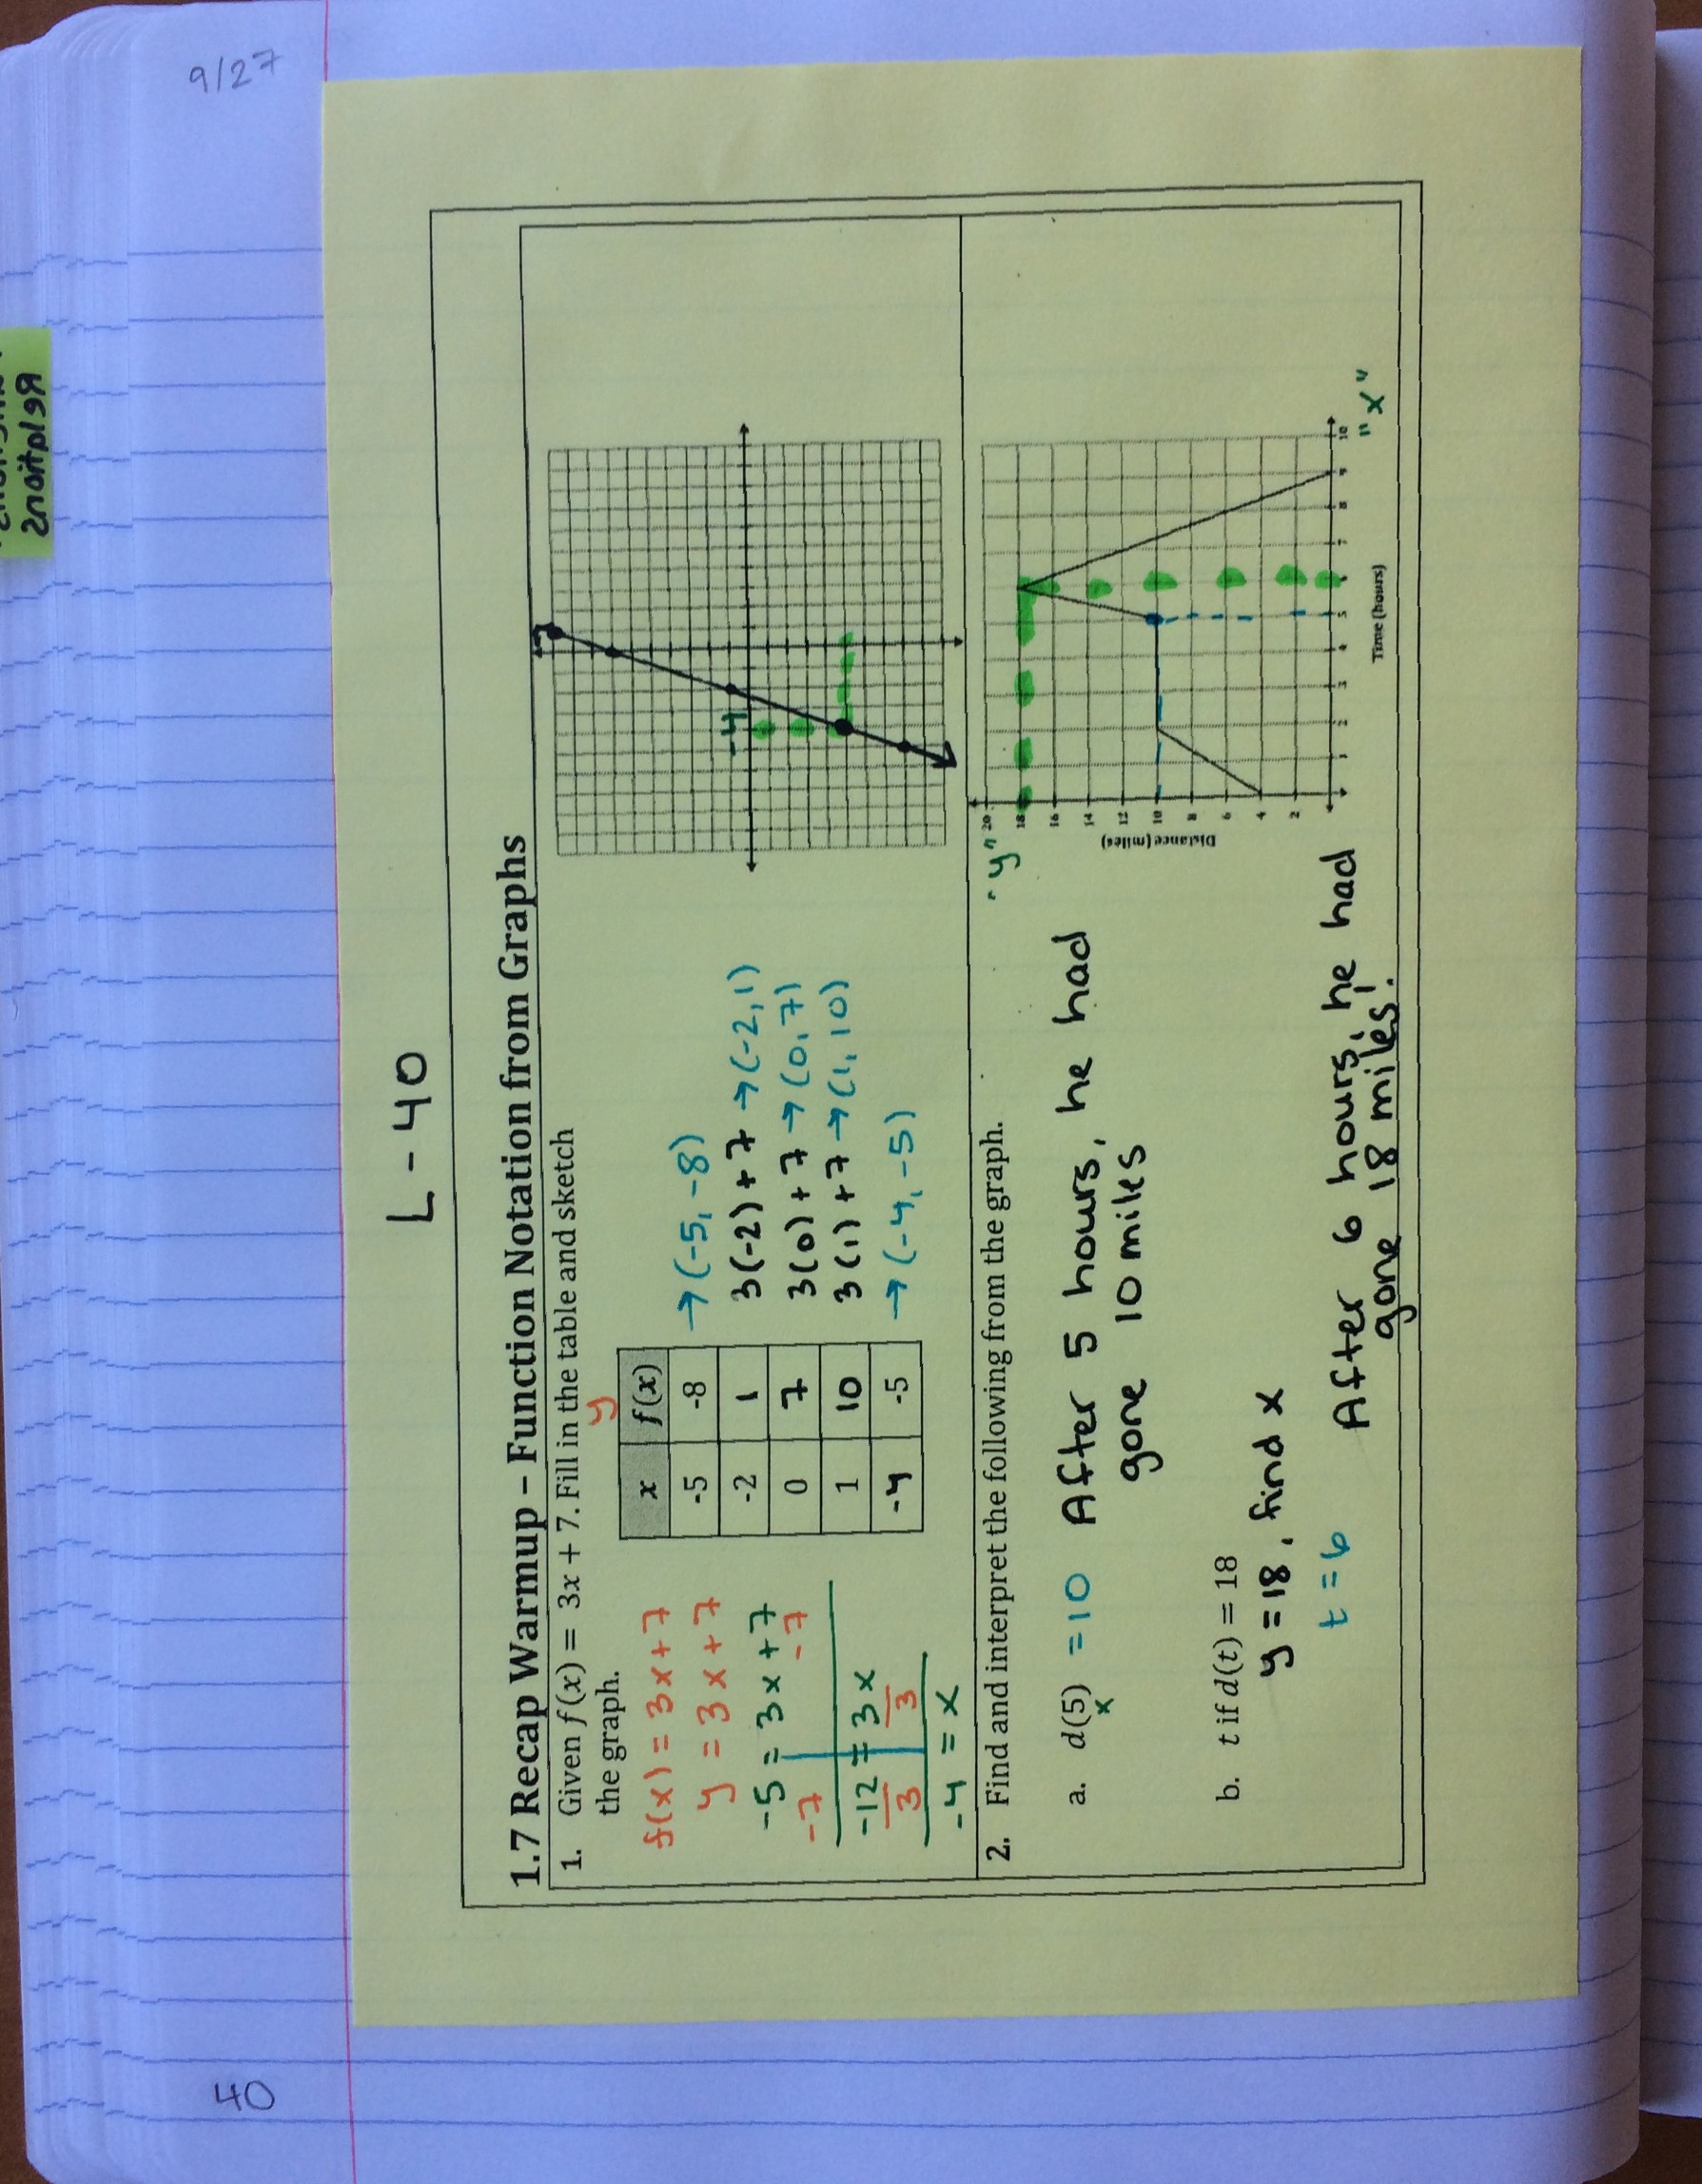
Day 7: Test!
