This is a bonus installment in the Everything You Ever Wanted To Know about Using Exit Tickets in your Math Classroom blogging series to show you how to take an exit ticket template that you use and love, and turn it into a digital format for your students to complete. As we grapple with hybrid schedules and the possibility of distance learning, this is more important than ever!

Step 1: Take a snip (a screenshot) of your exit ticket and save it to your computer.
Make sure to save this image somewhere you can easily find it! I have a Windows computer and use the Snipping tool. Just search “snip” in the search and it’ll come up! If you have a different computer, just Google how to do a screenshot. You might need to crop it down if it captures the entire screen. You just want the exit ticket.

Step 2: Open a new Google Slides presentation and change the dimensions.
If your exit ticket is a half-sheet, change it to 8.5×5.5″. If it’s a quarter sheet, change it to 4.25×5.5″. Don’t forget to delete the textboxes that come with every new Google Slide so that you have a blank slide to work with.
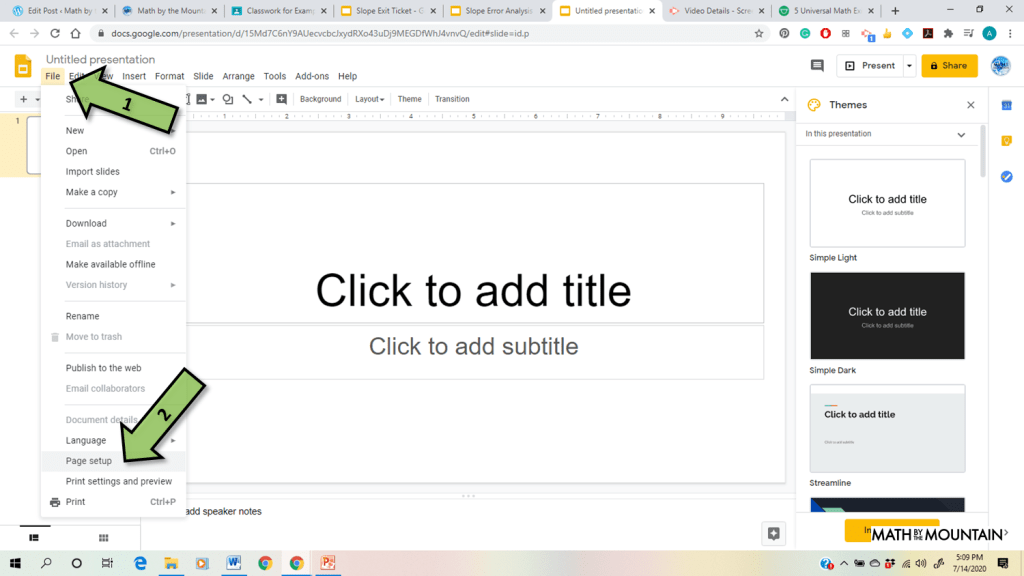
Step 3: Insert the snipped image you took in Step 1 as the background of the slide.
Click Background, Choose Image, and then select the image file from wherever you saved it on your computer in Step 1. Finally, click Done.


Step 4: Insert textboxes anywhere you would like your students to write.
You may also wish to provide extra instructions in the textboxes such as, “Click here and delete text – type your work here!” messages.
Step 5: Name your presentation something descriptive.
In my example, I name it “Slope Exit Slip.”
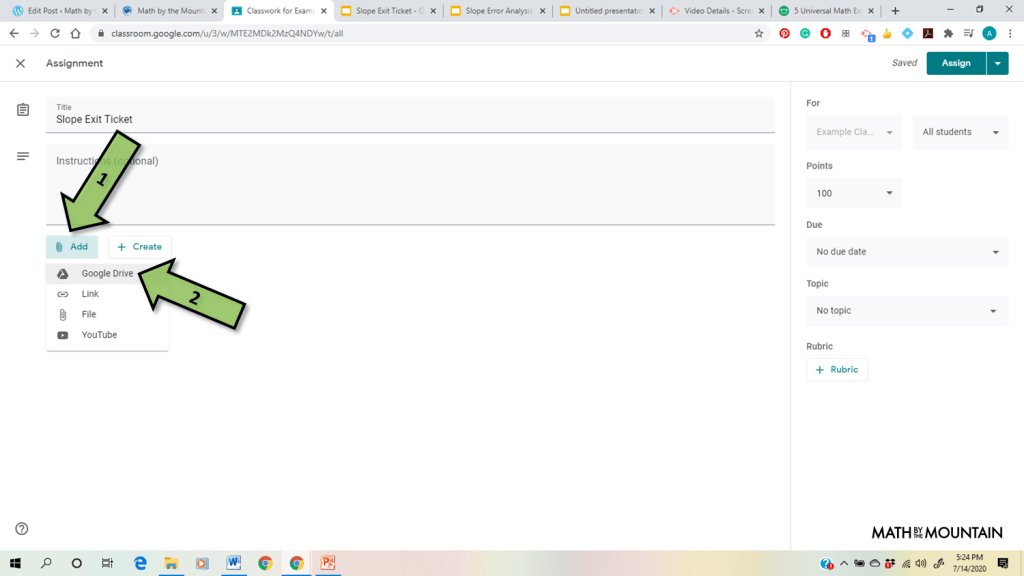
Step 6: Post your exit ticket to Google Classroom as an assignment.
- Go to Google Classroom and go to the Classwork tab
- Click the + Create button and select Assignment.
- Add a file from Google Drive by clicking the 📎 Add button. It should be the most recent file.
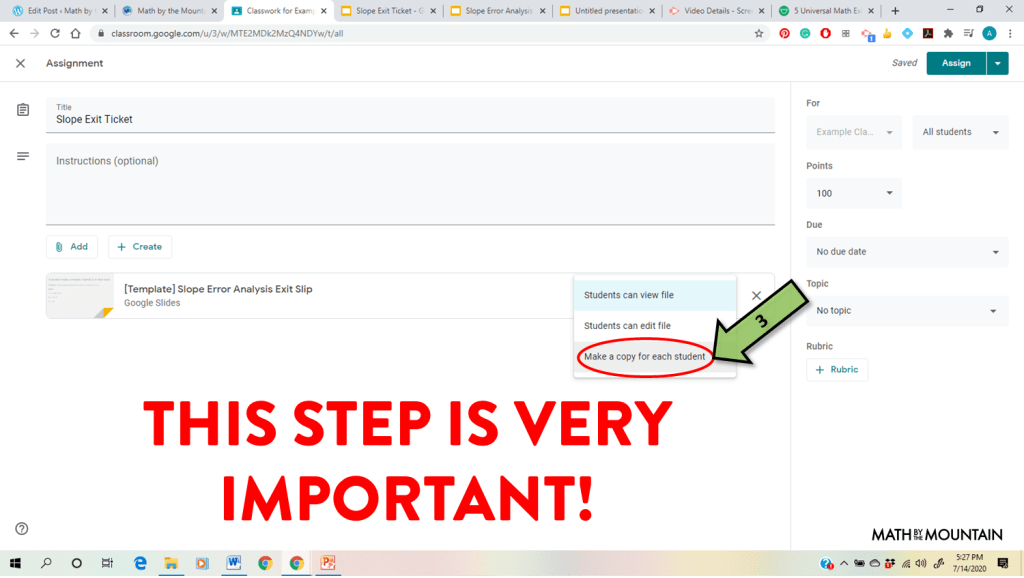
- Change, using the drop-down menu where it defaults to “Students can view file” to “Make a copy for each student.” This part is very important! I repeat, make sure it says “Make a copy for each student.”
- Click Assign!
Want to see how it’s done? Here’s a video tutorial!
I know that sometimes seeing someone do it and explain at the same time is SO much more helpful. Here’s a YouTube video I made walking you through each part of the process!
BONUS Tip: If you want your students graphing, insert points and lines using the shape tool so all they have to do is drag and drop, or rotate the shapes!
Want some killer exit slip templates to get you started on your exit ticket journey? Check out mine! They’re totally universal and fit all of your needs. They’re not digital, but I hope I’ve shown you just how easy it is to turn any exit ticket digital!

-Audrey

2 thoughts on “How to Make a Digital Exit Ticket: Turn Your Exit Tickets DIGITAL!”